> ## Documentation Index
> Fetch the complete documentation index at: https://docs.hellotars.com/llms.txt
> Use this file to discover all available pages before exploring further.
# Learn how to manage your whatsapp channel deployments and credits tracking
> Configure WhatsApp channel integrations. Manage your channel deployments, track credits, and optimize your messaging experience.
Channel settings allow you to connect and configure WhatsApp Business numbers for your AI Agents, enabling seamless communication through WhatsApp messaging.
## WhatsApp Business Numbers management
Click the `+ Add Business Number` button in the top-right corner to open the configuration modal.

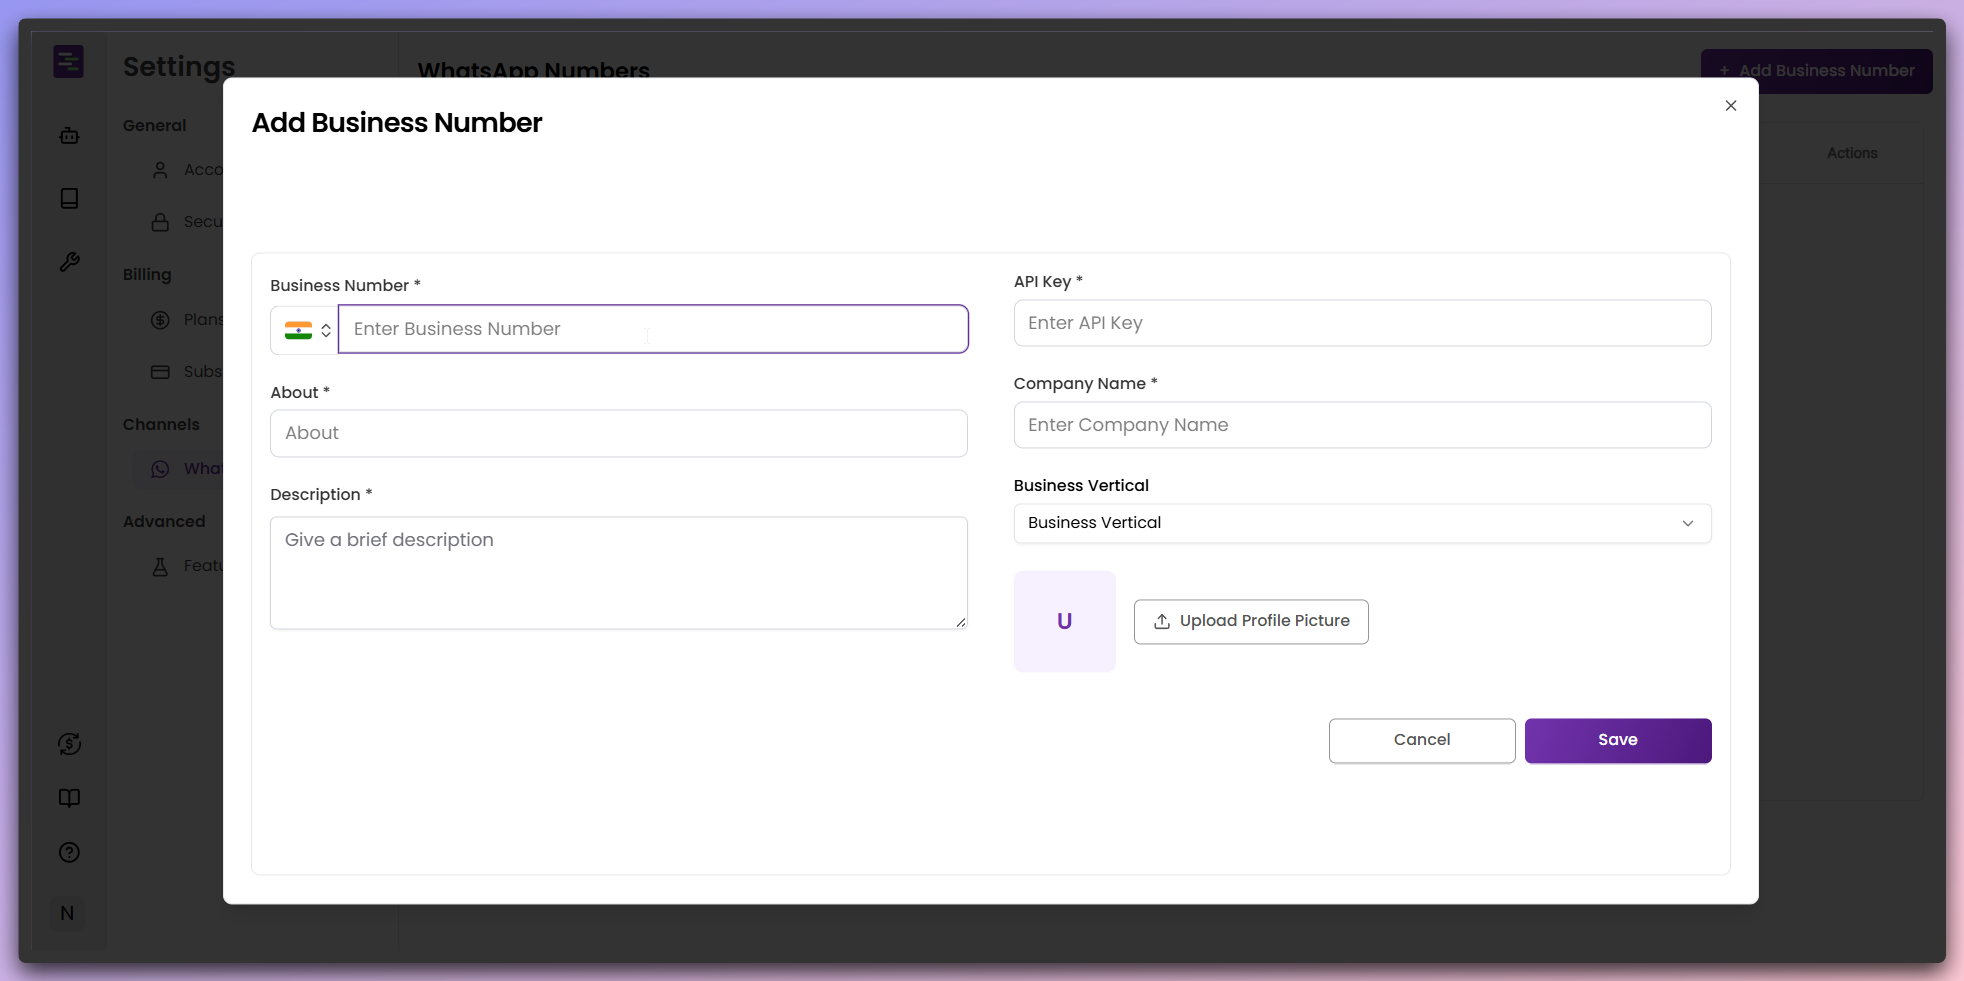 **Required Information:**
* **Business Number**: Enter your WhatsApp Business phone number with country code
* **API Key**: Provide your WhatsApp Business API key for authentication
* **About**: Brief description of the business
* **Description**: Detailed description of the business purpose
* **Company Name**: Your organization name
* **Business Vertical**: Select your industry category
* **Profile Picture**: Upload your business profile picture
Click `Save` to add the Business Number to your account.
Once successfully added, your Business Number appears in the WhatsApp numbers
table.
**Required Information:**
* **Business Number**: Enter your WhatsApp Business phone number with country code
* **API Key**: Provide your WhatsApp Business API key for authentication
* **About**: Brief description of the business
* **Description**: Detailed description of the business purpose
* **Company Name**: Your organization name
* **Business Vertical**: Select your industry category
* **Profile Picture**: Upload your business profile picture
Click `Save` to add the Business Number to your account.
Once successfully added, your Business Number appears in the WhatsApp numbers
table.
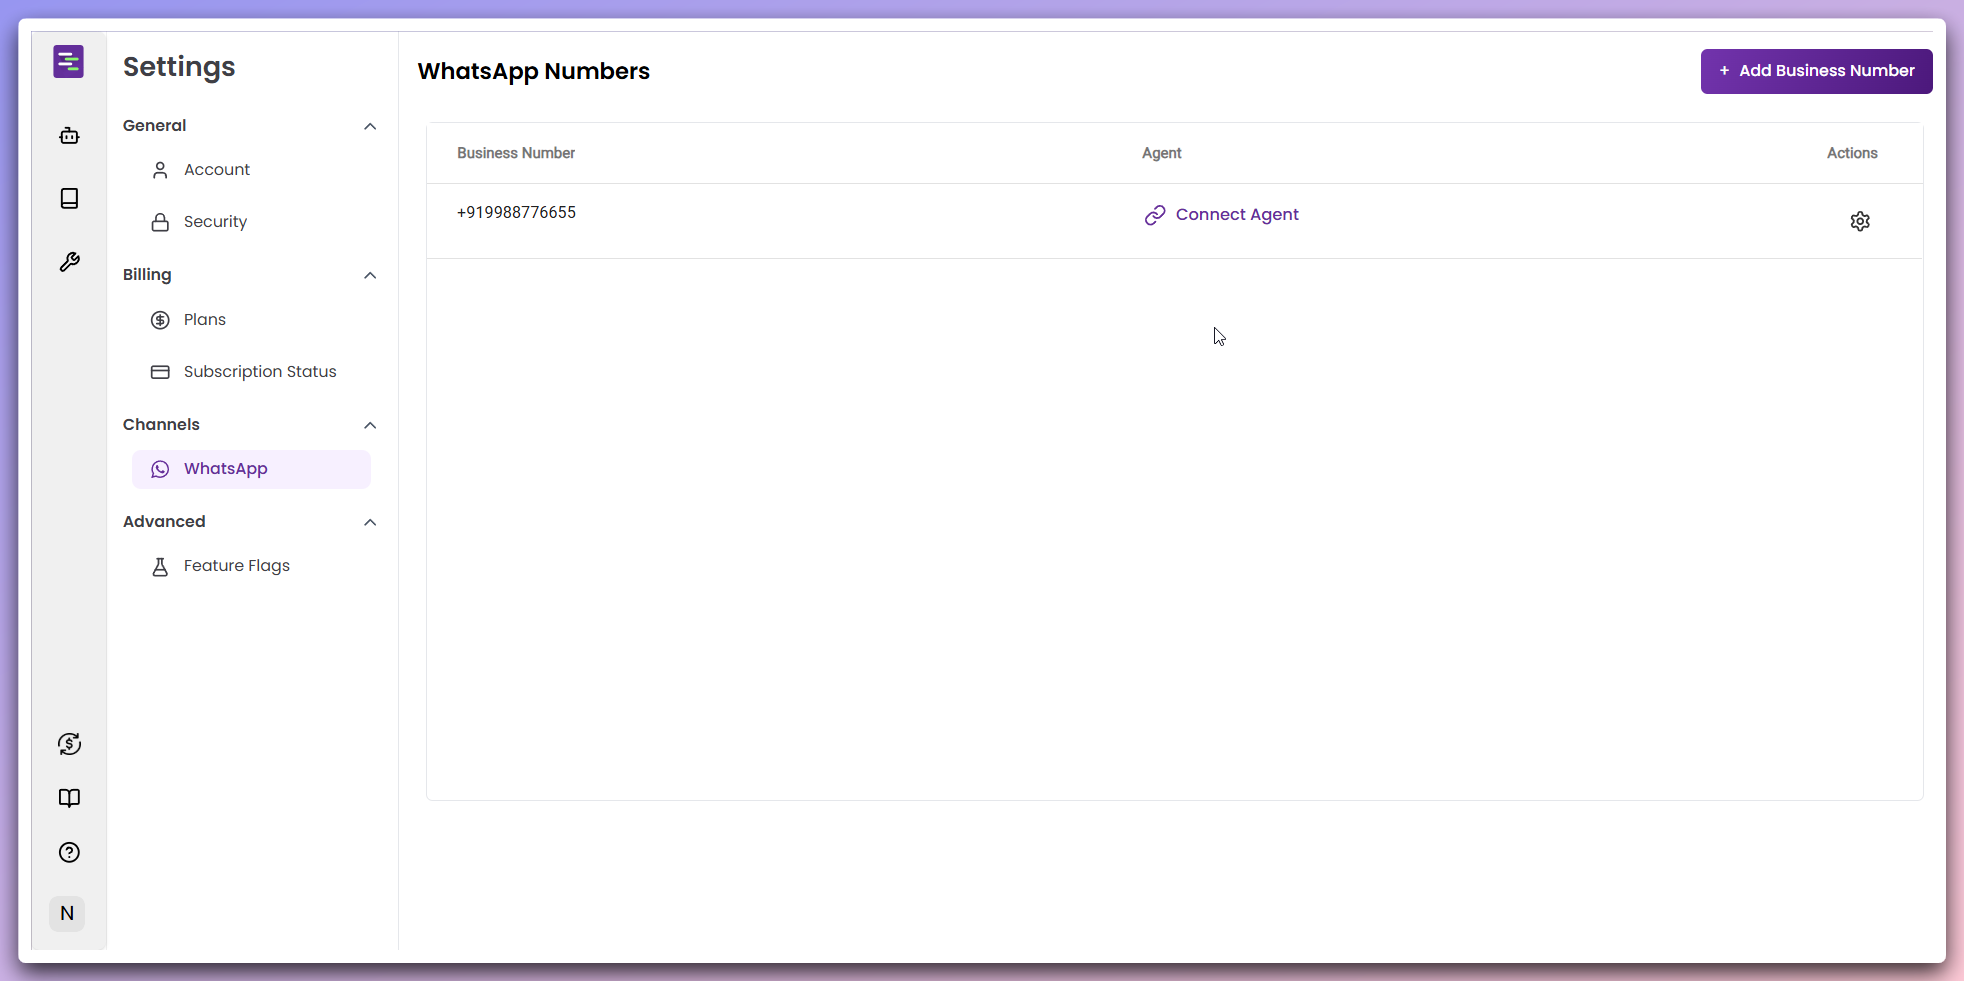 **Table Structure:** - **Business Number**: Shows your added WhatsApp number -
**Agent**: Displays "Connect Agent" button for Agent assignment - **Actions**:
Gear icon for additional options
Your Business number is now ready for Agent connection.
Click the `Connect Agent` button to assign an AI Agent to your WhatsApp
number.
**Table Structure:** - **Business Number**: Shows your added WhatsApp number -
**Agent**: Displays "Connect Agent" button for Agent assignment - **Actions**:
Gear icon for additional options
Your Business number is now ready for Agent connection.
Click the `Connect Agent` button to assign an AI Agent to your WhatsApp
number.
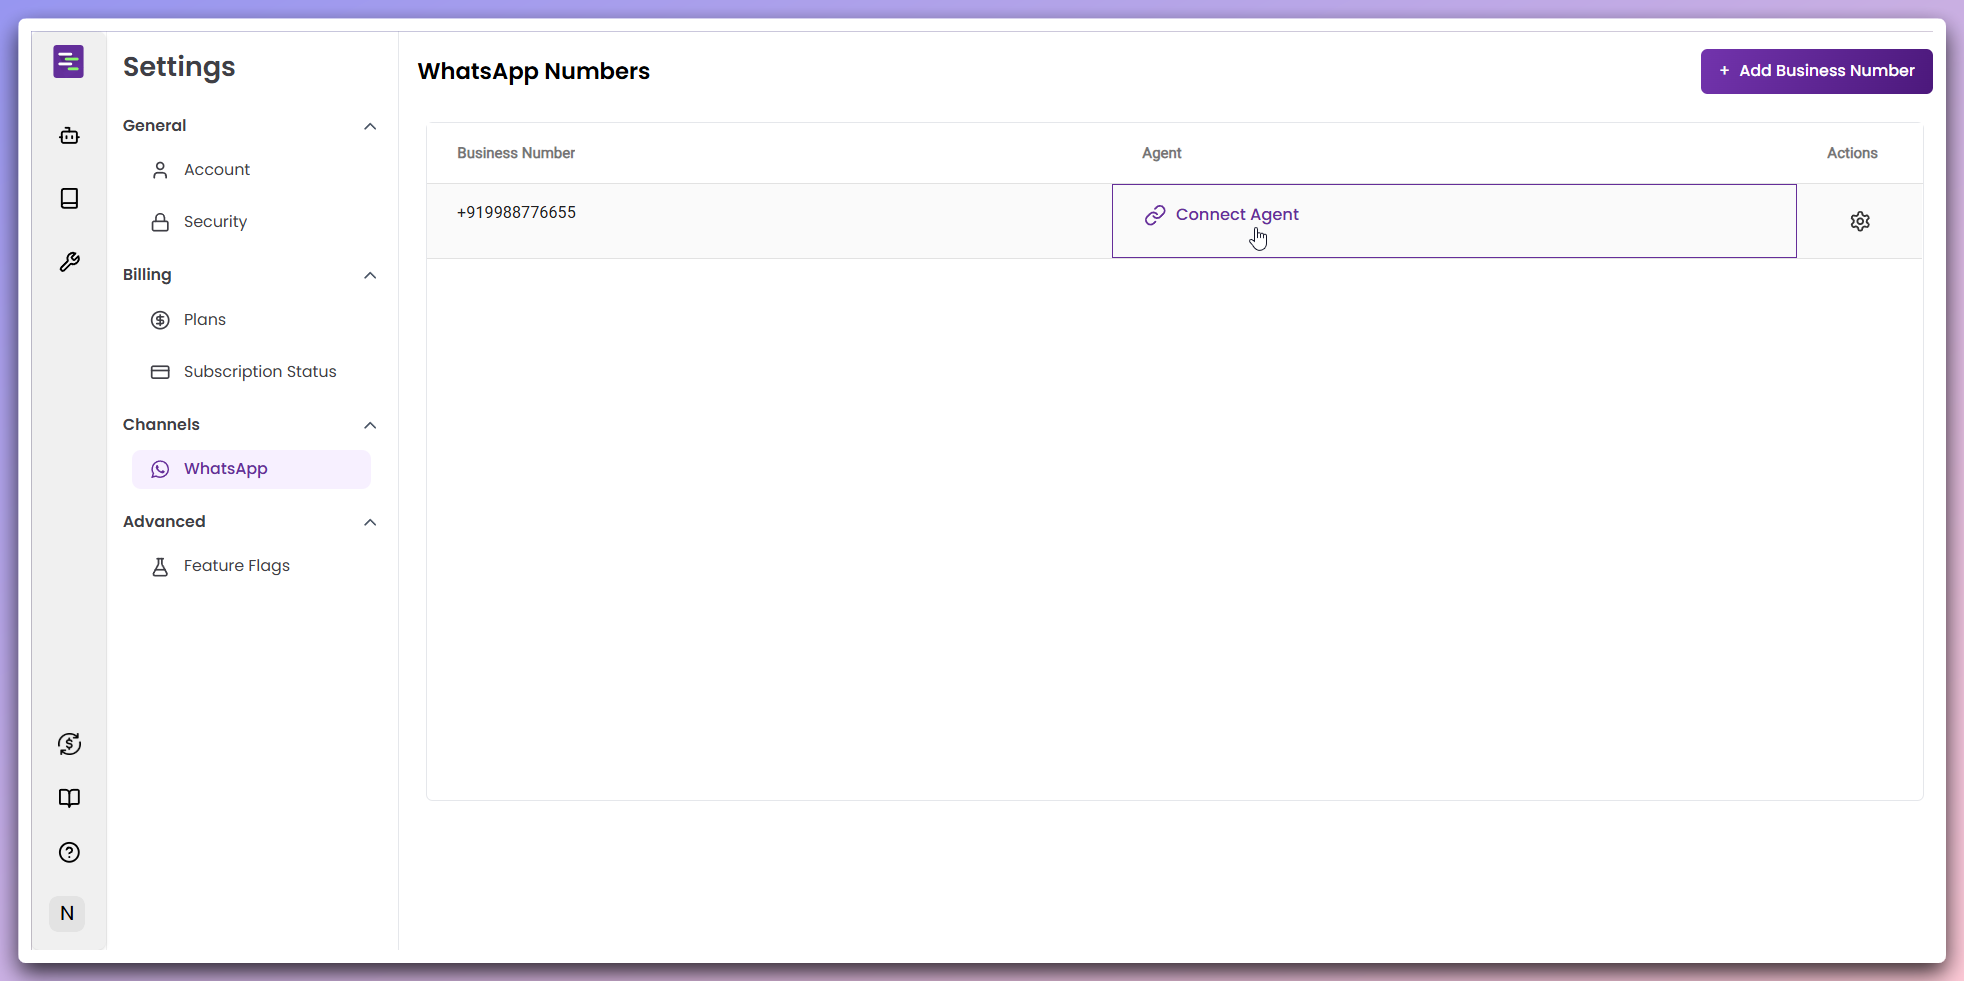 This opens the Agent selection modal where you can choose from your created
agents.
In the Agent selection modal, choose the Agent you want to connect to your
WhatsApp number.
This opens the Agent selection modal where you can choose from your created
agents.
In the Agent selection modal, choose the Agent you want to connect to your
WhatsApp number.
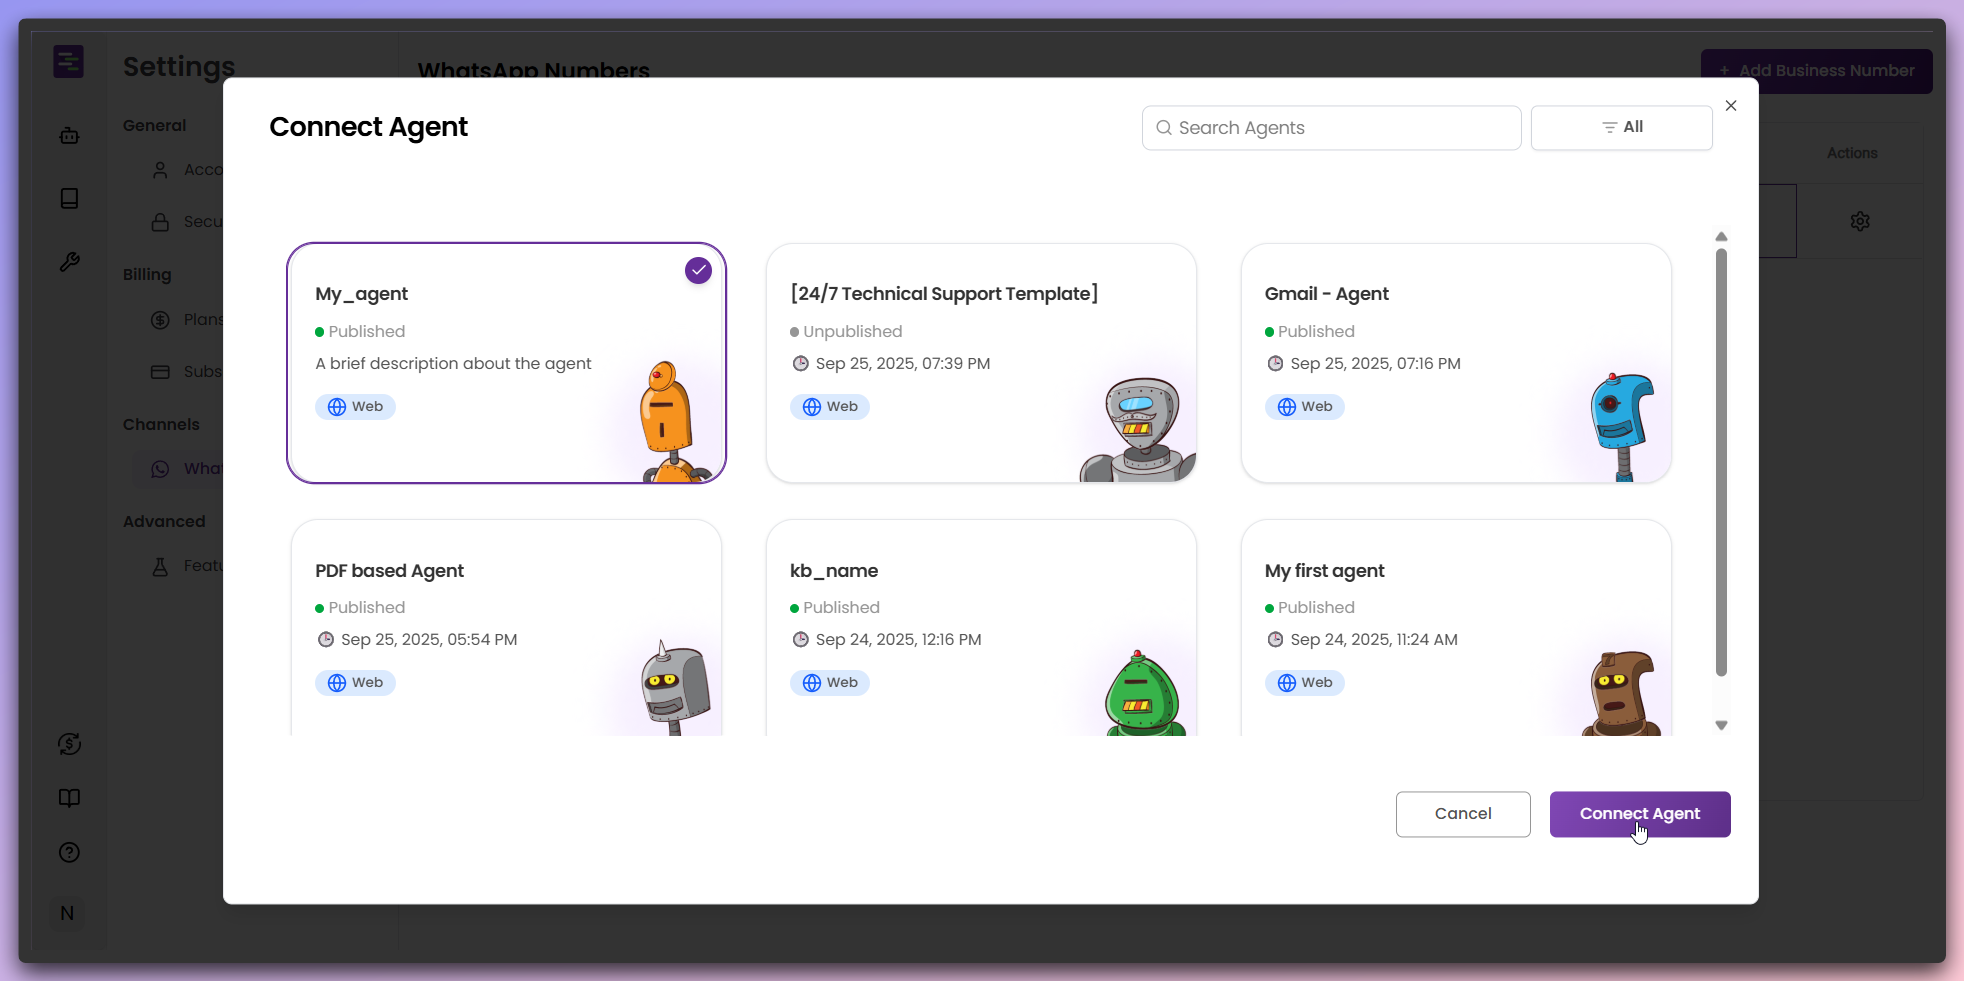 **Agent Selection:** - Browse through all your created agents - Use the search
bar to find specific agents - Select the desired Agent (highlighted with
purple border and checkmark) - Click `Connect Agent` to complete the
connection
**Agent Assignment**: The selected Agent will handle all conversations for
this WhatsApp number.
Once connected, your Agent is now active on the WhatsApp number.
**Agent Selection:** - Browse through all your created agents - Use the search
bar to find specific agents - Select the desired Agent (highlighted with
purple border and checkmark) - Click `Connect Agent` to complete the
connection
**Agent Assignment**: The selected Agent will handle all conversations for
this WhatsApp number.
Once connected, your Agent is now active on the WhatsApp number.
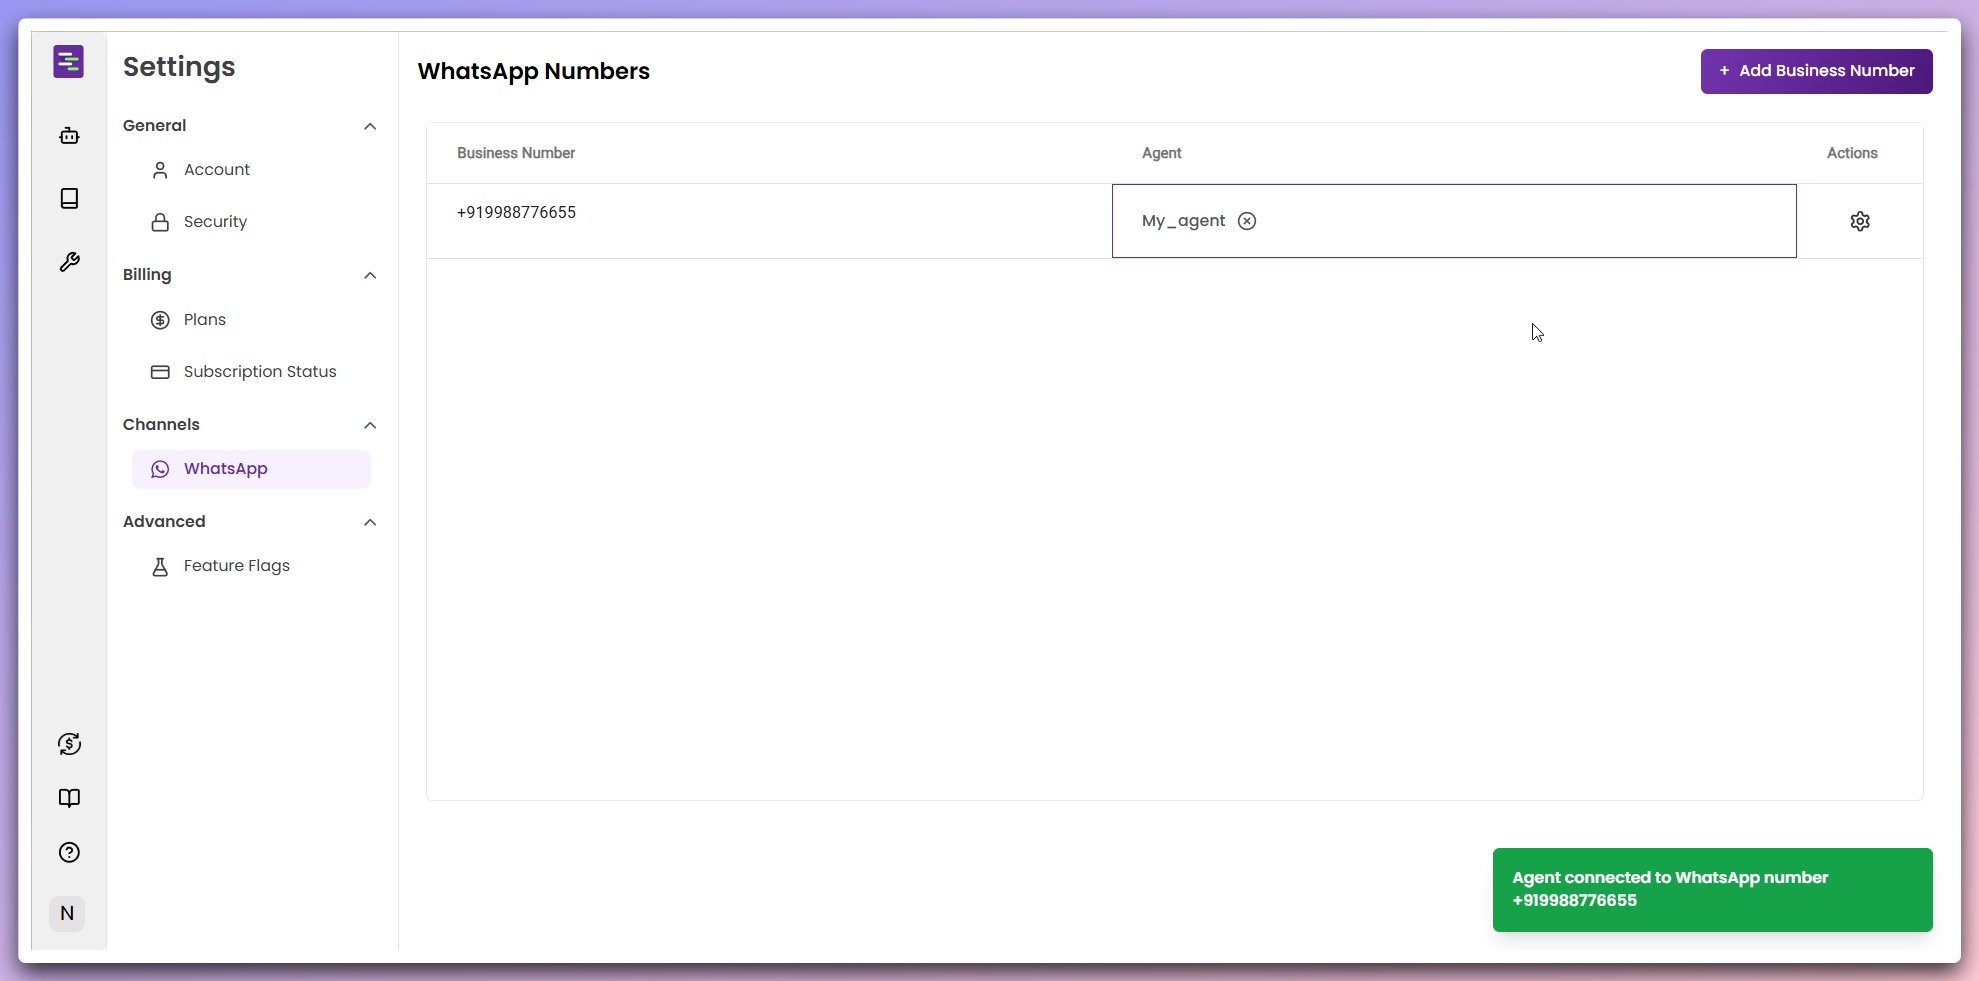 **Connection Confirmation:** - Agent name appears in the table under the
"Agent" column - Success notification confirms the connection - Agent is now
ready to handle WhatsApp conversations
**Live Integration**: Customers can now message your WhatsApp number and
interact with your AI Agent.
To disconnect an Agent from your WhatsApp number, click the 'X' icon next to
the Agent name.
**Connection Confirmation:** - Agent name appears in the table under the
"Agent" column - Success notification confirms the connection - Agent is now
ready to handle WhatsApp conversations
**Live Integration**: Customers can now message your WhatsApp number and
interact with your AI Agent.
To disconnect an Agent from your WhatsApp number, click the 'X' icon next to
the Agent name.
 This opens a confirmation modal to ensure you want to remove the Agent
connection.
In the removal confirmation modal, review the action and confirm the
disconnection.
This opens a confirmation modal to ensure you want to remove the Agent
connection.
In the removal confirmation modal, review the action and confirm the
disconnection.
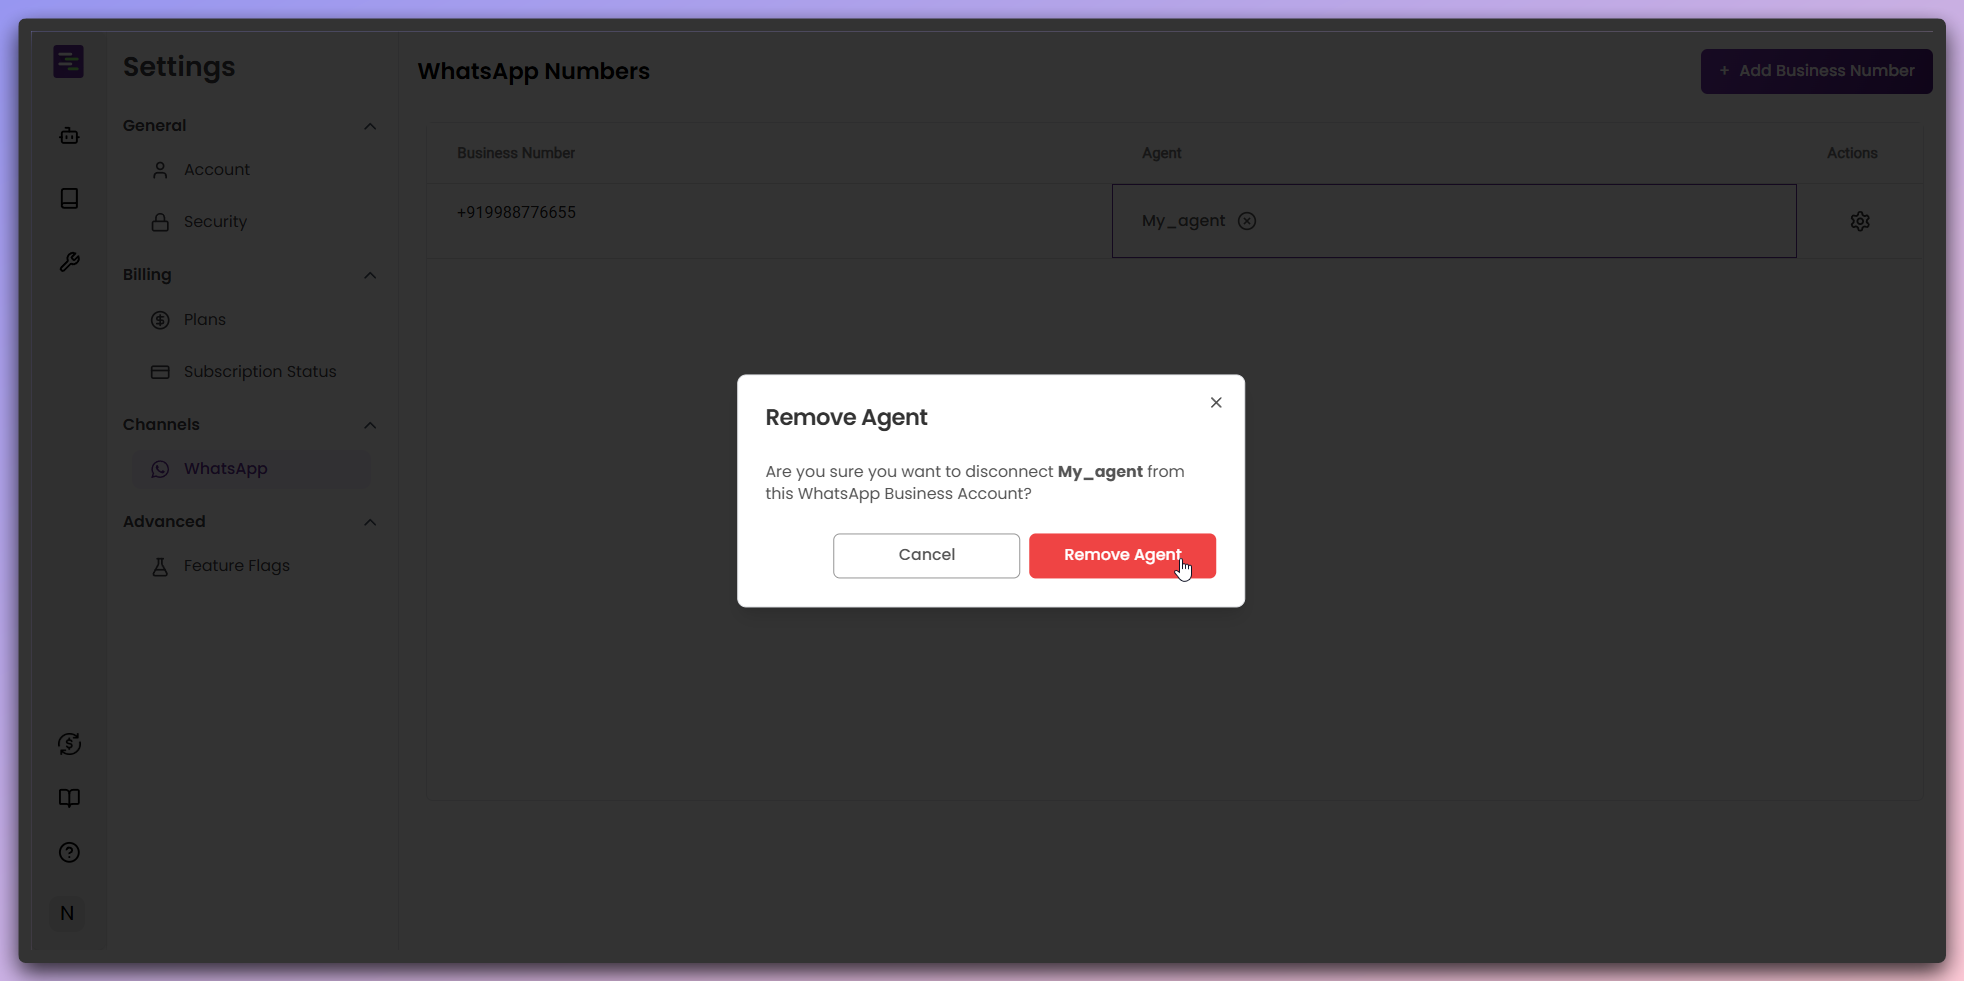 **Removal Process:** - Review the confirmation message - Click `Remove Agent`
to disconnect the Agent - The Agent will be disconnected from the WhatsApp
number - You can now connect a different Agent if needed
**Agent Disconnection**: Once removed, the Agent will no longer respond to
messages on this WhatsApp number.
Click the gear icon in the Actions column to access additional options for your WhatsApp number.
**Removal Process:** - Review the confirmation message - Click `Remove Agent`
to disconnect the Agent - The Agent will be disconnected from the WhatsApp
number - You can now connect a different Agent if needed
**Agent Disconnection**: Once removed, the Agent will no longer respond to
messages on this WhatsApp number.
Click the gear icon in the Actions column to access additional options for your WhatsApp number.
 **Available actions:**
* **Edit**: Modify Business number details, API key, and other configuration
* **Delete**: Remove the WhatsApp number completely from your account
**Edit functionality**: The edit option opens the same configuration modal where you can update all Business number details.
## Learn more
Learn how WhatsApp integration works in Tars
Customize additional platform preferences
**Available actions:**
* **Edit**: Modify Business number details, API key, and other configuration
* **Delete**: Remove the WhatsApp number completely from your account
**Edit functionality**: The edit option opens the same configuration modal where you can update all Business number details.
## Learn more
Learn how WhatsApp integration works in Tars
Customize additional platform preferences