Prerequisites
Before we start building, ensure you have everything ready:- ✅ Tars Account - Create account if you don’t have one
- ✅ Gmail Account - Use your support email for professional communication
Agent workflow overview
In this guide, you’ll build an AI support Agent that answers user questions using your Knowledge Base and escalates issues to support via email.
Add Knowledge sources
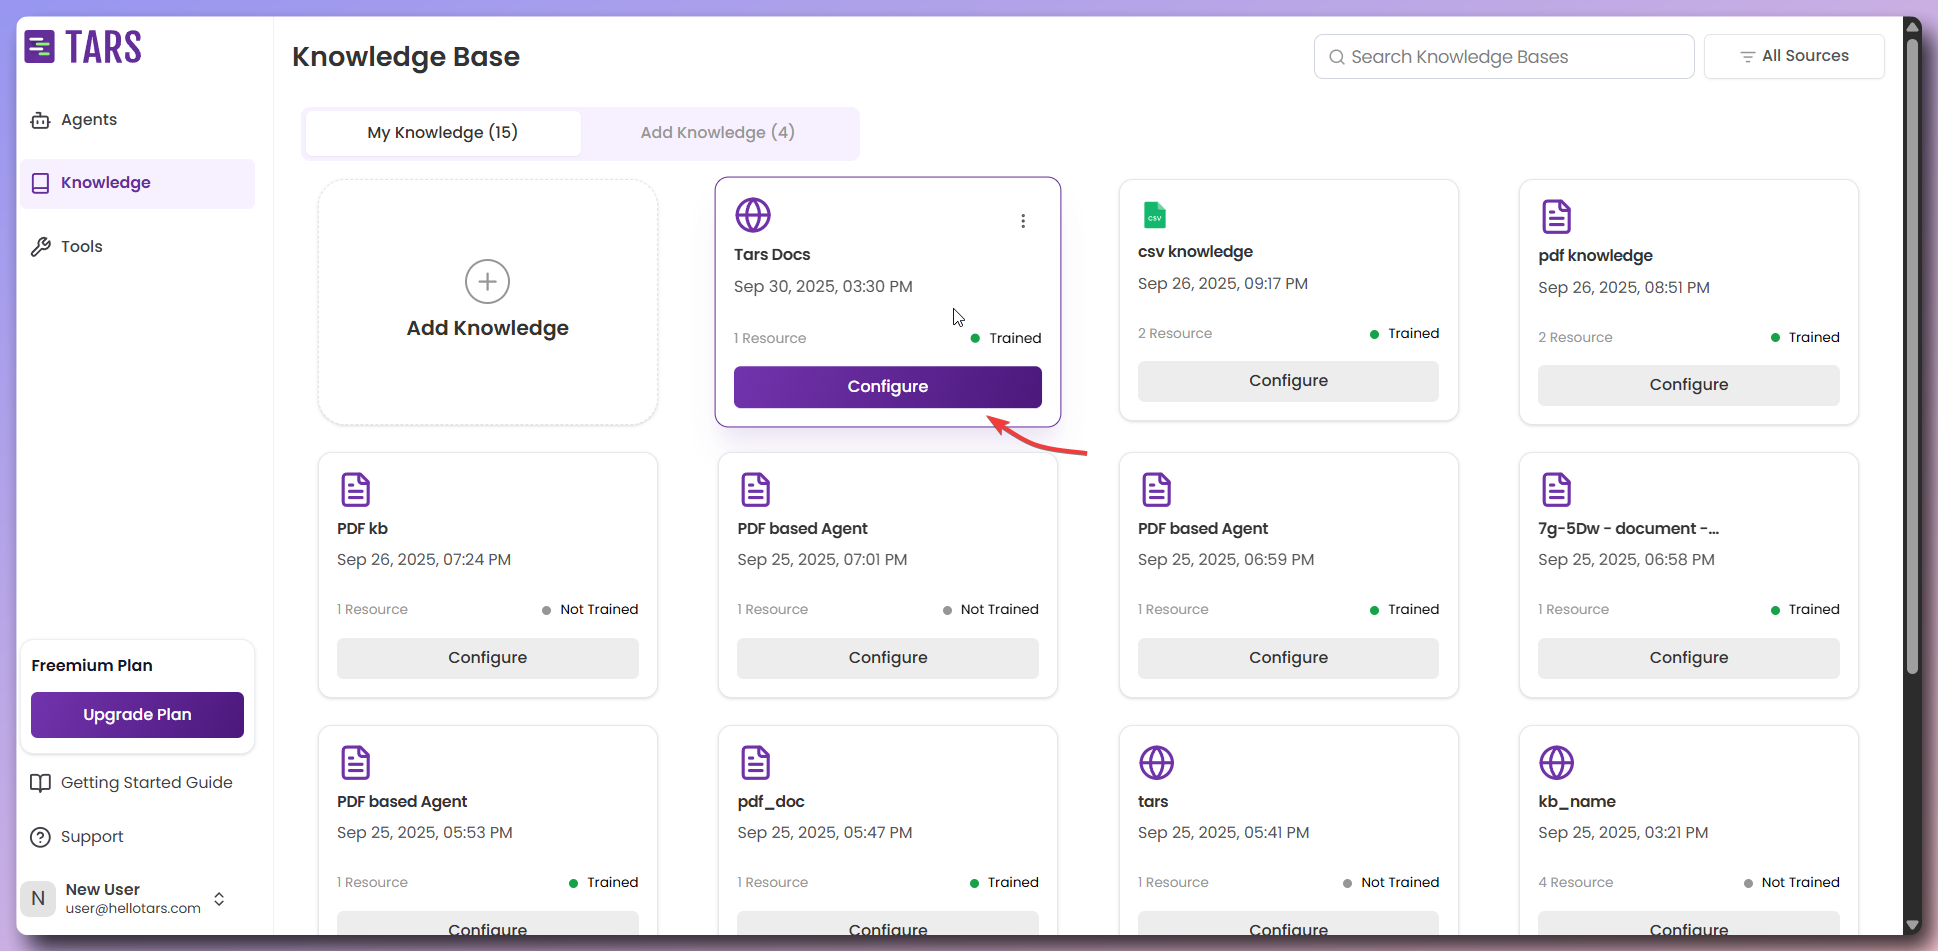
Your AI Agent needs knowledge to answer customer questions accurately. Let’s add your company’s information.Step 1: Navigate to Knowledge Bases
Step 1: Navigate to Knowledge Bases
Step 2: Create Tars Docs Knowledge Base
Step 2: Create Tars Docs Knowledge Base
Configuration
- Knowledge Base Name:
Tars Docs - Data Source:
Website URL - URL:
https://help.hellotars.com(Tars help documentation) - Settings:
Use default settings for optimal results
What happens next
- Fetch Links - System discovers and scrapes all documentation pages
- Training - AI processes and indexes the content for search
- Ready to Use - Knowledge base appears in
My Knowledge Basessection
Connect tool
Now let’s connect the Gmail tool to your Agent to send email notifications.Step 1: Navigate to Tools
Step 1: Navigate to Tools
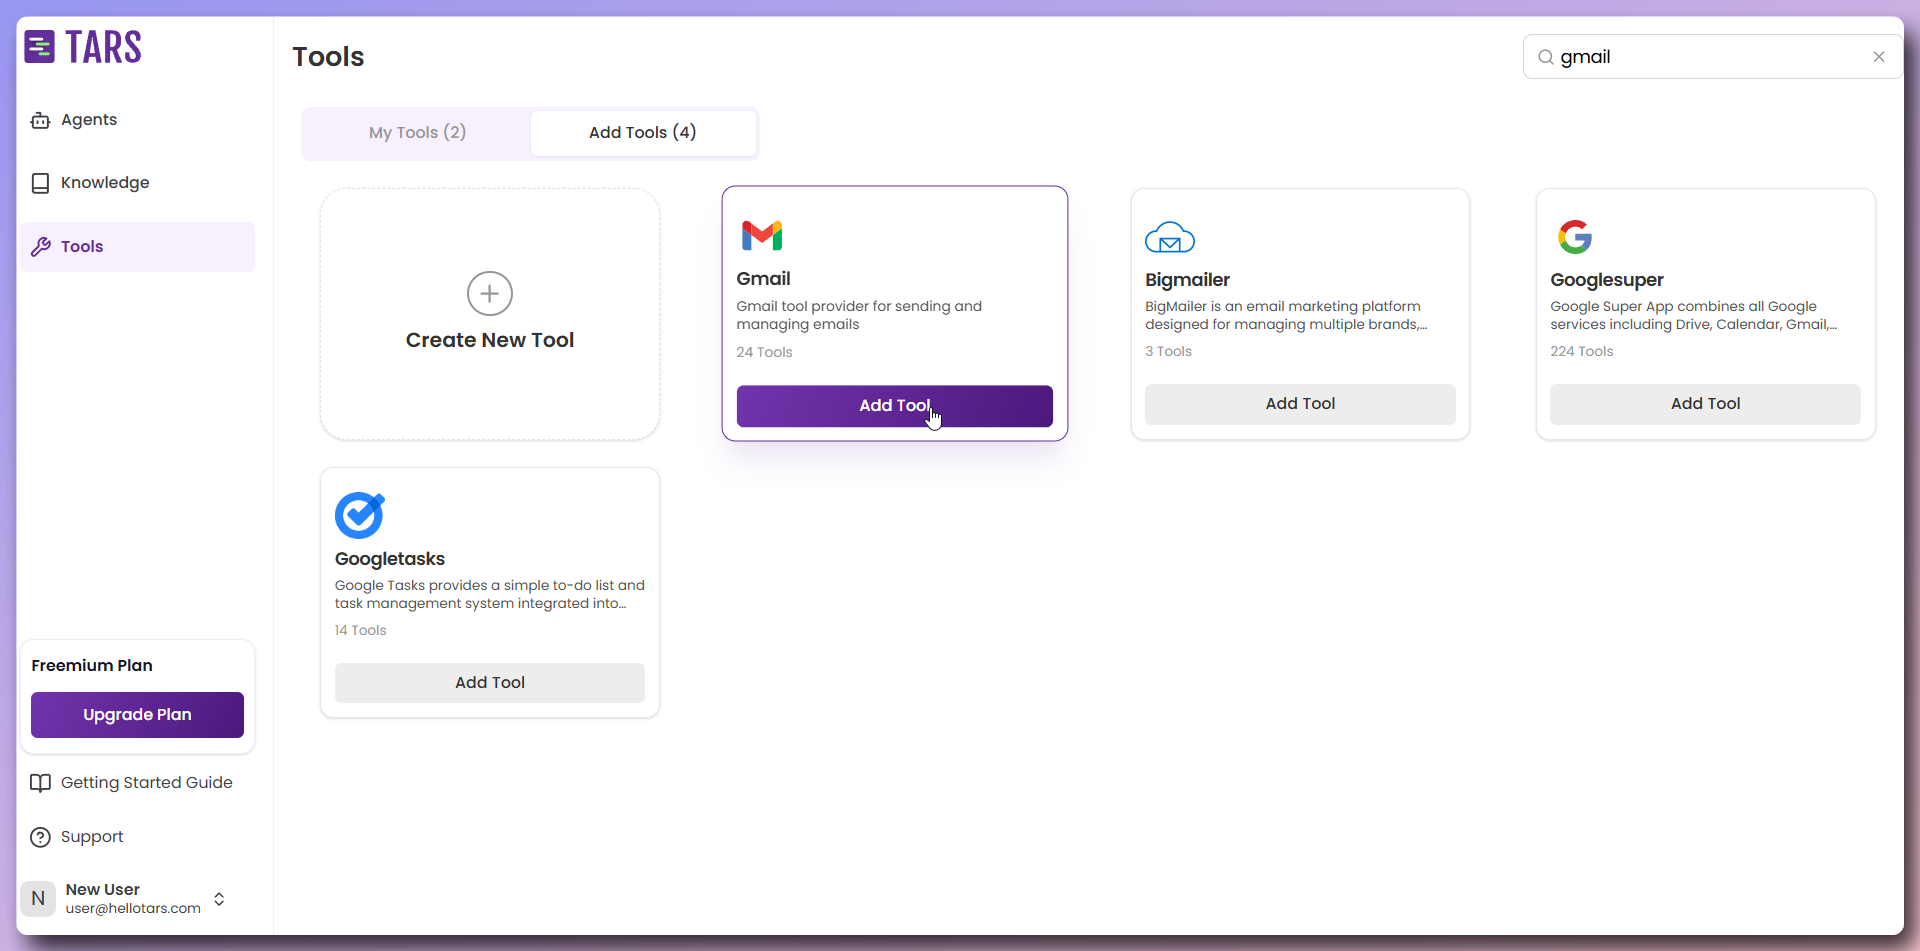
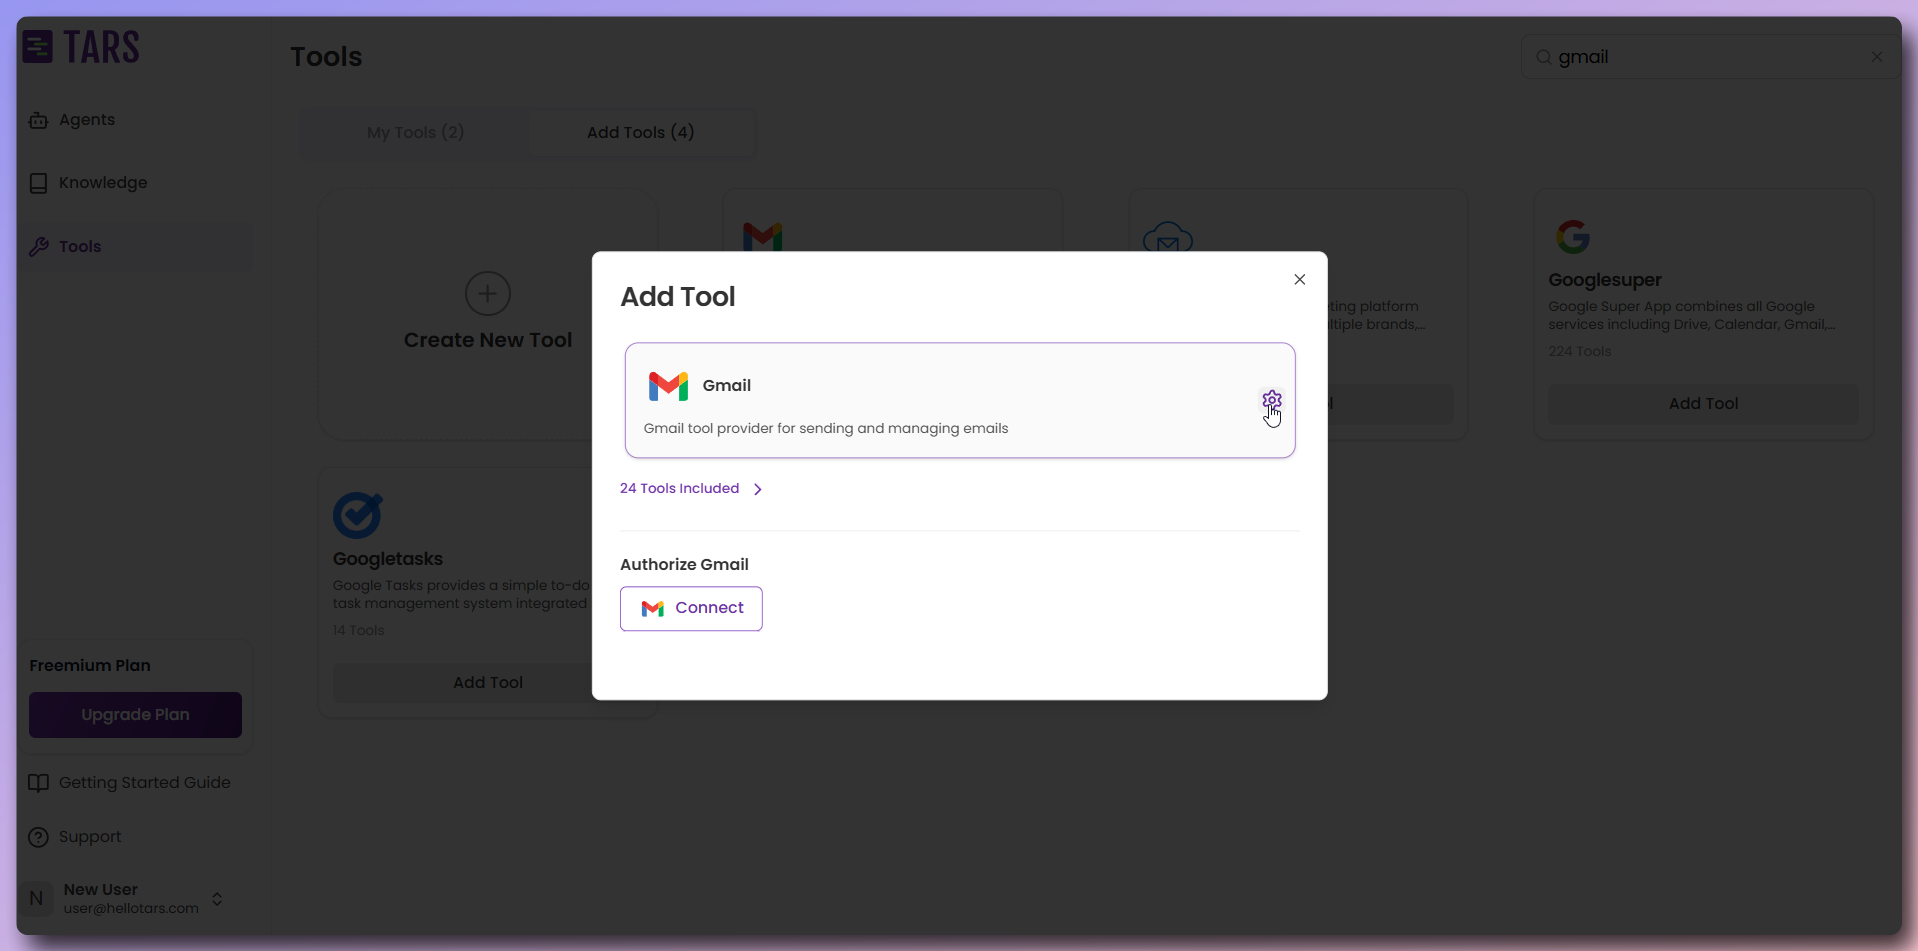

Step 2: Follow the detailed guide
Step 2: Follow the detailed guide
Tools connection guide
Quick overview
- Gmail: Required for sending customer confirmation emails
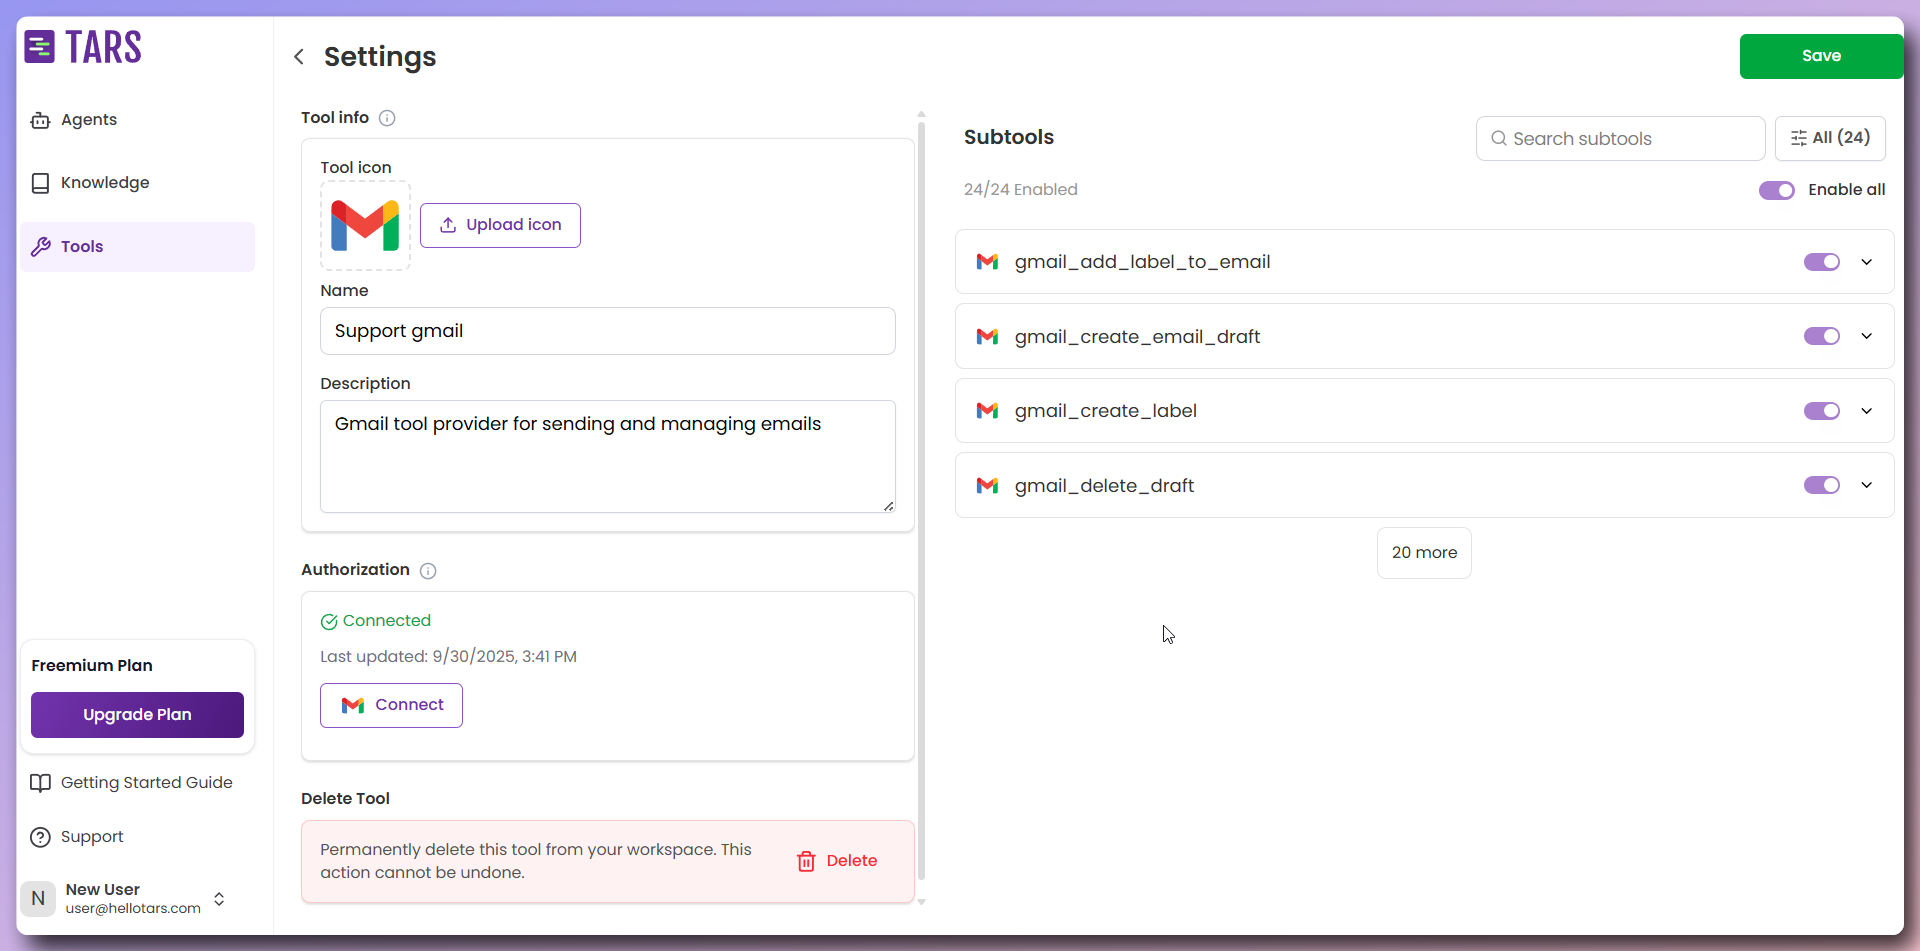
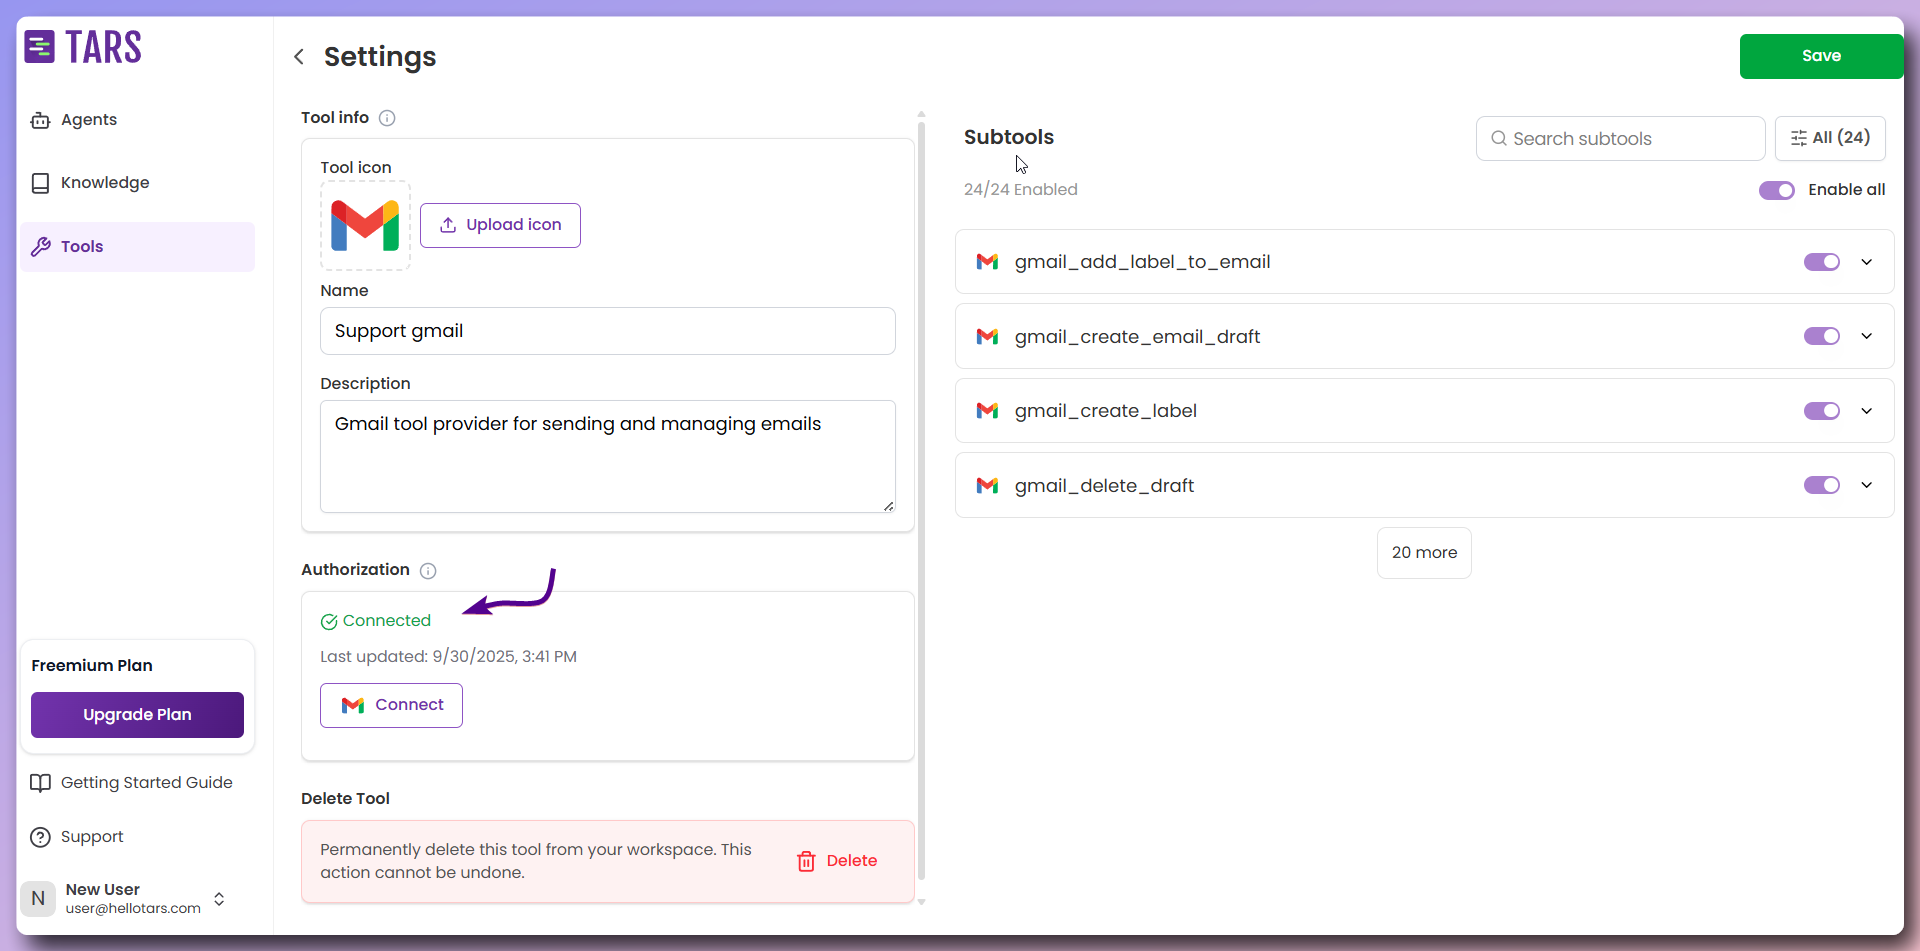
Step 3: Verify your connections
Step 3: Verify your connections
Connection Status
- ✅ Connected - Tool is successfully authenticated and ready to use
- ❌ Error - Authentication failed or connection issue
Create your AI Agent
Now let’s build your AI Agent from scratch and configure it step by step.Step 1: Create Agent from Scratch
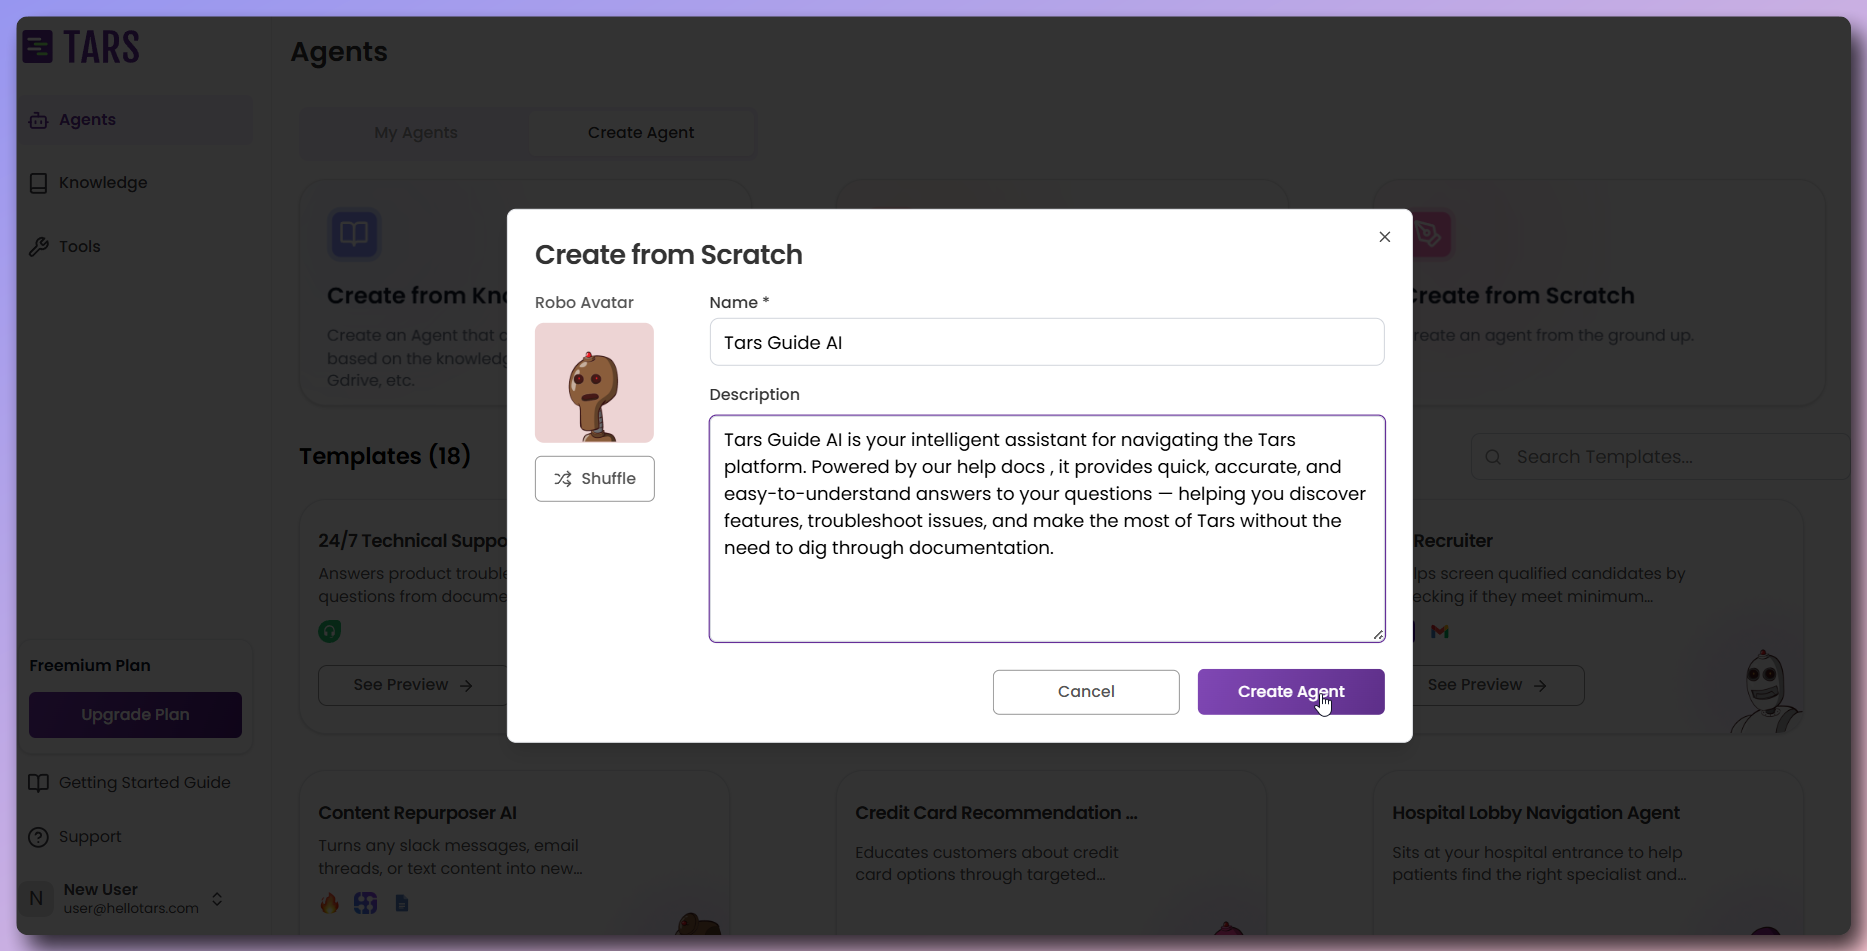
Step 1: Create Agent from Scratch
- Navigate to the Create Agents page in your Tars dashboard:
- Click the Create from Scratch card
- Enter Agent details:
- Name: Tars Guide AI
- Icon: Choose or shuffle for a custom icon
- Click Create Agent
Step 2: Basic Agent publish and preview
Step 2: Basic Agent publish and preview
Publish and then Preview to test your basic Agent setup.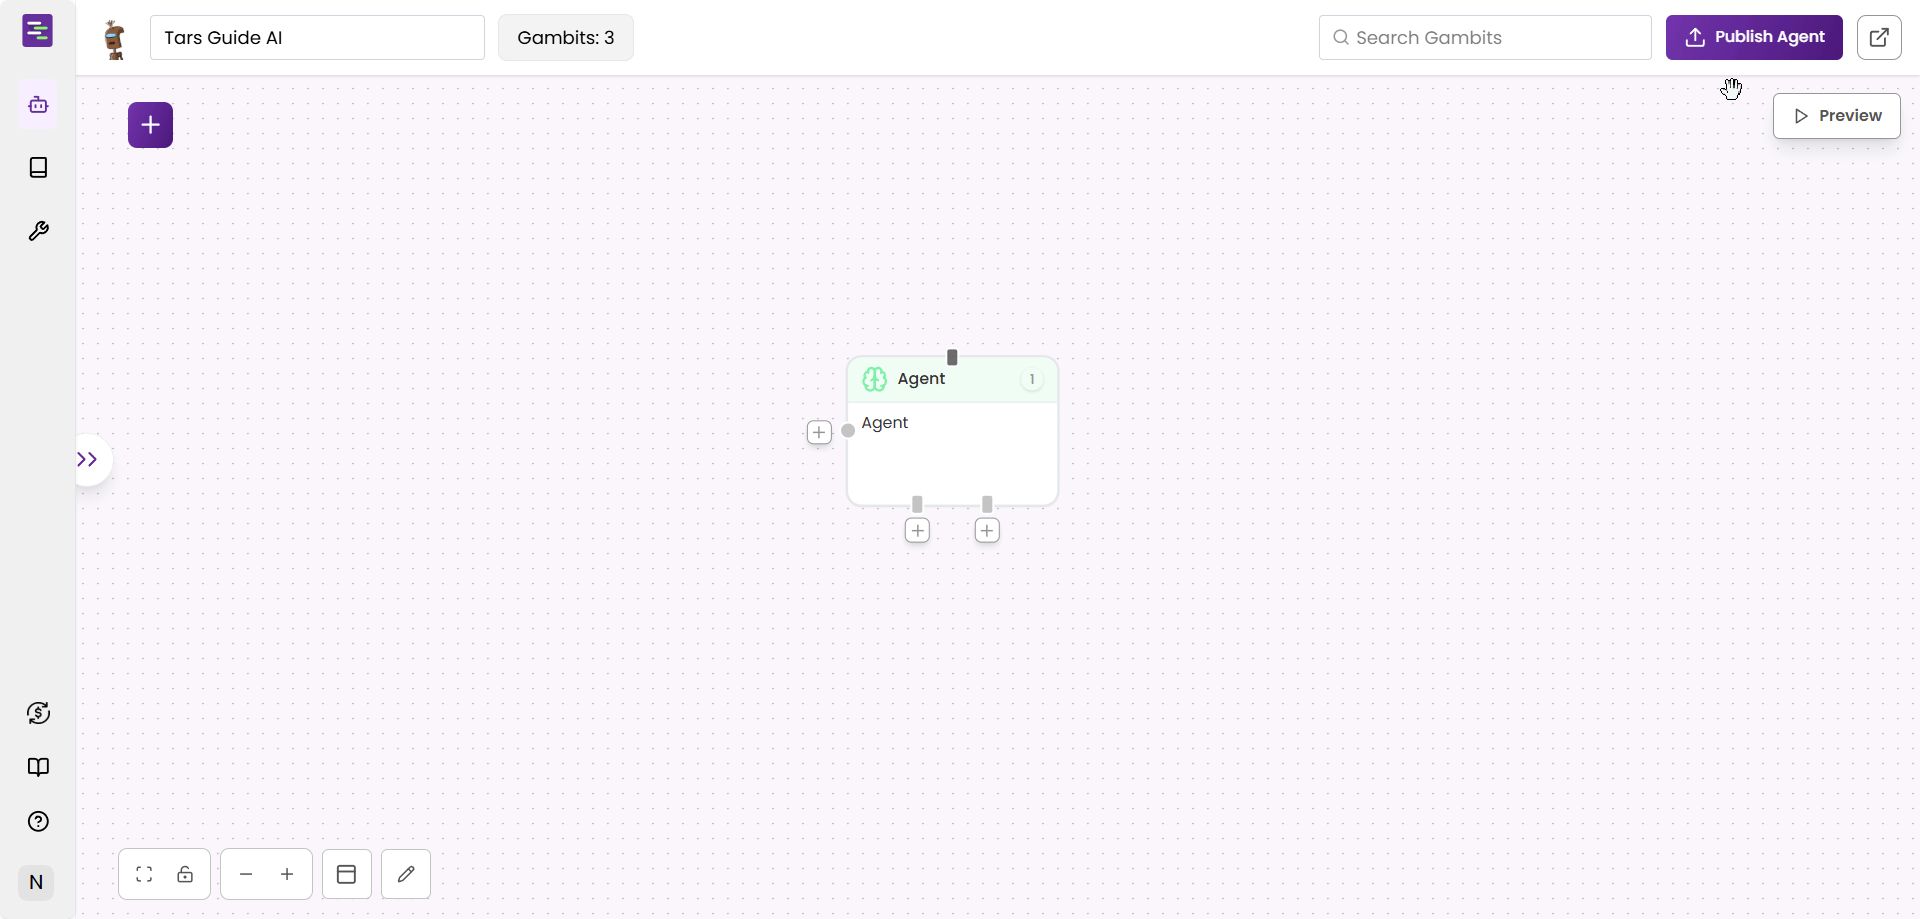
Step 3: Self-loop the Agent
Step 3: Self-loop the Agent

Step 4: Publish and preview
Step 4: Publish and preview
Publish and then Preview to test your Agent setup.Now you can see that the conversation is continuing and you can ask as many questions as you want.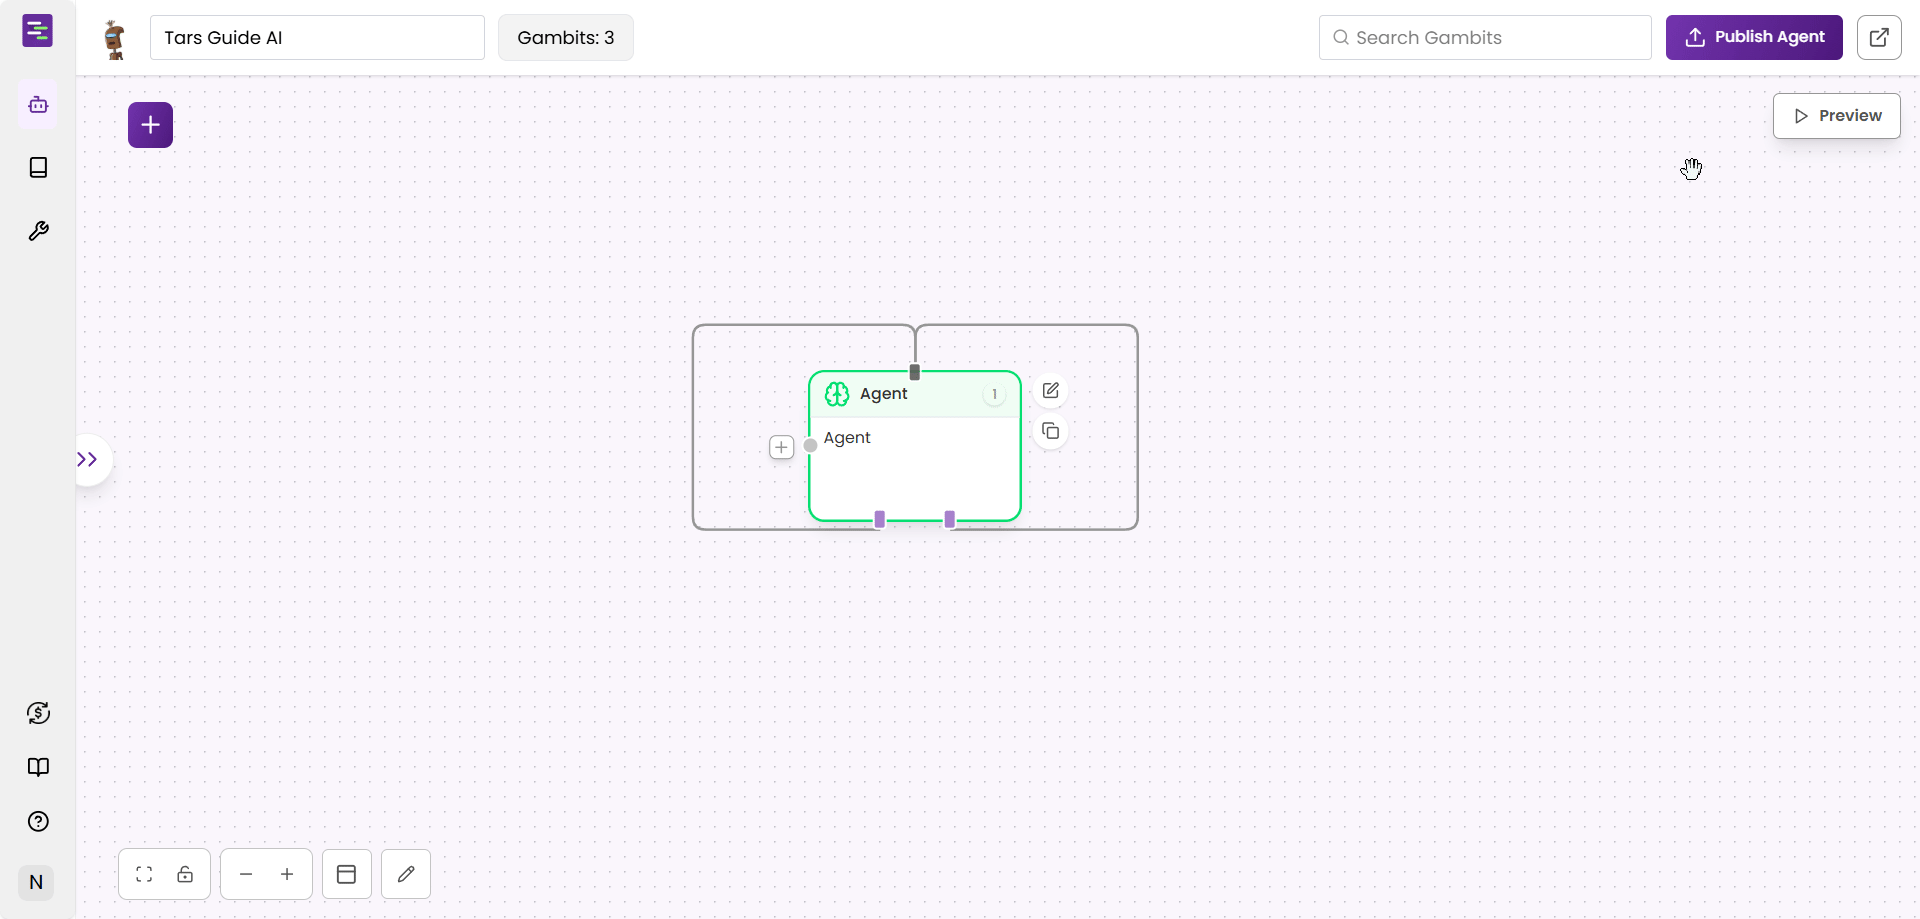
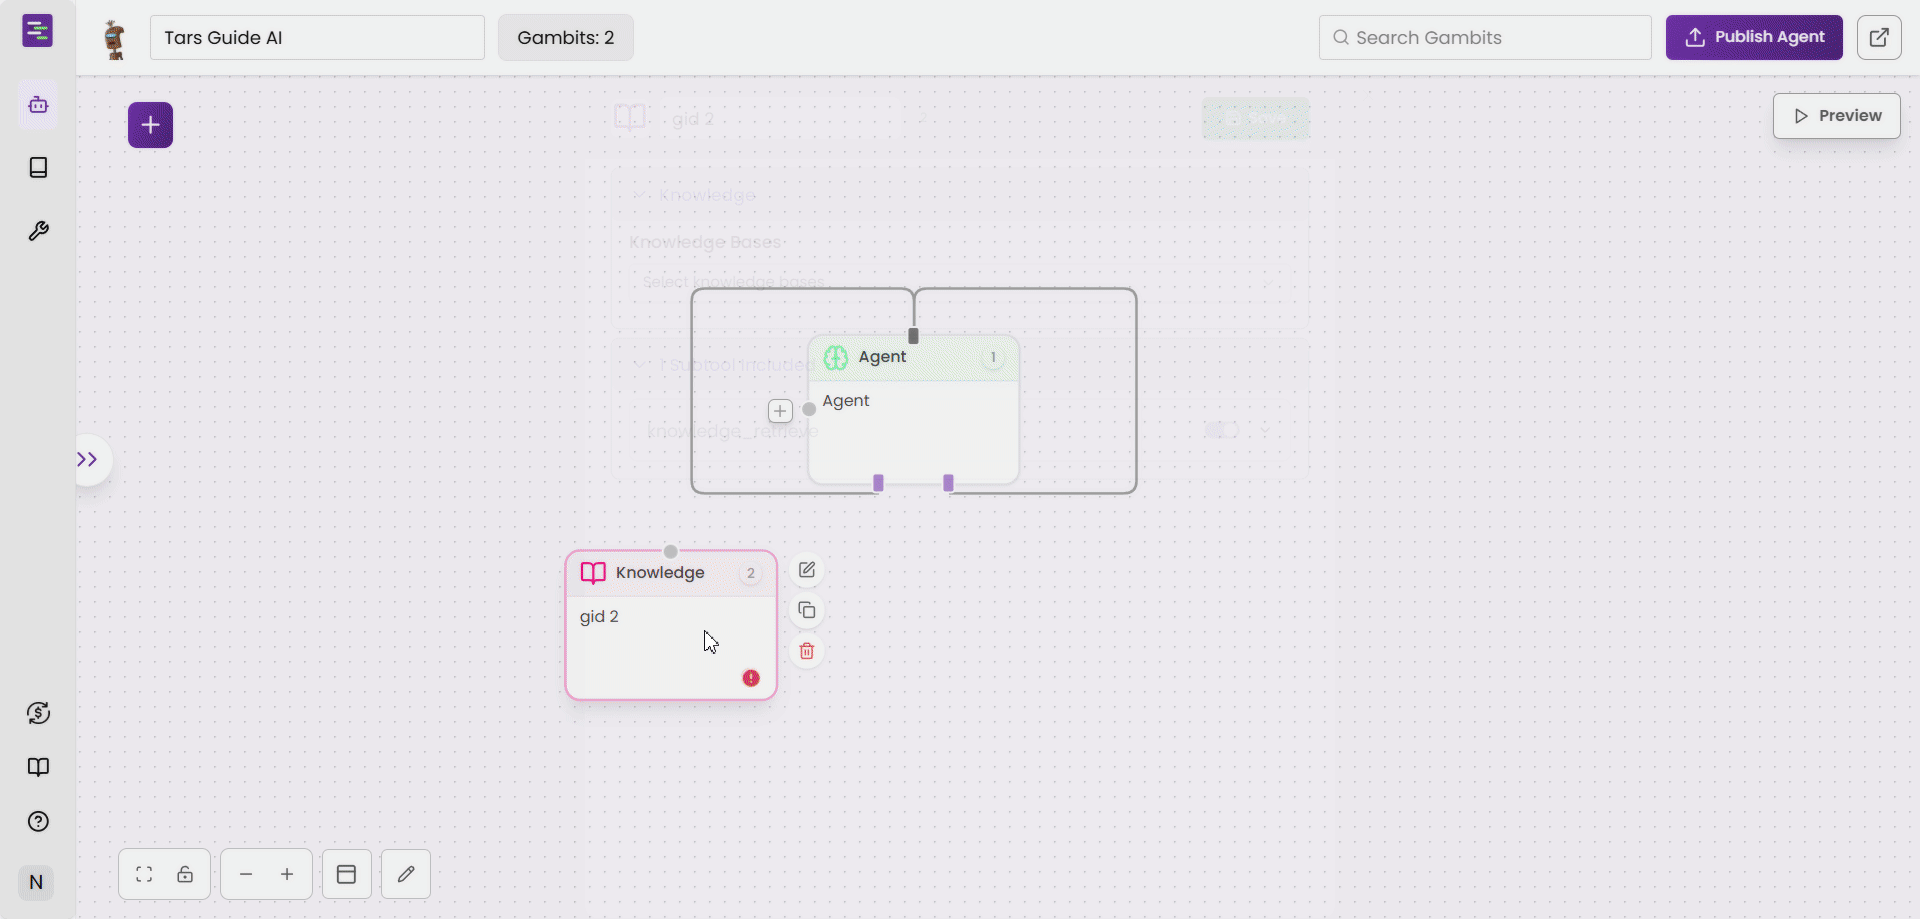
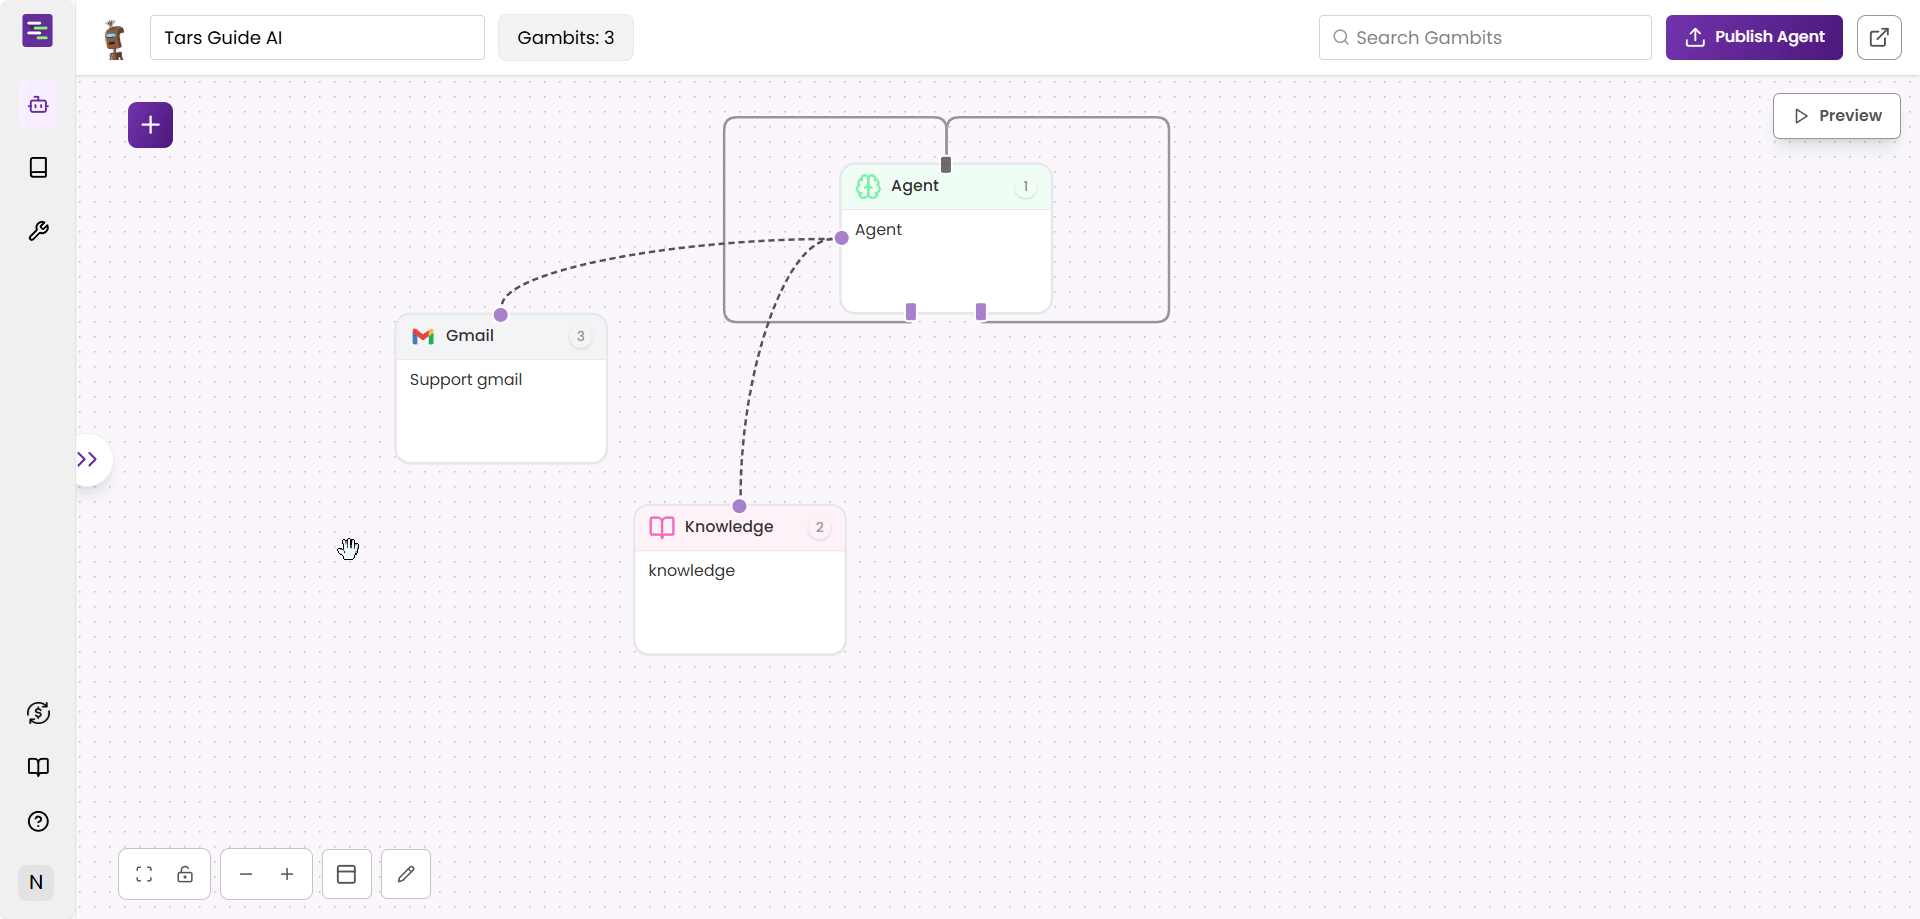
Step 5: Add Knowledge Base
Step 5: Add Knowledge Base
Knowledge gambit to the canvas.
Drag the Knowledge gambit onto the canvas and select “Tars Docs” from the dropdown.
Knowledge gambit will now be added and you could see a pulsating indicator on the gambit.This shows that the Knowledge gambitStep 6: Select Knowledge Base
Step 6: Select Knowledge Base
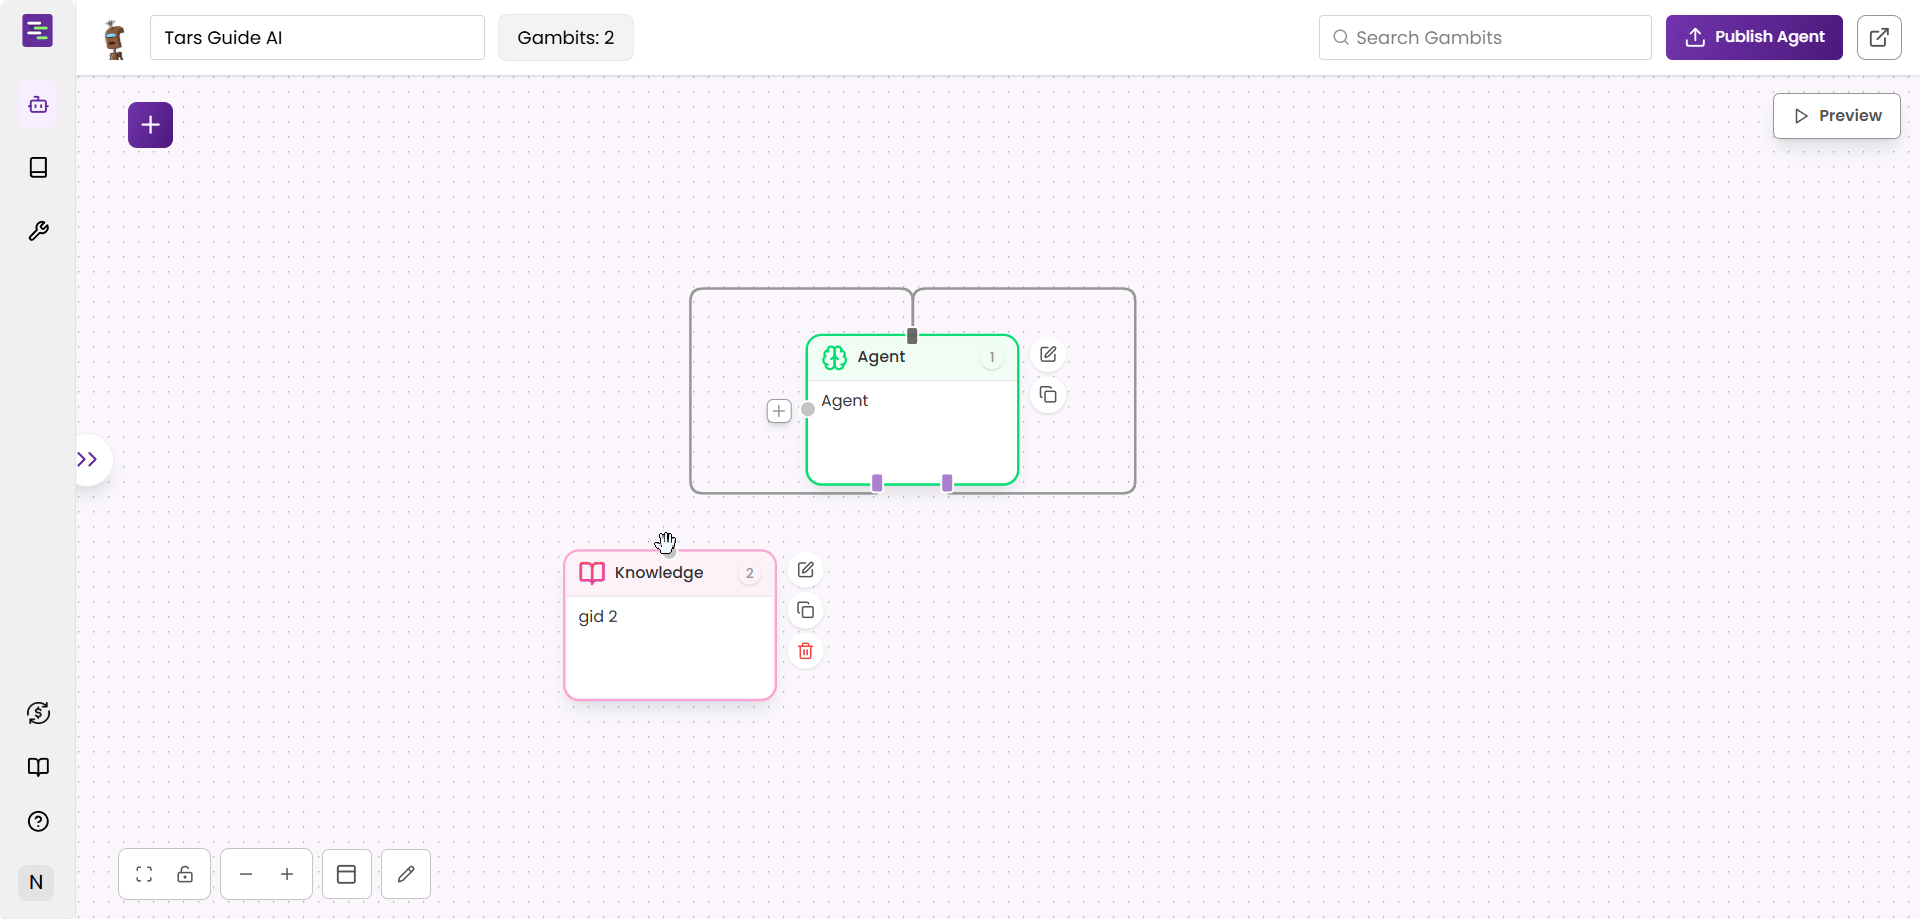
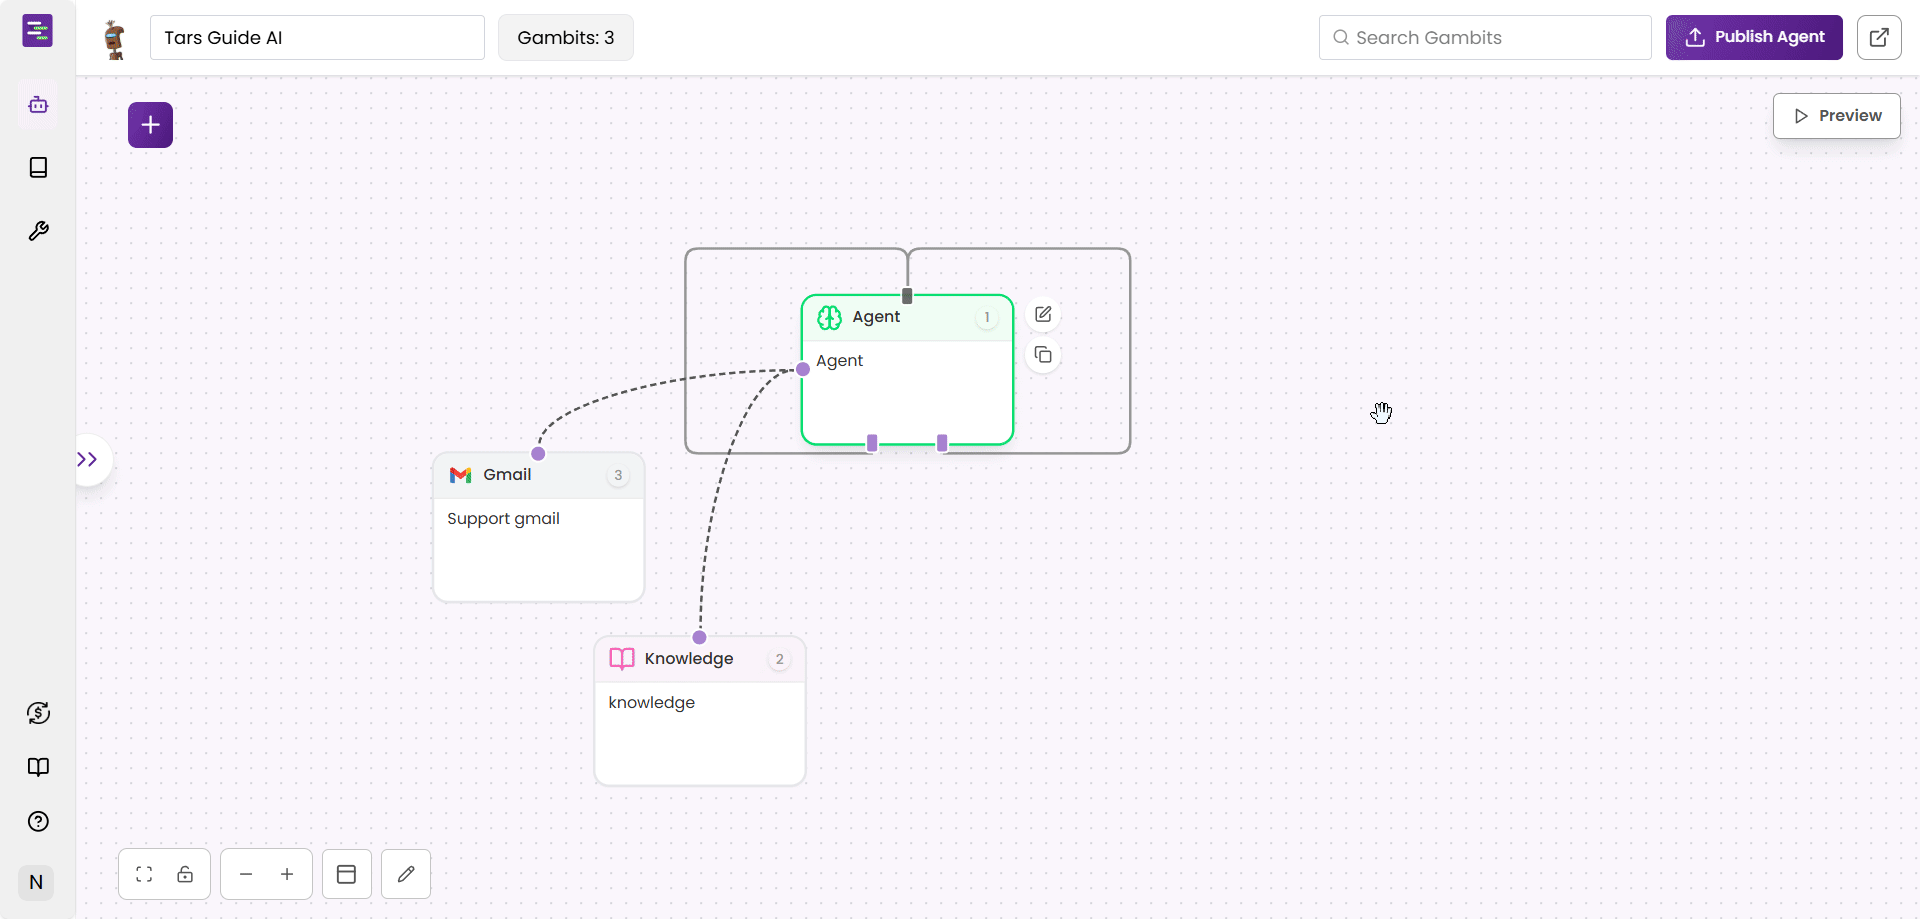
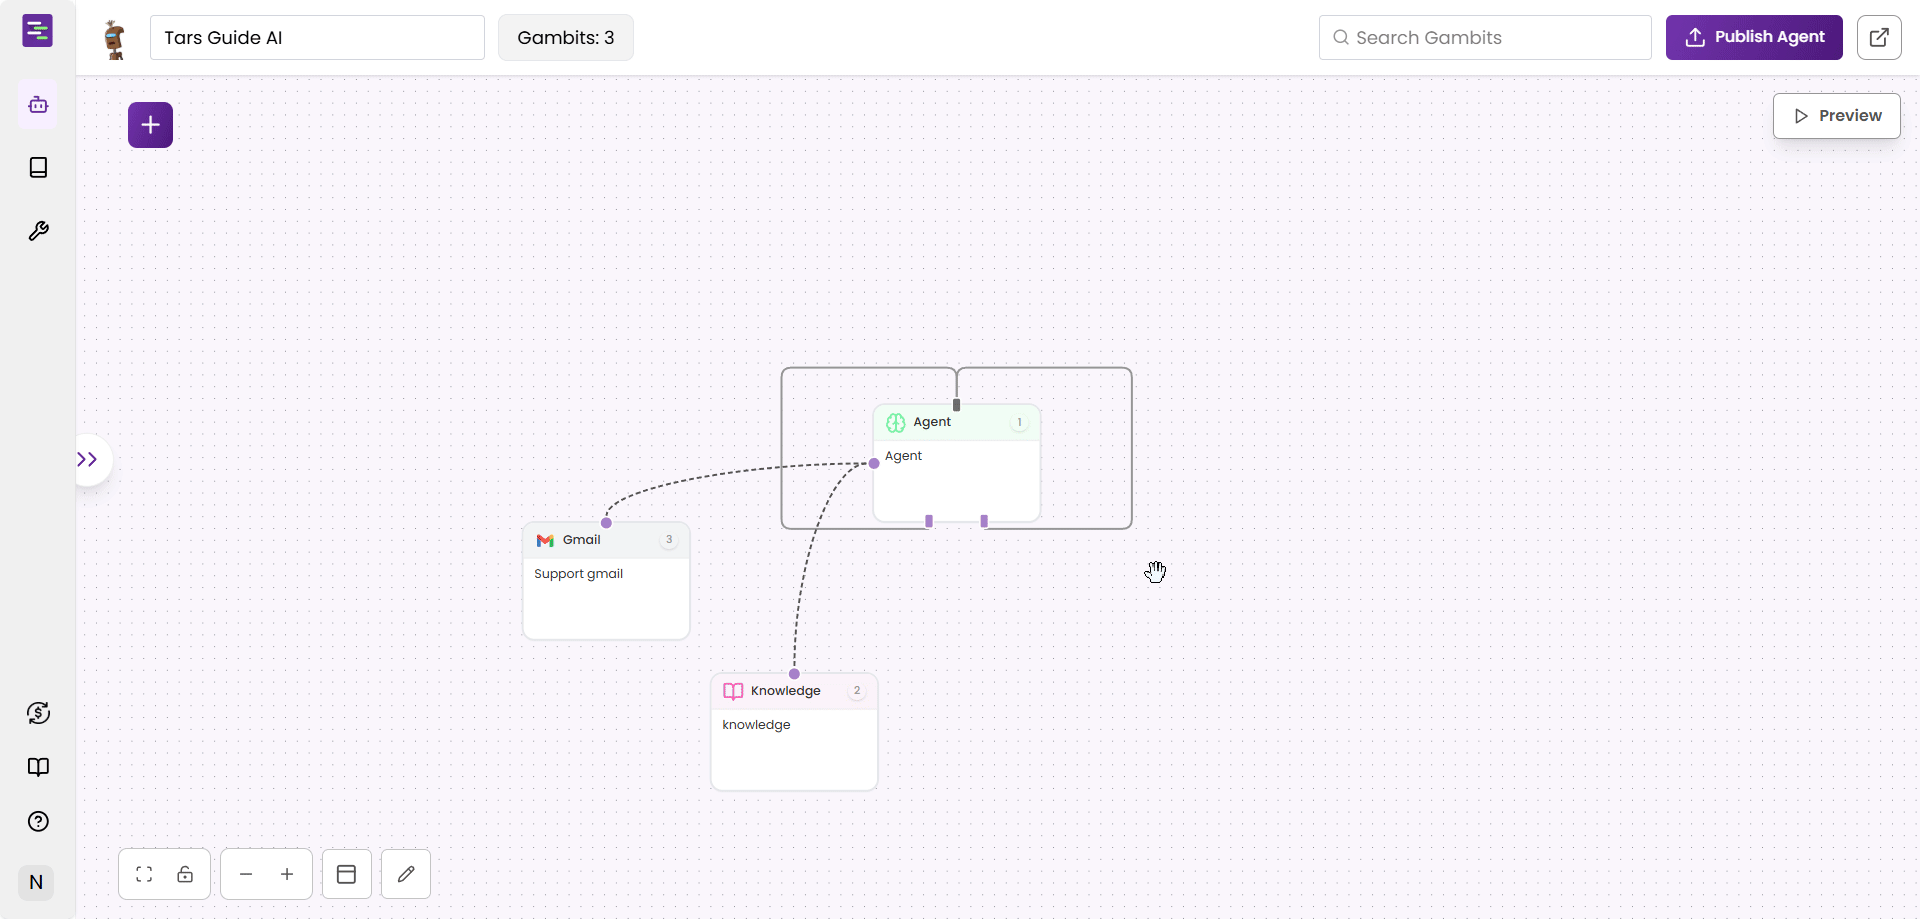
Step 7: Connect Knowledge Base to Agent
Step 7: Connect Knowledge Base to Agent
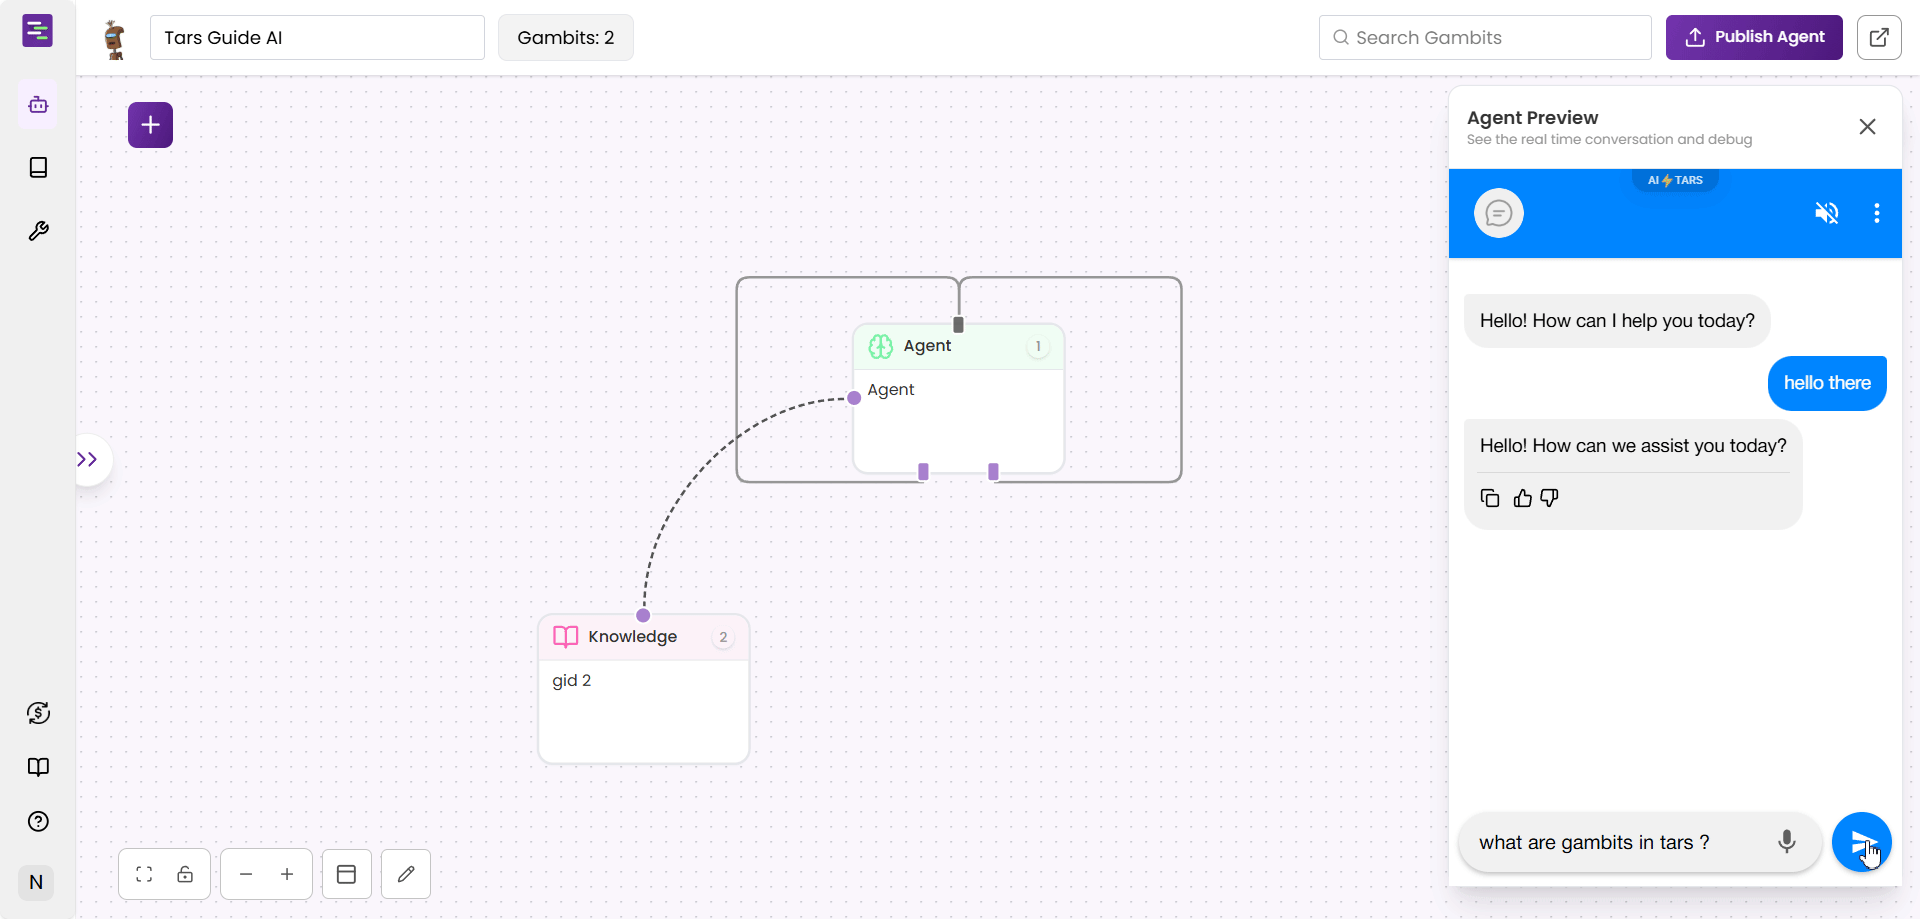
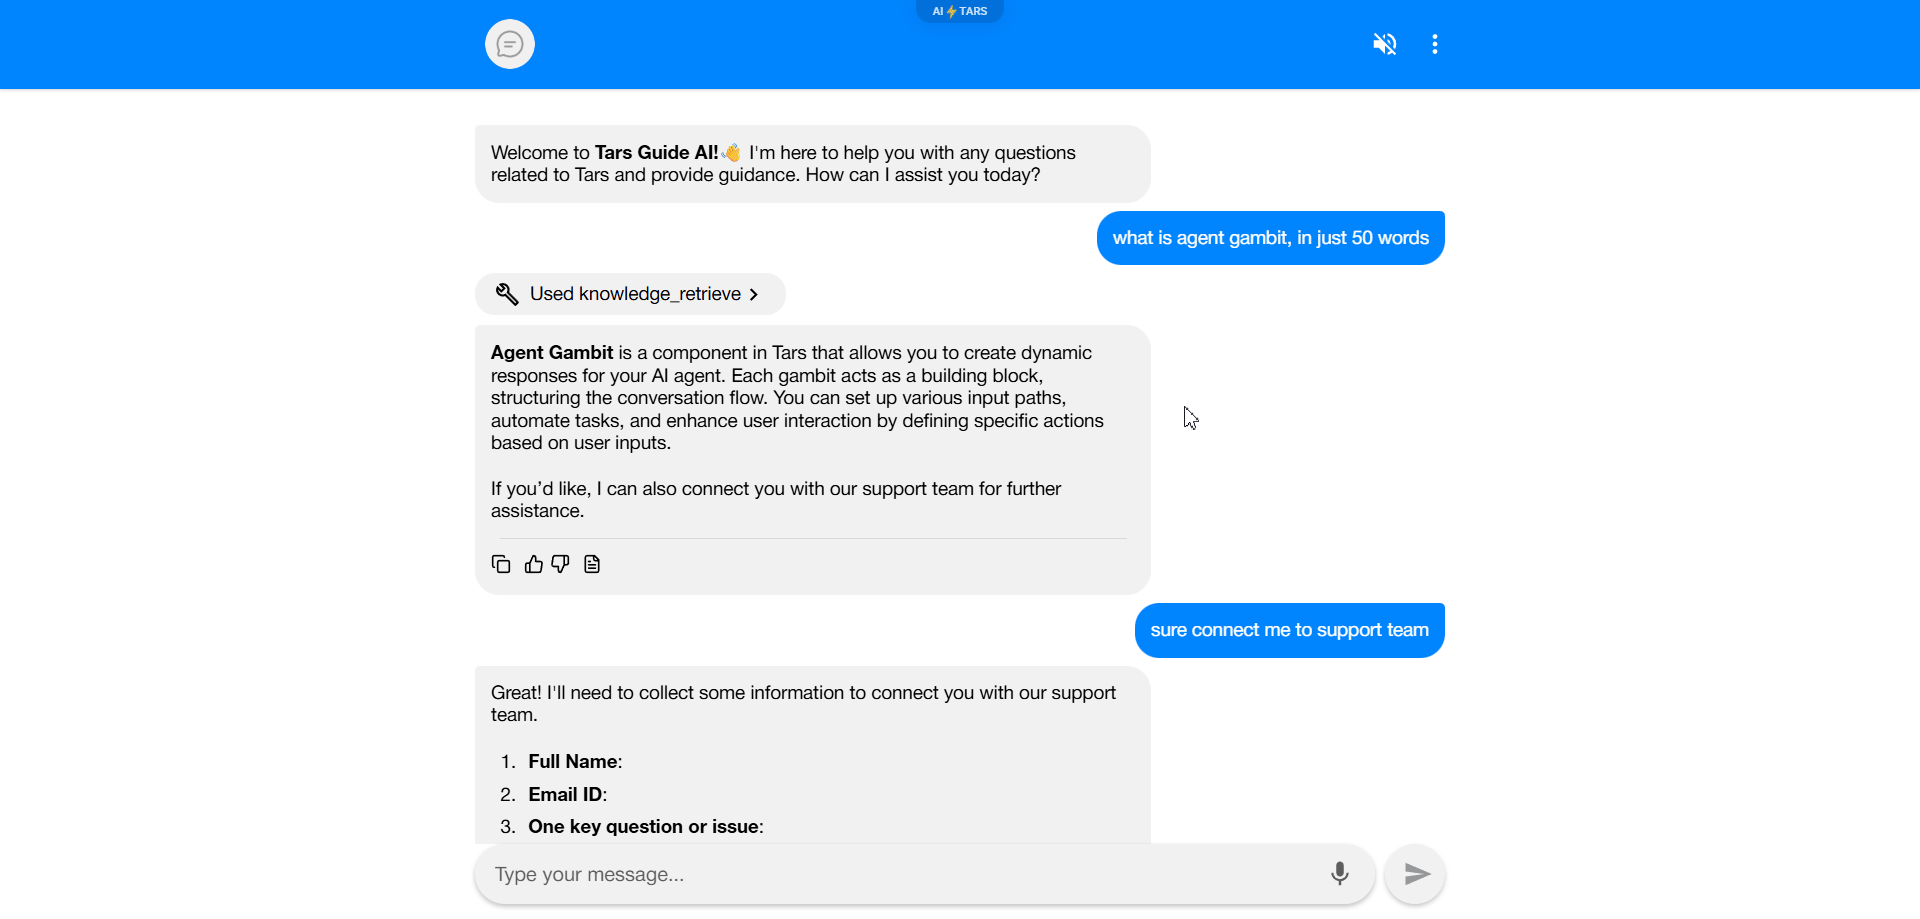
Step 8: Test with Knowledge
Step 8: Test with Knowledge
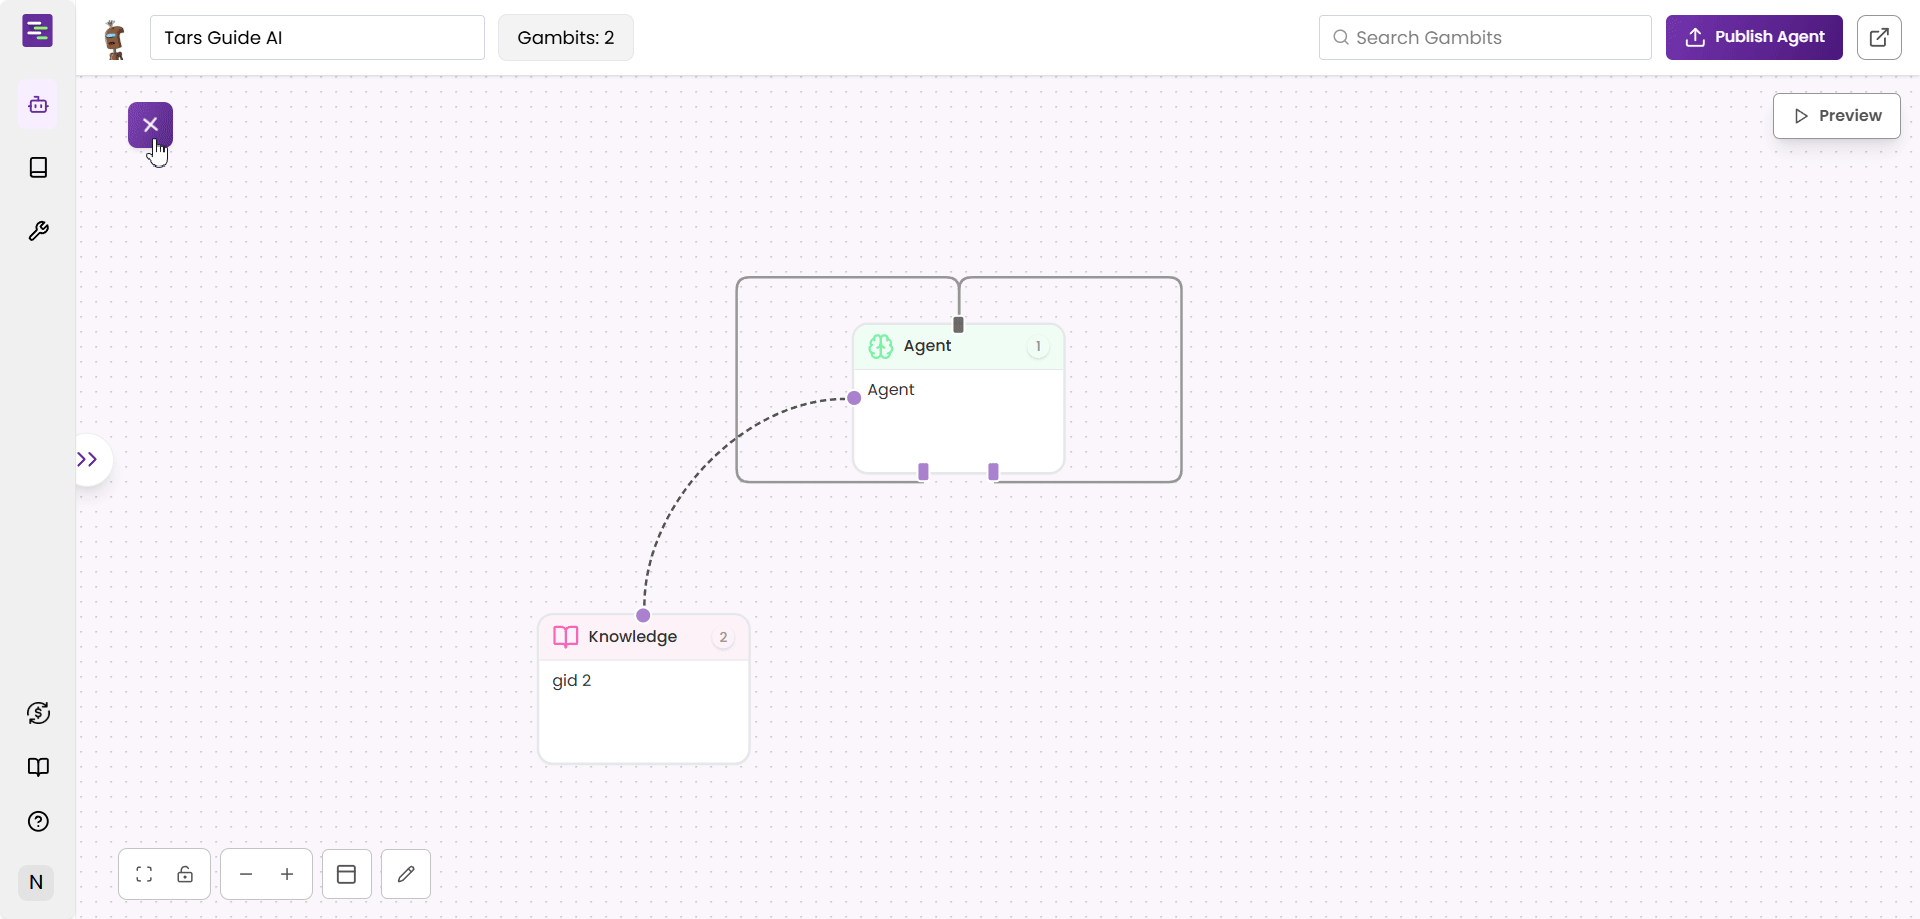
Step 9: Add Gmail Tool
Step 9: Add Gmail Tool
Step 10: Select Gmail Tool
Step 10: Select Gmail Tool
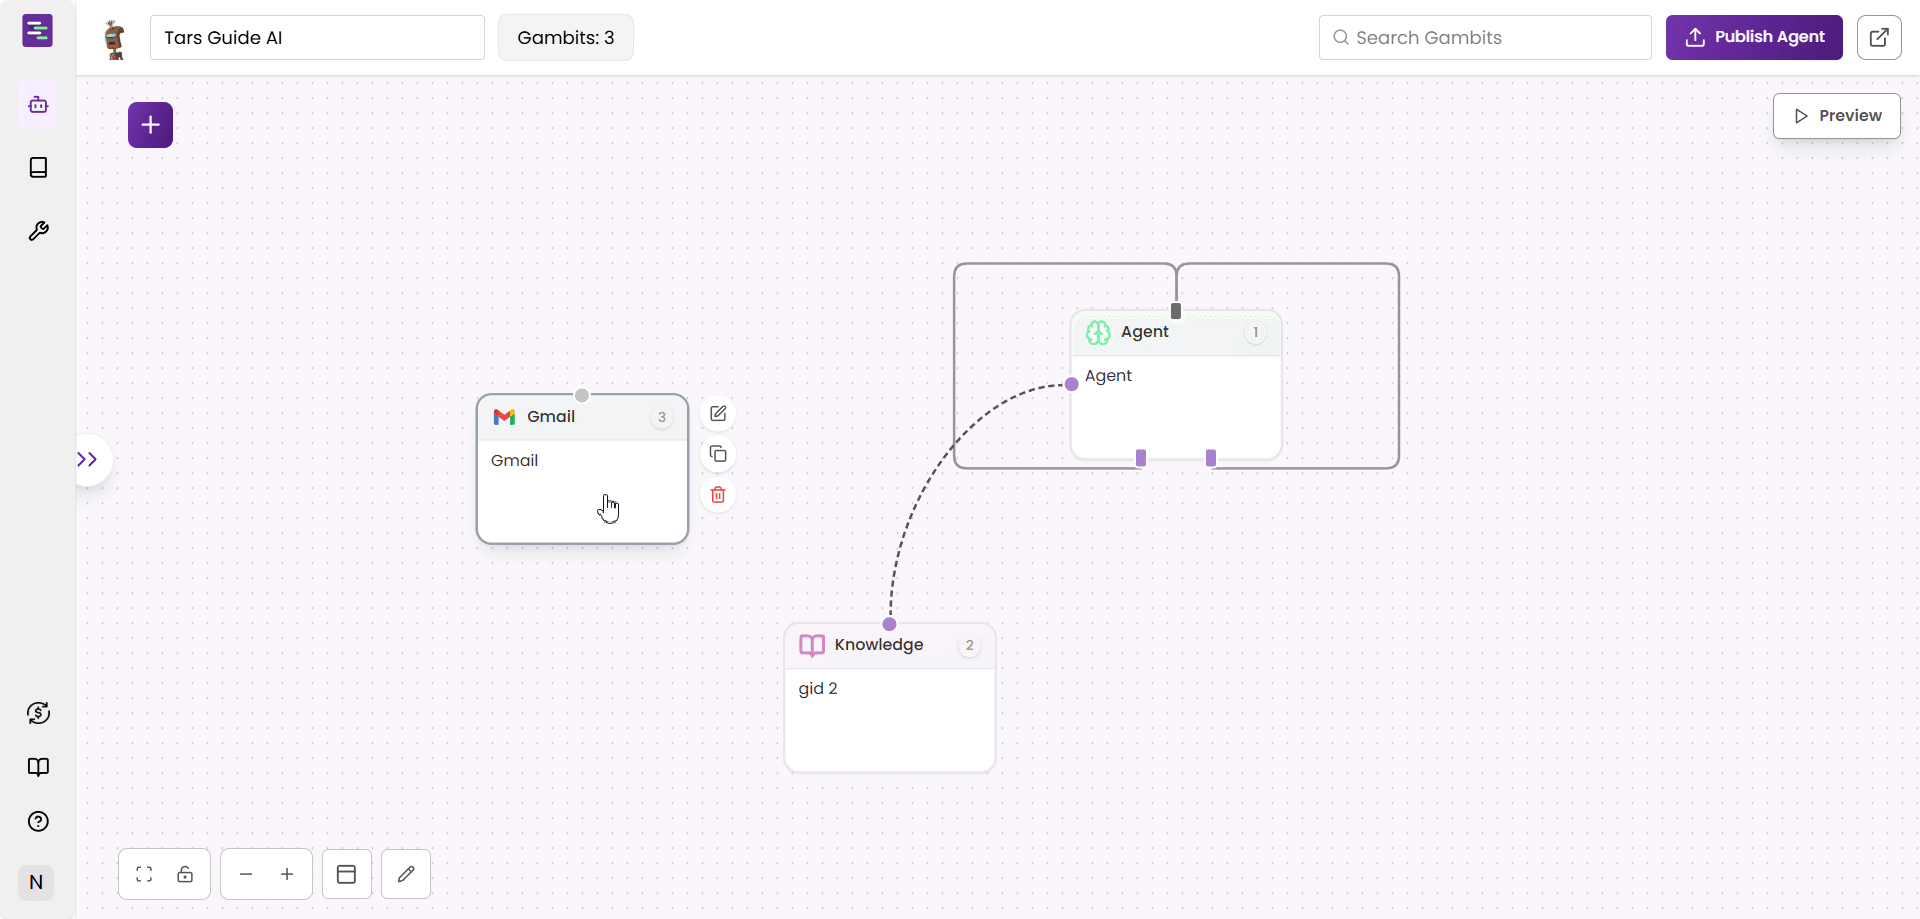
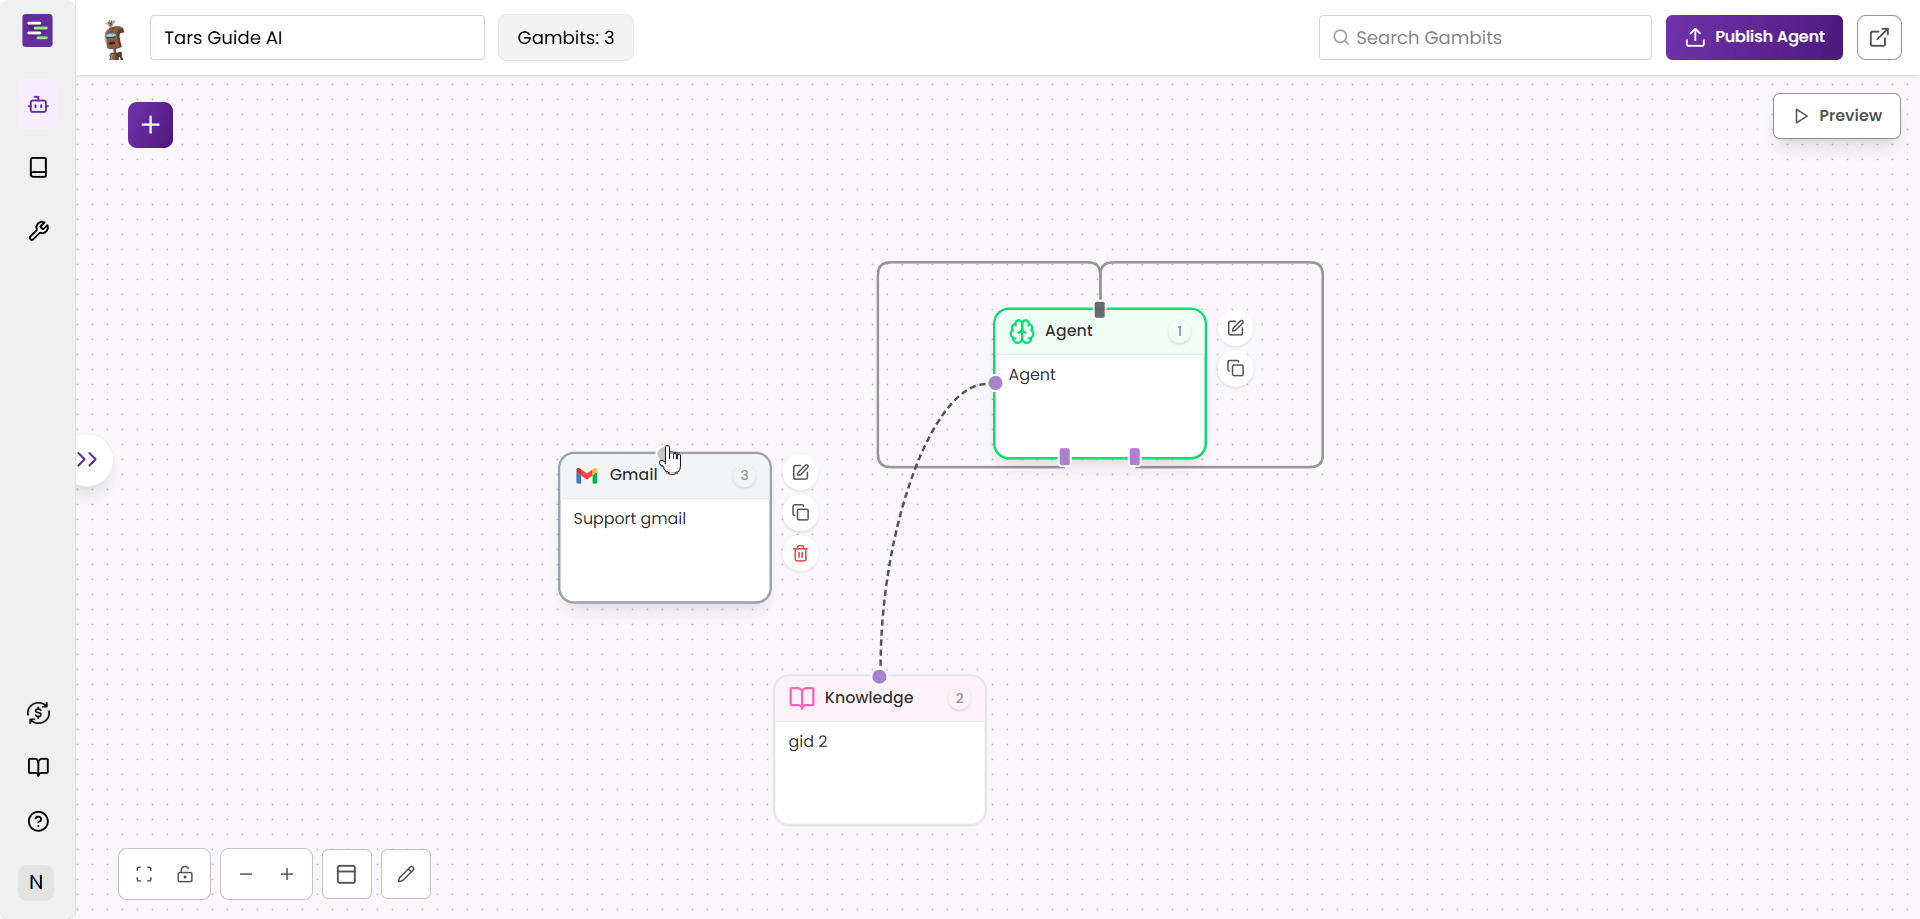
Step 11: Connect Gmail Tool
Step 11: Connect Gmail Tool
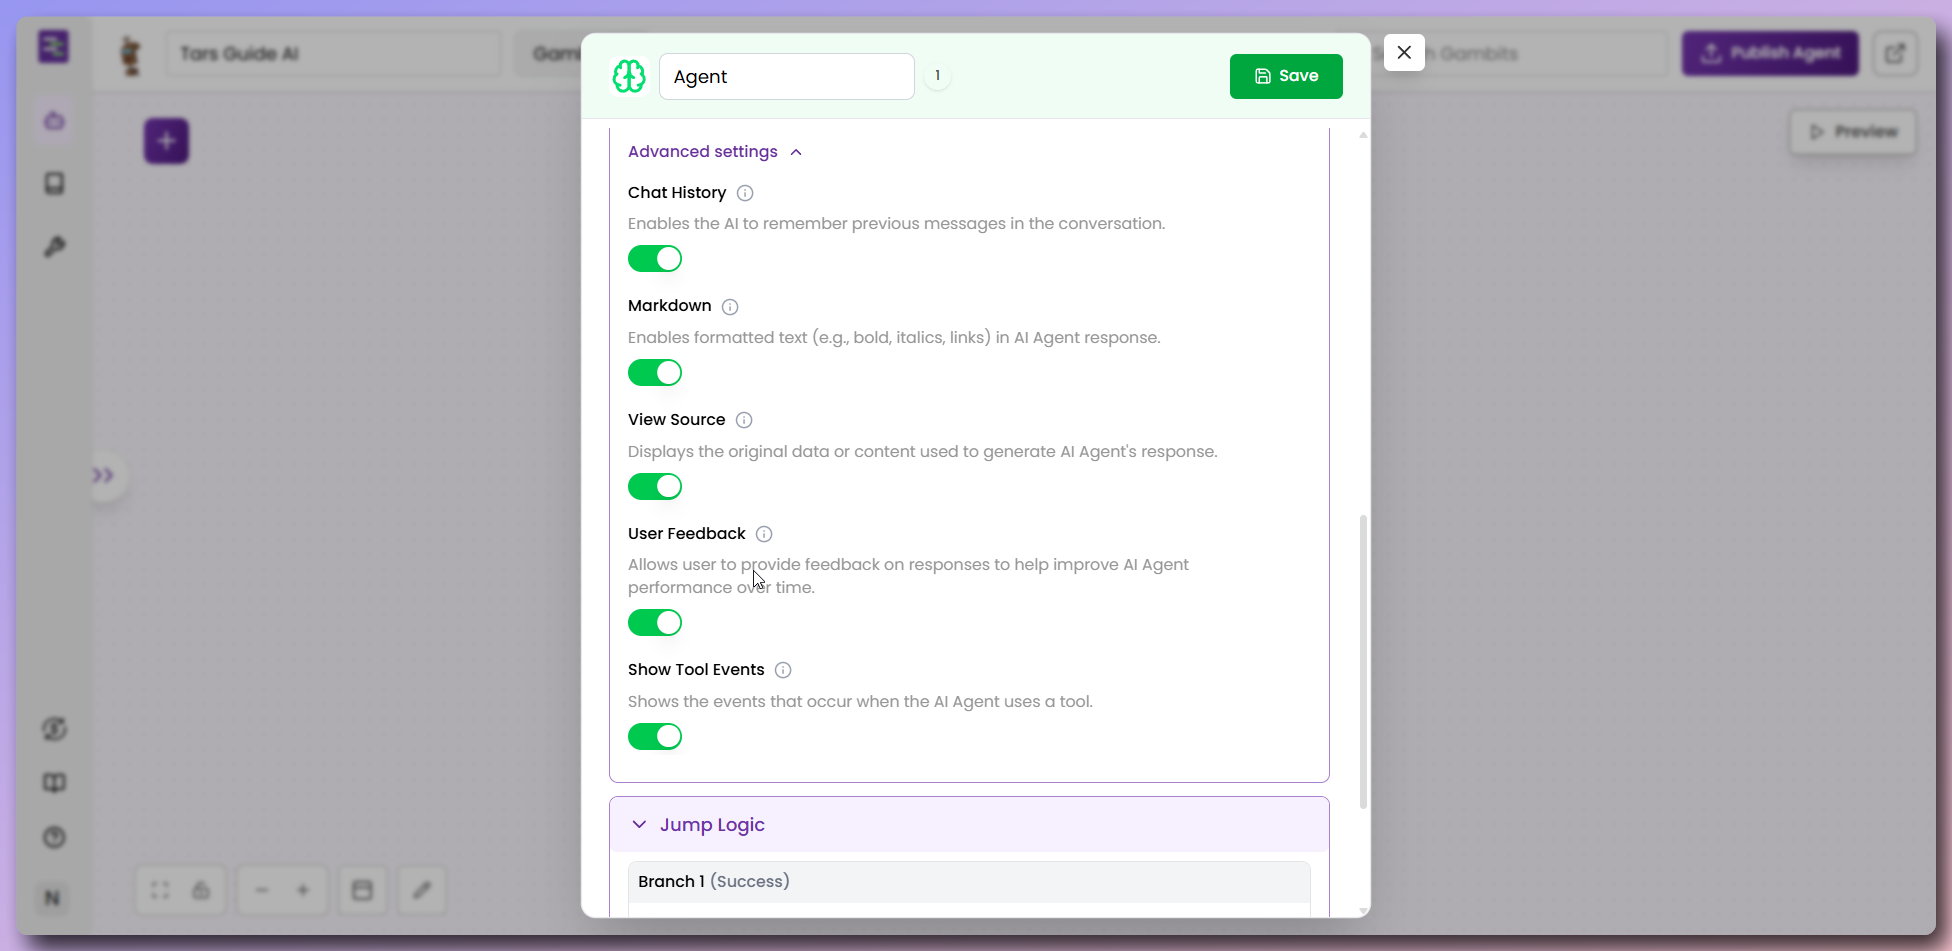
Step 12: Configure Agent settings
Step 12: Configure Agent settings
- Welcome message
- Basic settings
- Advanced settings
- Jump logic
- Initiates the conversation
- Not repeated in continuous interactions
- Provides a friendly greeting and sets the context
Step 13: Customize Agent prompt
Step 13: Customize Agent prompt
- Complete prompt
- Prompt breakdown
Step 14: Final testing
Step 14: Final testing
- First ask any question related to knowledge source you have added.
- Then ask for any help or support.
- The Agent would ask your details and send you an email with the details.
Configure your AI Agent
Now that your Agent is created, let’s configure its metadata and advanced settings to customize its behavior, appearance, and integrations.Navigate to Configuration
Navigate to Configuration
- Open your Agent in the builder (you’ll see the canvas with your Agent workflow)
- Look for the double arrow icon (
>>) on the left side of the canvas - Click the double arrow (
>>) to open the side panel - View the “Build Agent” section with options: Make, Configure, Design, Distribute/Share
- Click “Configure” to expand the configuration options
- Select from the configuration tabs:
- General - Basic Agent information and settings
- SEO Settings - Meta information and search optimization
- Email Notifications - Notification preferences
- Goal Settings - Success metrics and analytics
- Voice & Audio - Speech and audio configurations
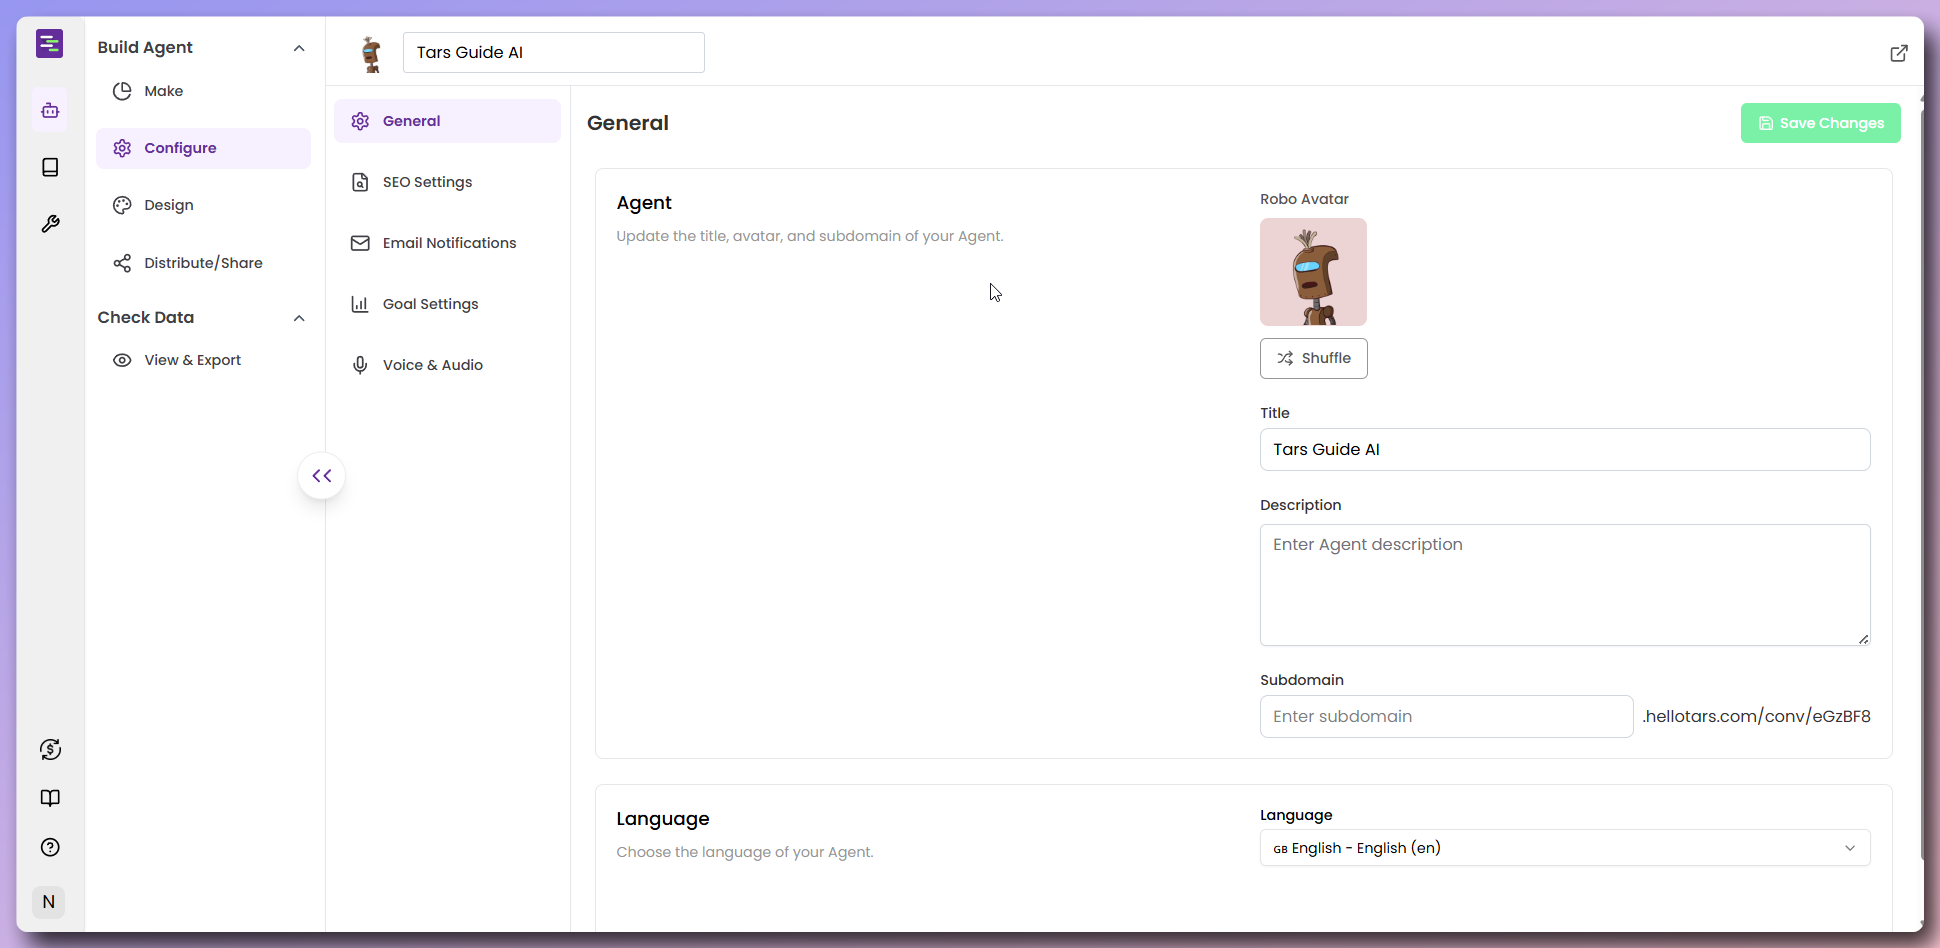
General settings
General settings
Agent Configuration
- Robot Avatar: Upload or select a custom avatar for your Agent (shows a robot character)
- Title: Set the Agent’s display name (e.g., “Tars Guide AI”)
- Description: Write a detailed description of what the Agent does
- Subdomain: Configure a custom URL slug (default format:
<slug>.hellotars.com/conv/xxxxxxthe default value of slug isAgentif not configured) - Language: Select the primary language for the Agent (dropdown with English options)
SEO settings
SEO settings
Meta Information
- Meta Image: Upload an image for social media previews and thumbnails
- Meta Title: Set the page title that appears in search results (e.g., “Tars Guide AI | TARS”)
Favicon Configuration
- Favicon: Upload a custom favicon that appears in browser tabs
- Shows preview of how it will appear in the browser
- Toggle to use Meta Image as favicon
Agent Description
- Industry: Select from dropdown (e.g., “AI Agents”)
- Use Case: Define the specific use case for your Agent
- Description: Write a detailed description of what the Agent does

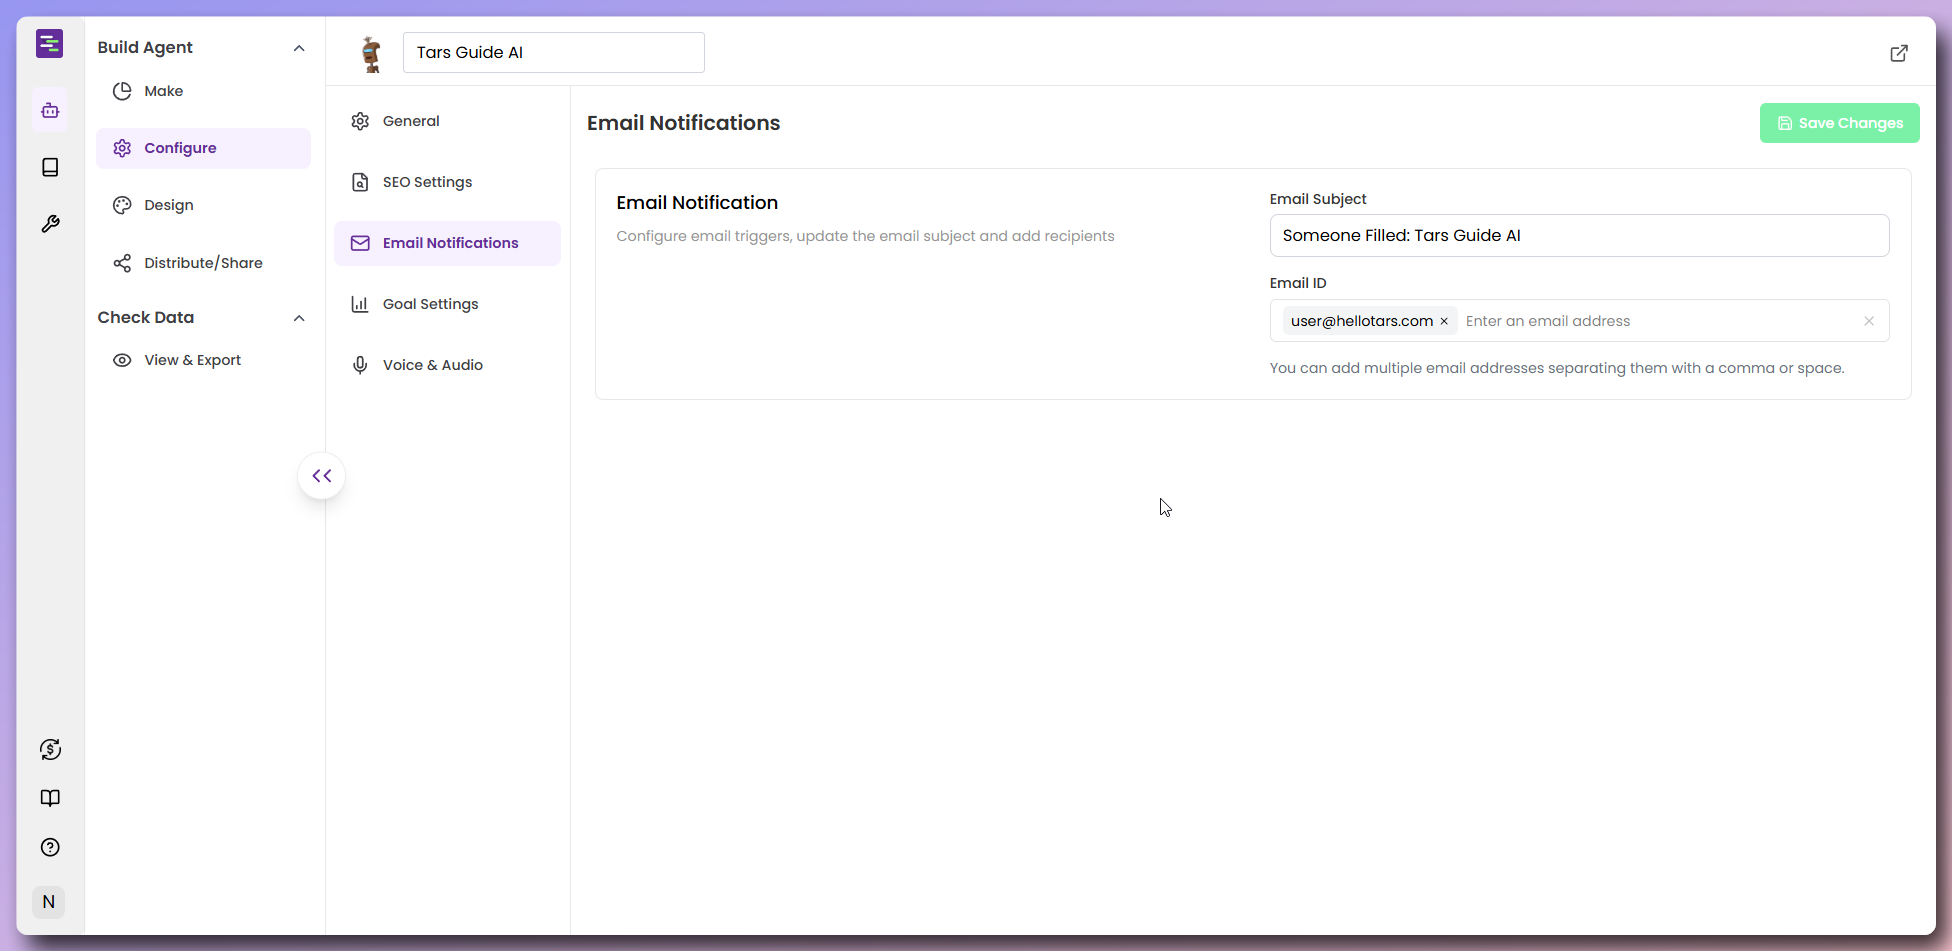
Email notification settings
Email notification settings
Email Notification Configuration
- Email Subject: Customize the subject line for notification emails (e.g., “Someone Filled: Tars Guide AI”)
- Email ID: Set the recipient email address for notifications (supports multiple addresses separated by comma or space)
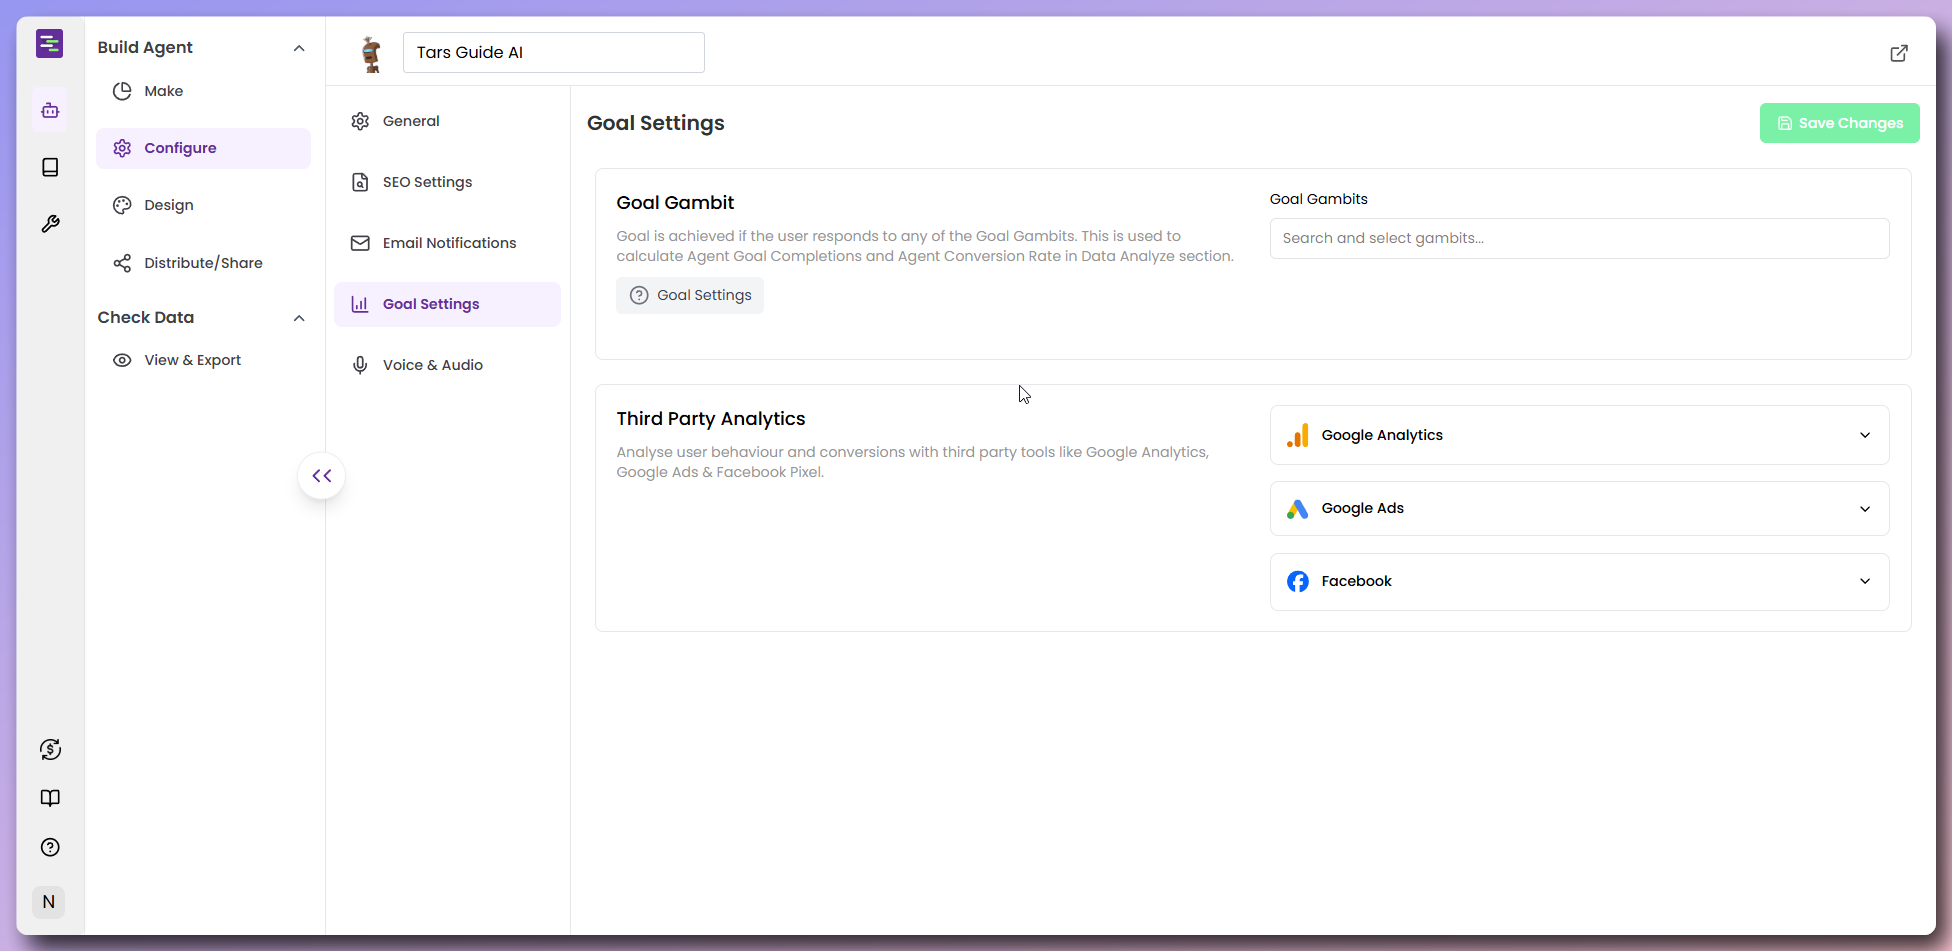
Goal settings
Goal settings
Goal Gambit configuration
- Goal Gambits: Search and select gambits that represent successful conversation outcomes
- Used to calculate Agent Goal Completions and Agent Conversion Rate in Data Analysis
- Multiple gambits can be selected from the dropdown
Third party analytics
Analyze user behaviour and conversions with third party tools like Google Analytics, Google Ads & Facebook Pixel.Google analytics configuration
- GA4 Code: Enter your Google Analytics 4 measurement ID (format: G-XXXXXXXXX)
- Event Tracking: Choose from dropdown options:
- Send no events to GA
- Send all user responses as events to GA
- Send only Goal Gambit user responses as events to GA
Google Ads configuration
- Remarketing/Conversion ID: Enter your Google Ads conversion ID (format: AW-XXXXXXXXX)
- Conversion Label: Set the conversion label for tracking
- Google Tag Manager Code: Enter your GTM container ID (format: GTM-XXXXXXX)
Facebook configuration
- Facebook Pixel ID: Enter your Facebook Pixel ID for tracking conversions and user behavior
Voice & Audio Settings
Voice & Audio Settings
Text-to-speech (TTS) configuration:
- Text-to-speech: Toggle to enable reading messages aloud in the selected voice
- TTS Streaming: Enable for real-time audio streaming
- Select Voice: Choose from available voice options (e.g., “Alloy”)
- Includes audio preview functionality
Speech-to-text (STT) configuration:
- Speech-to-Text: Toggle to enable automatic transcription to text
- Max Voice Record Time: Set maximum recording duration (e.g., “2 Mins”)

Customize design and appearance
Now that your Agent is configured, let’s customize its visual design to match your brand and create an engaging user experience.Navigate to design
Navigate to design
- Open your Agent in the builder (you’ll see the canvas with your Agent workflow)
- Click the double arrow icon (
>>) on the left side to open the side panel - Select “Design” from the “Build Agent” section
- View the design interface with “Agent Design” and “Widget Design” tabs

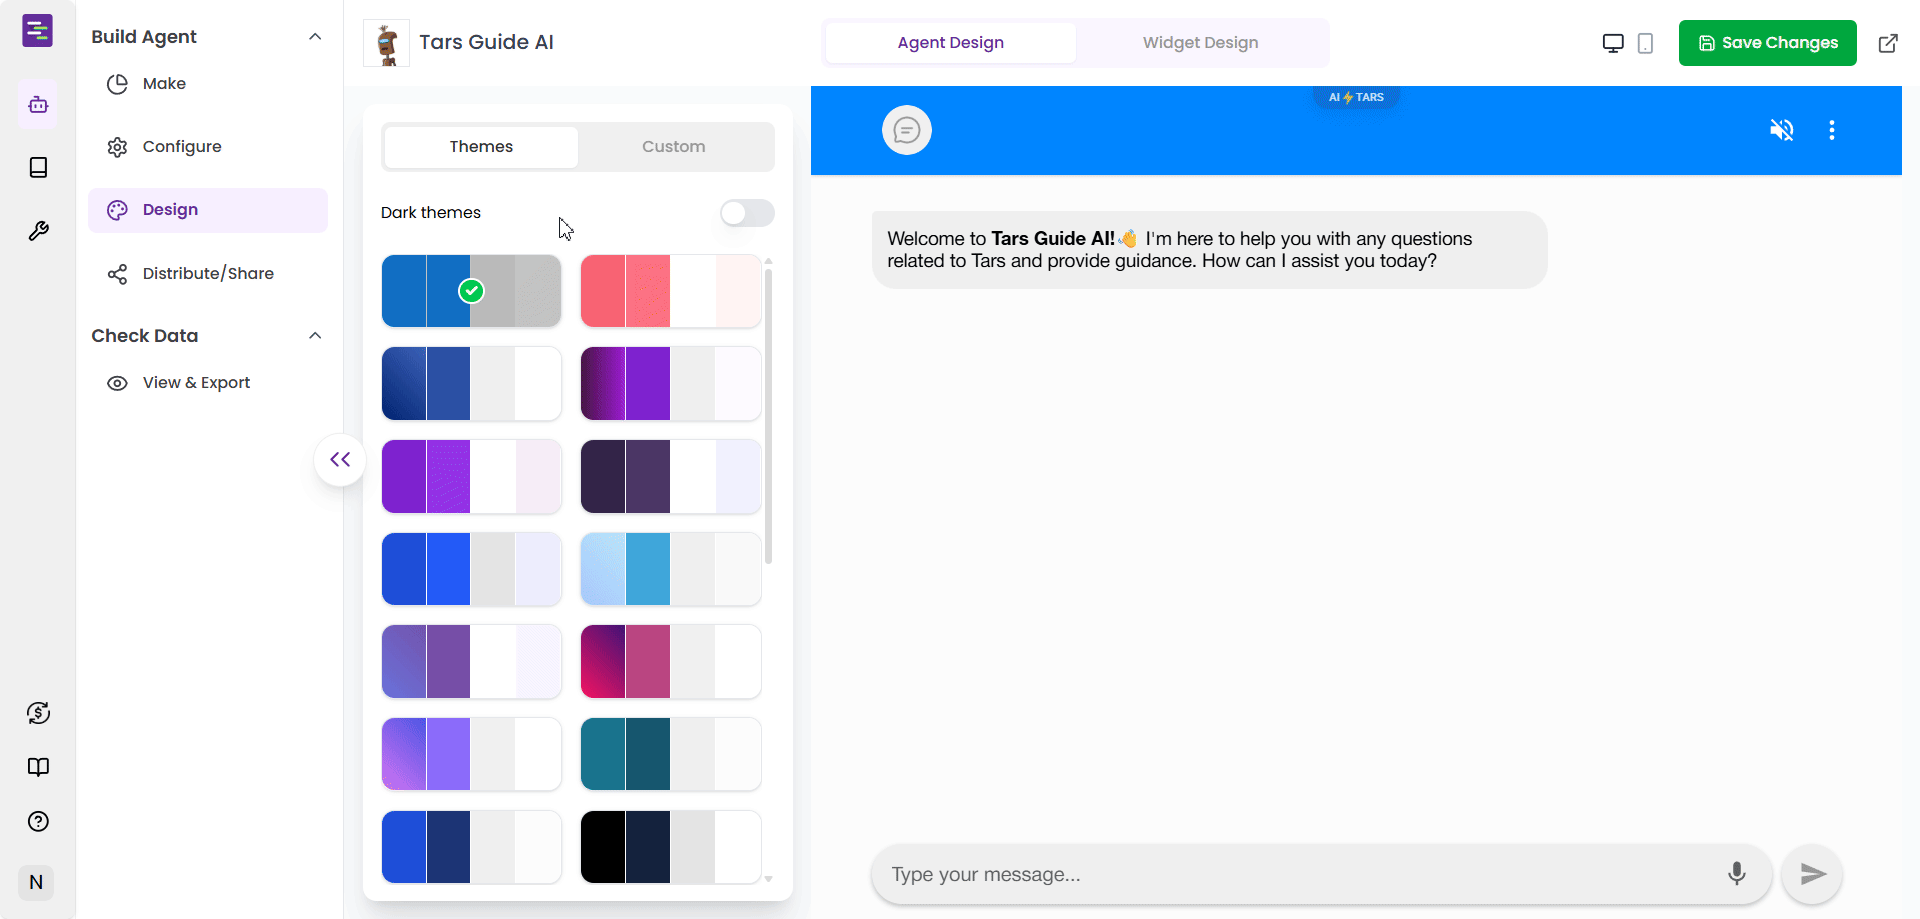
Explore themes
Explore themes
- Click on “Agent Design” tab to access chat interface themes
- Browse available themes in the “Themes” section
- Toggle “Dark themes” to explore dark mode variations
- Preview each theme in real-time on the right side
- Select a theme that matches your brand aesthetic
- Light Themes: Various color combinations for bright, clean interfaces
- Dark Themes: Professional dark mode options for modern appeal
- Real-time Preview: See changes instantly in the chat preview
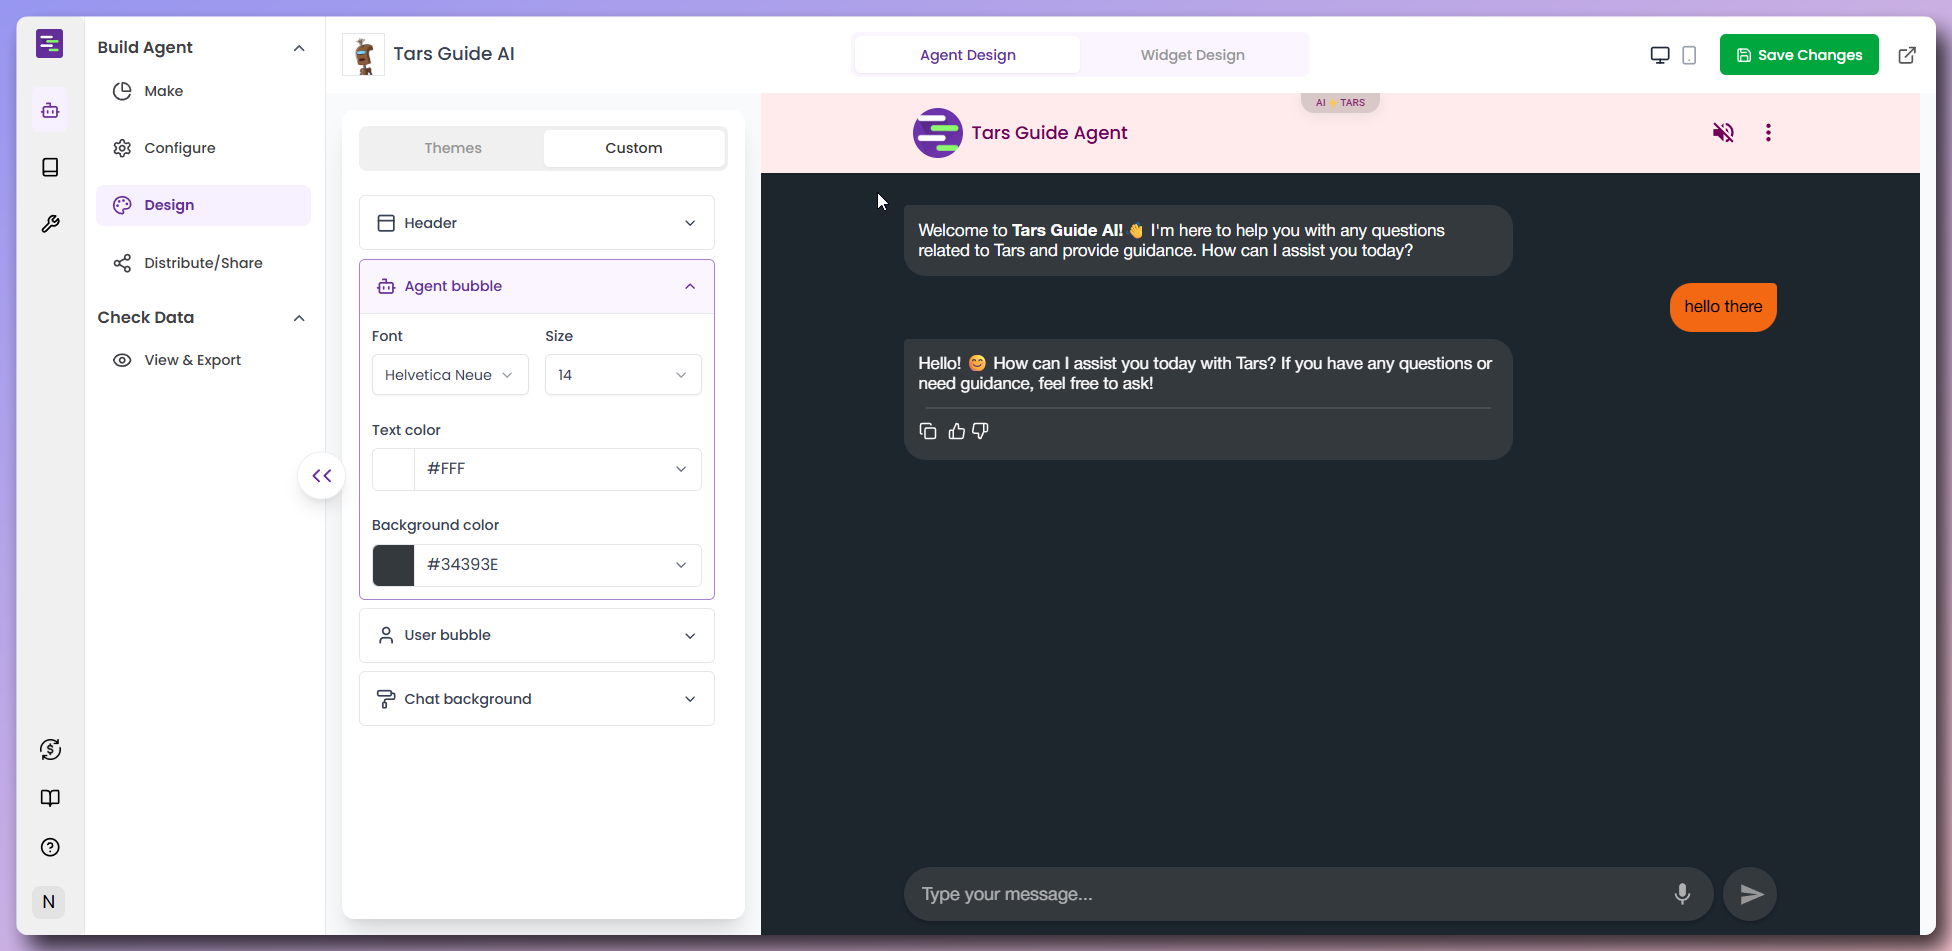
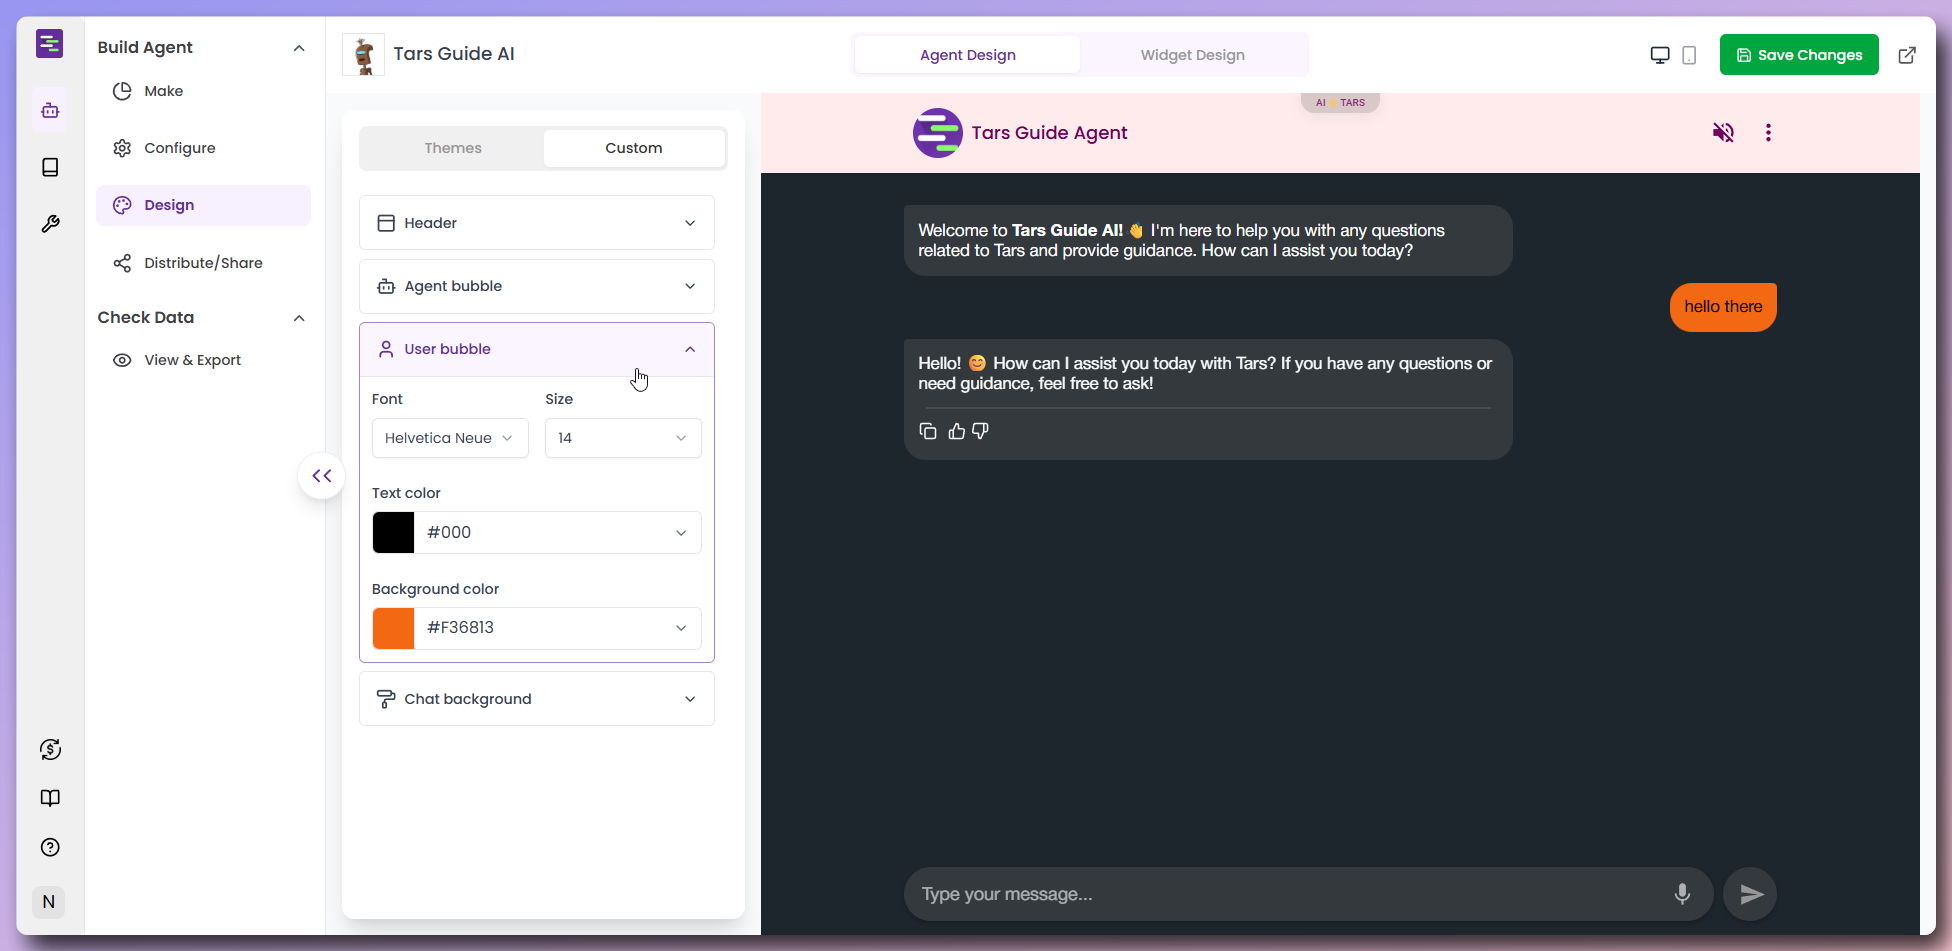
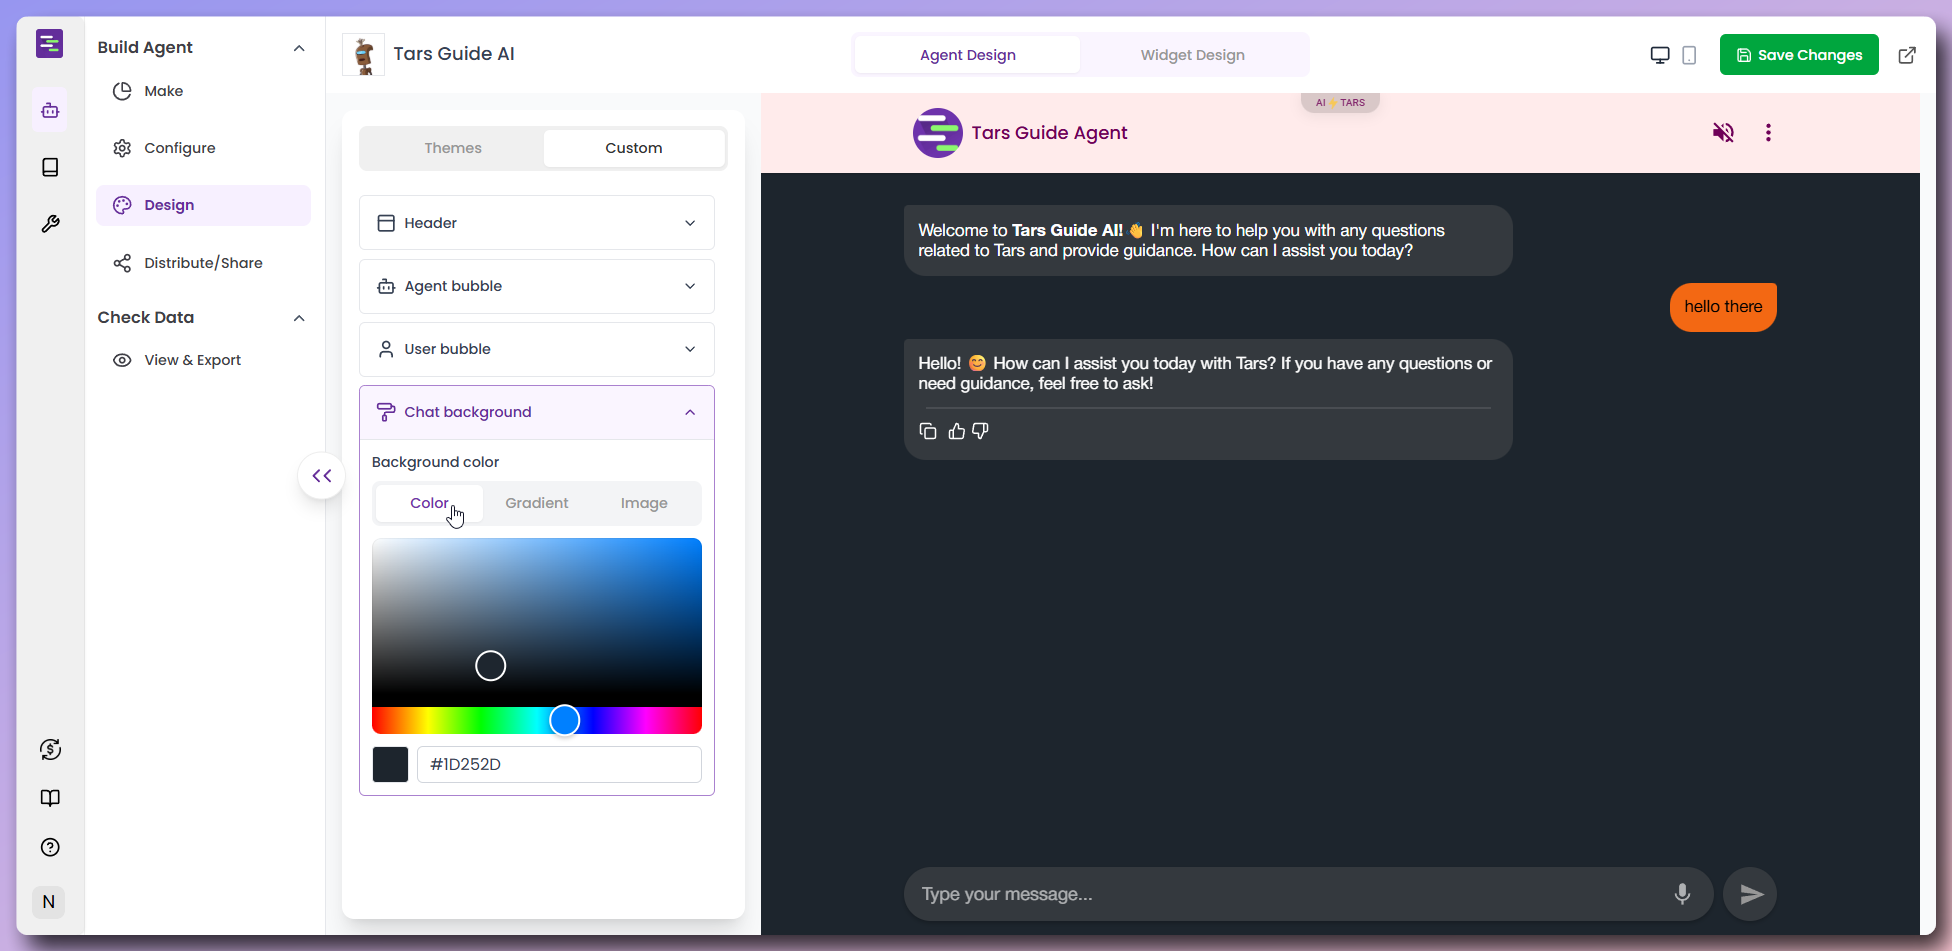
Custom design
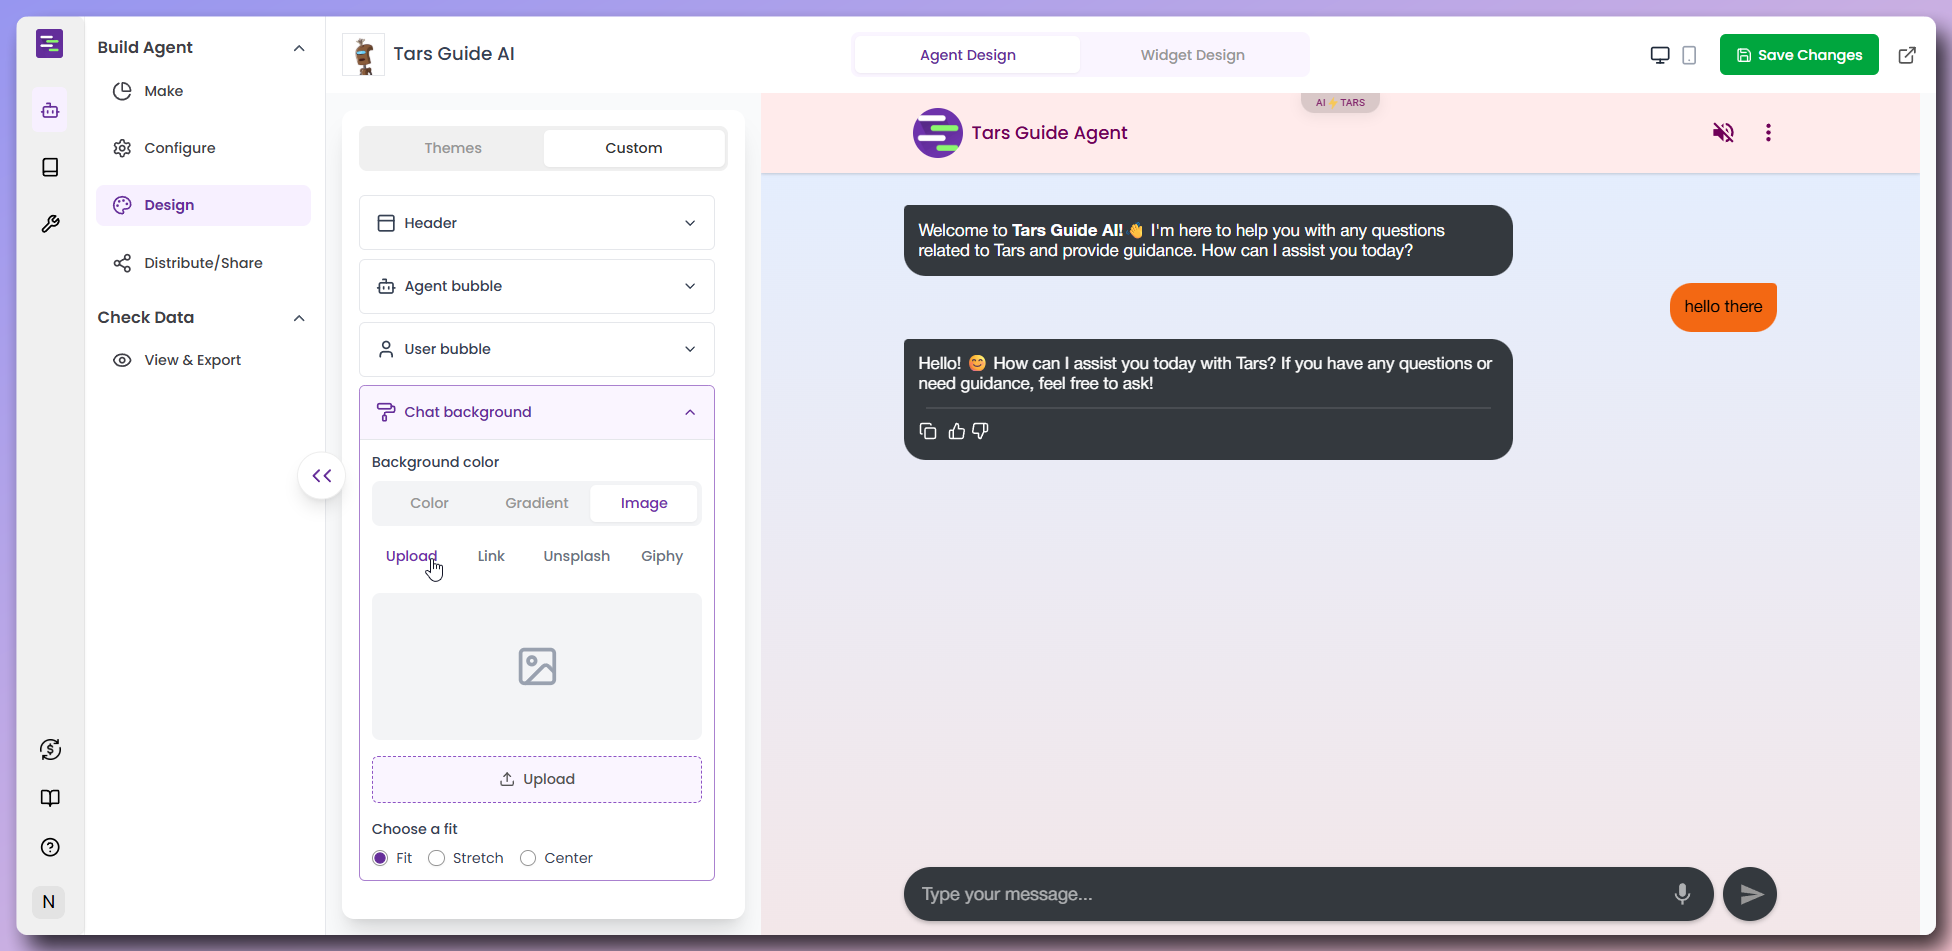
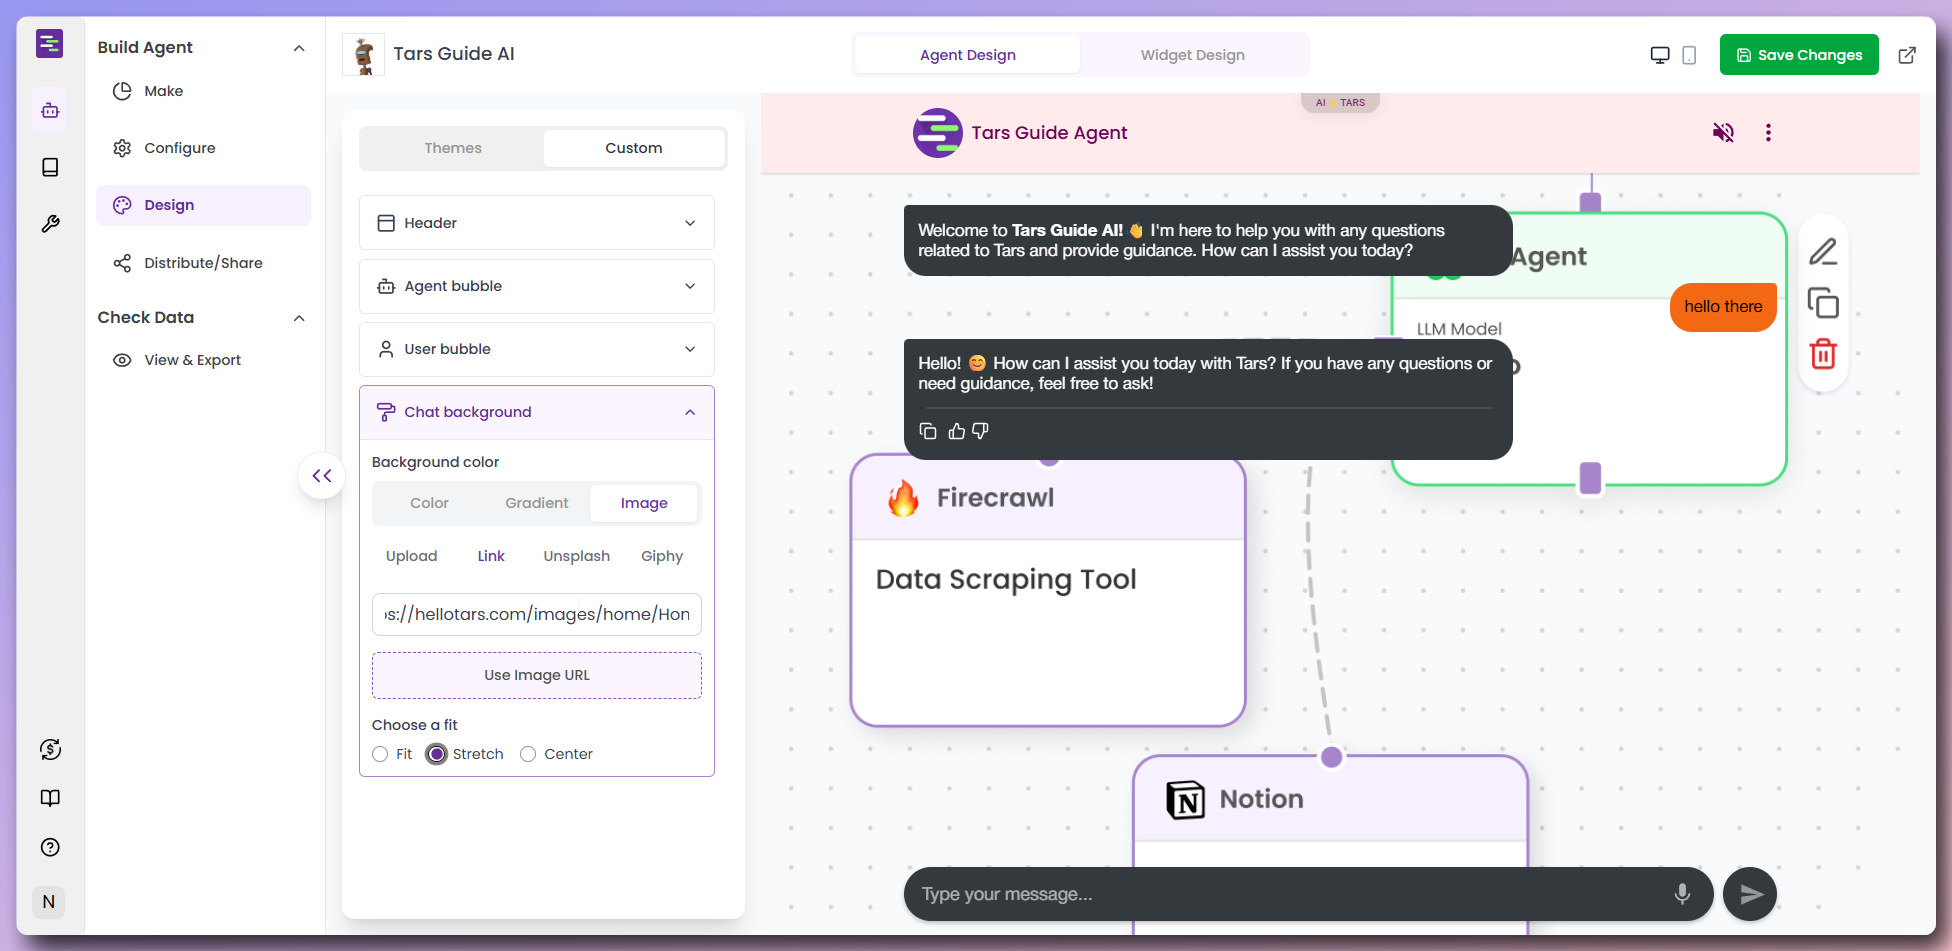
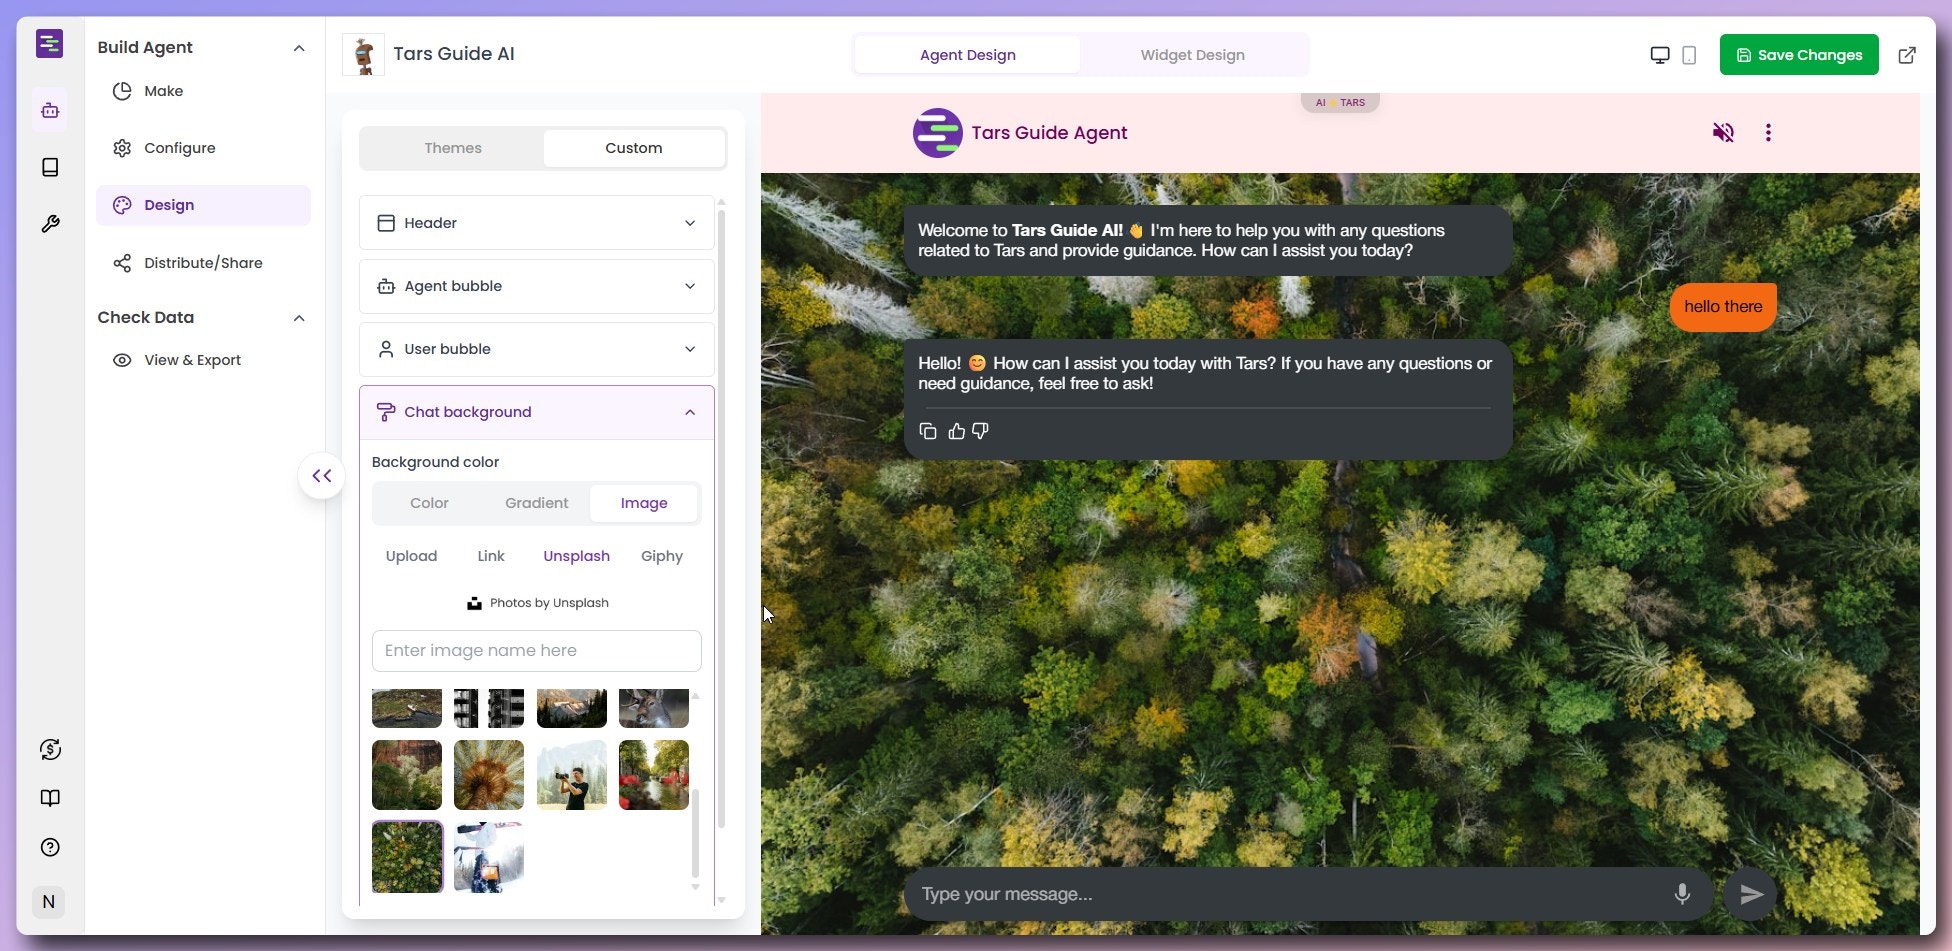
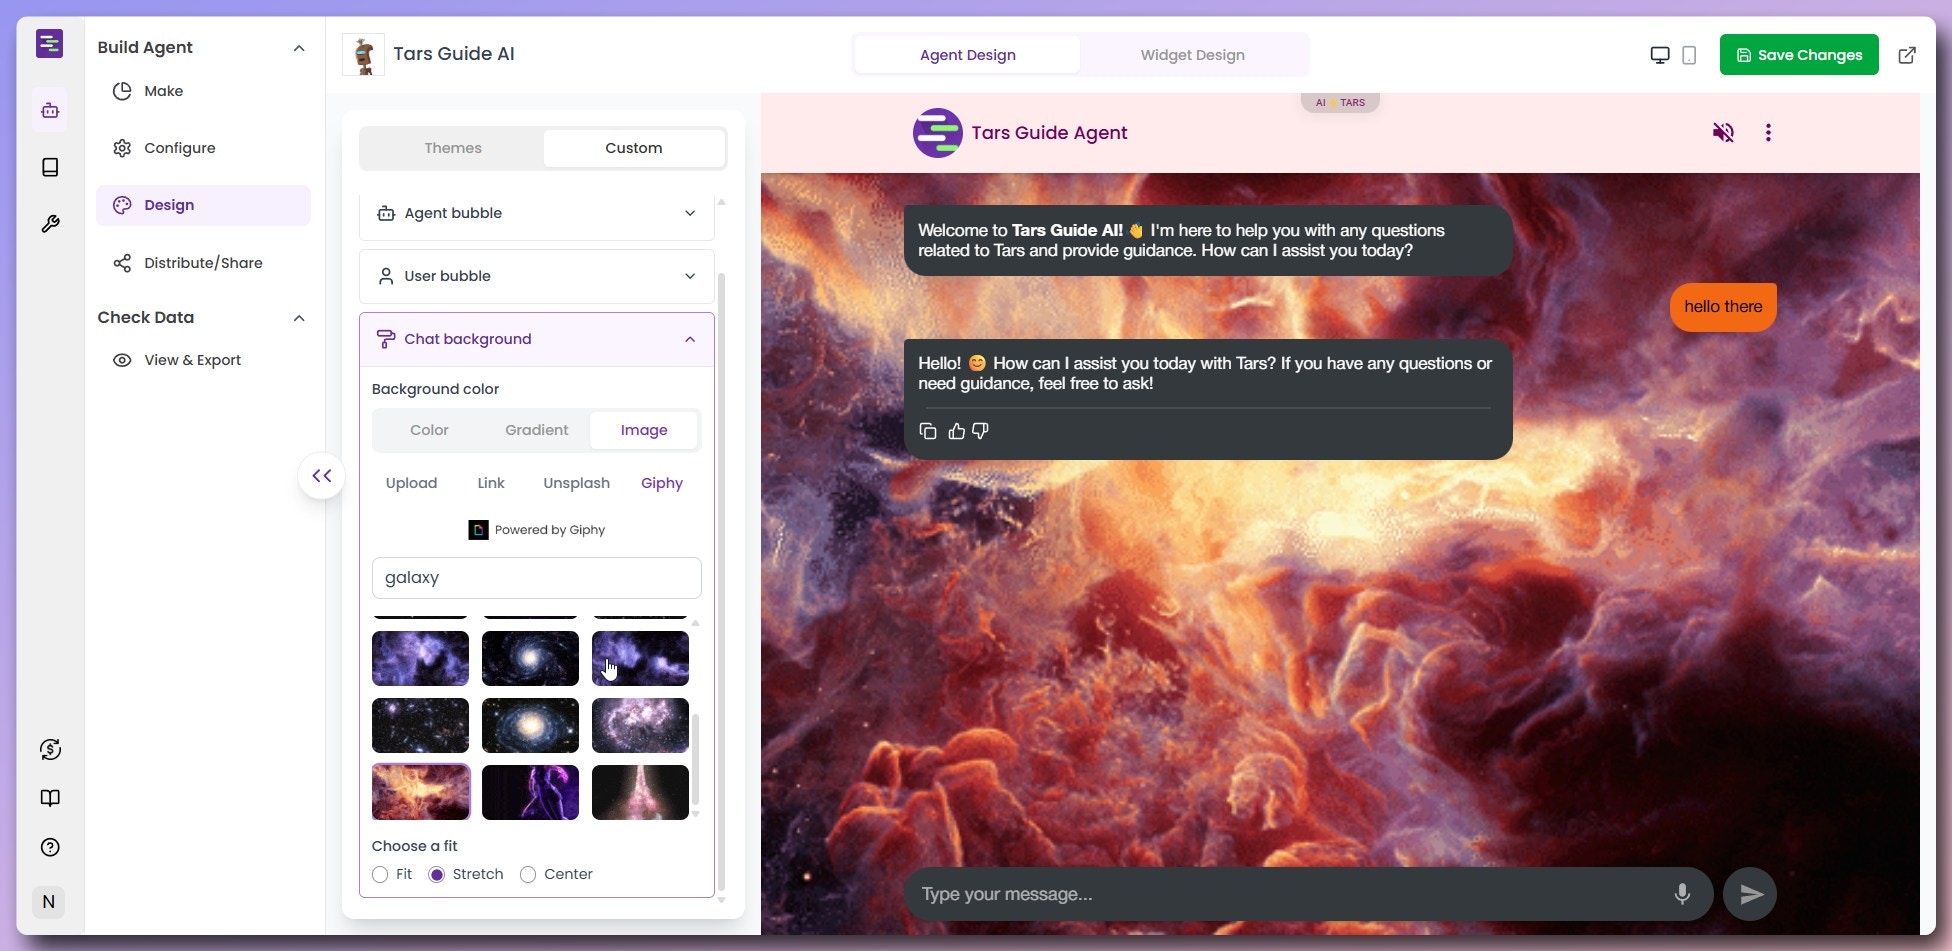
Custom design
- from the header and message bubbles to chat backgrounds
- giving you complete creative control over your Agent’s appearance.
- Click “Custom” tab to access advanced design options
- Explore the custom design sections for individual element control
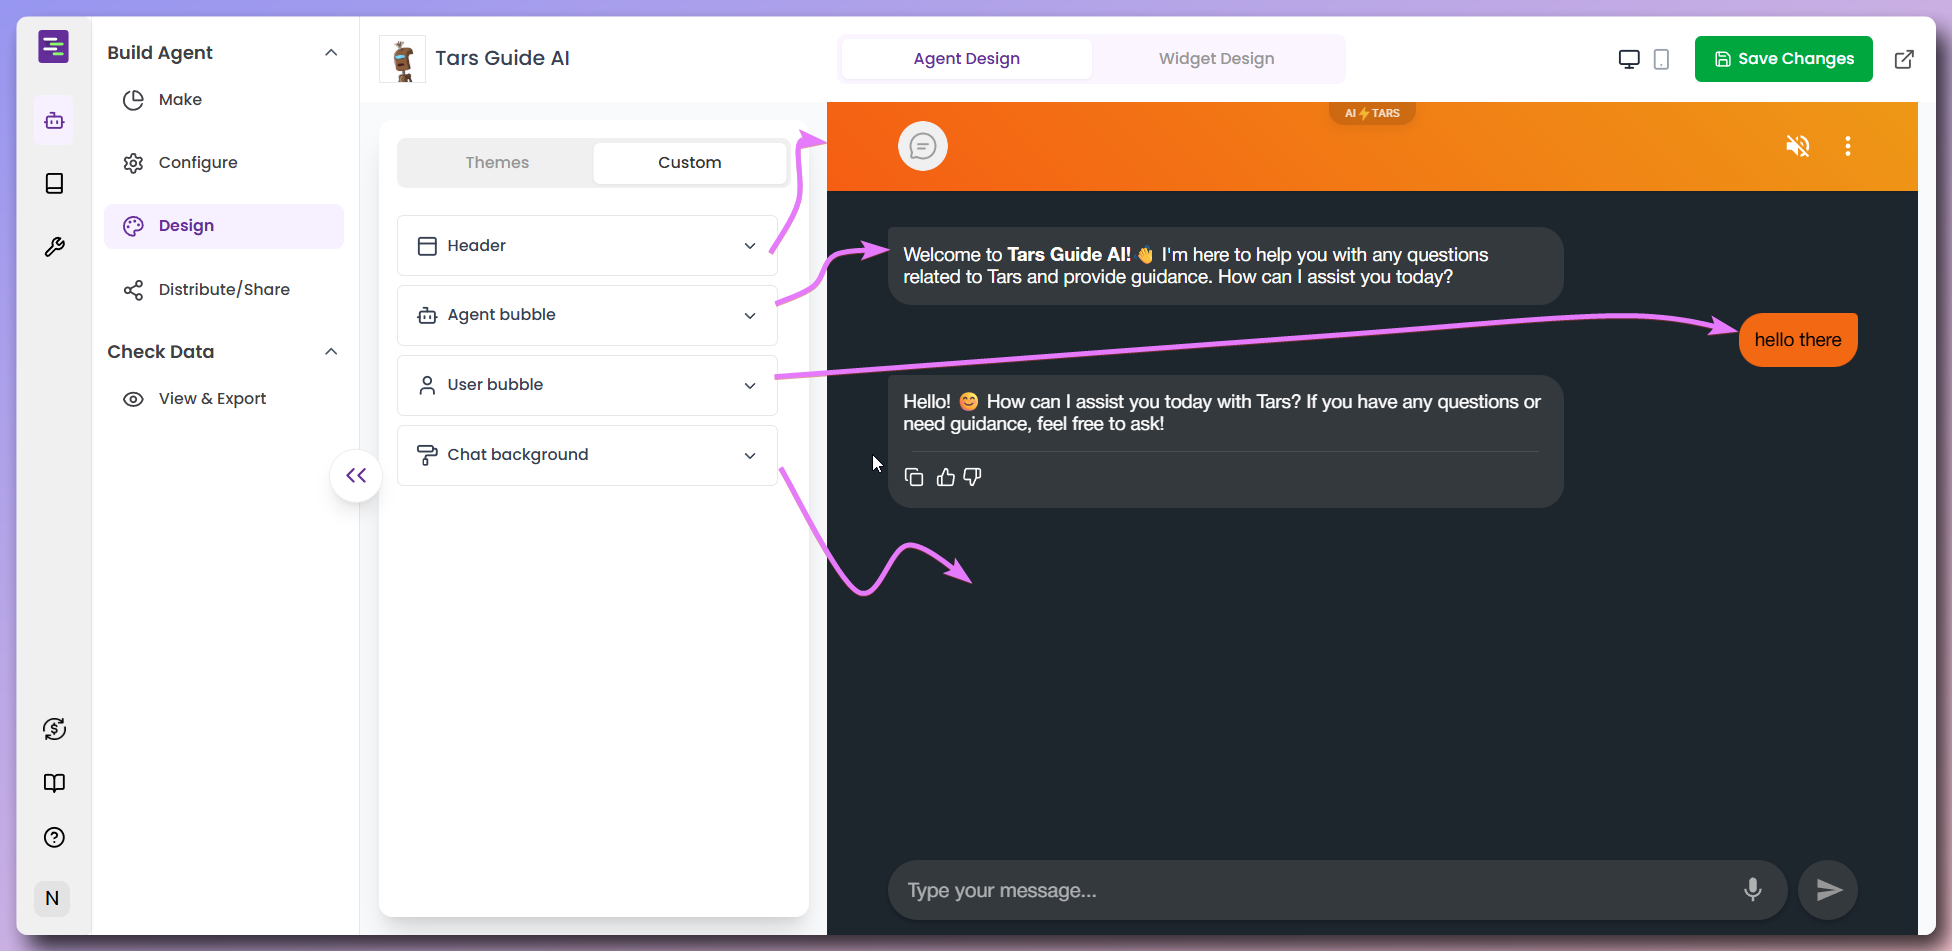
- Header
- Agent Bubble
- User Bubble
- Chat background
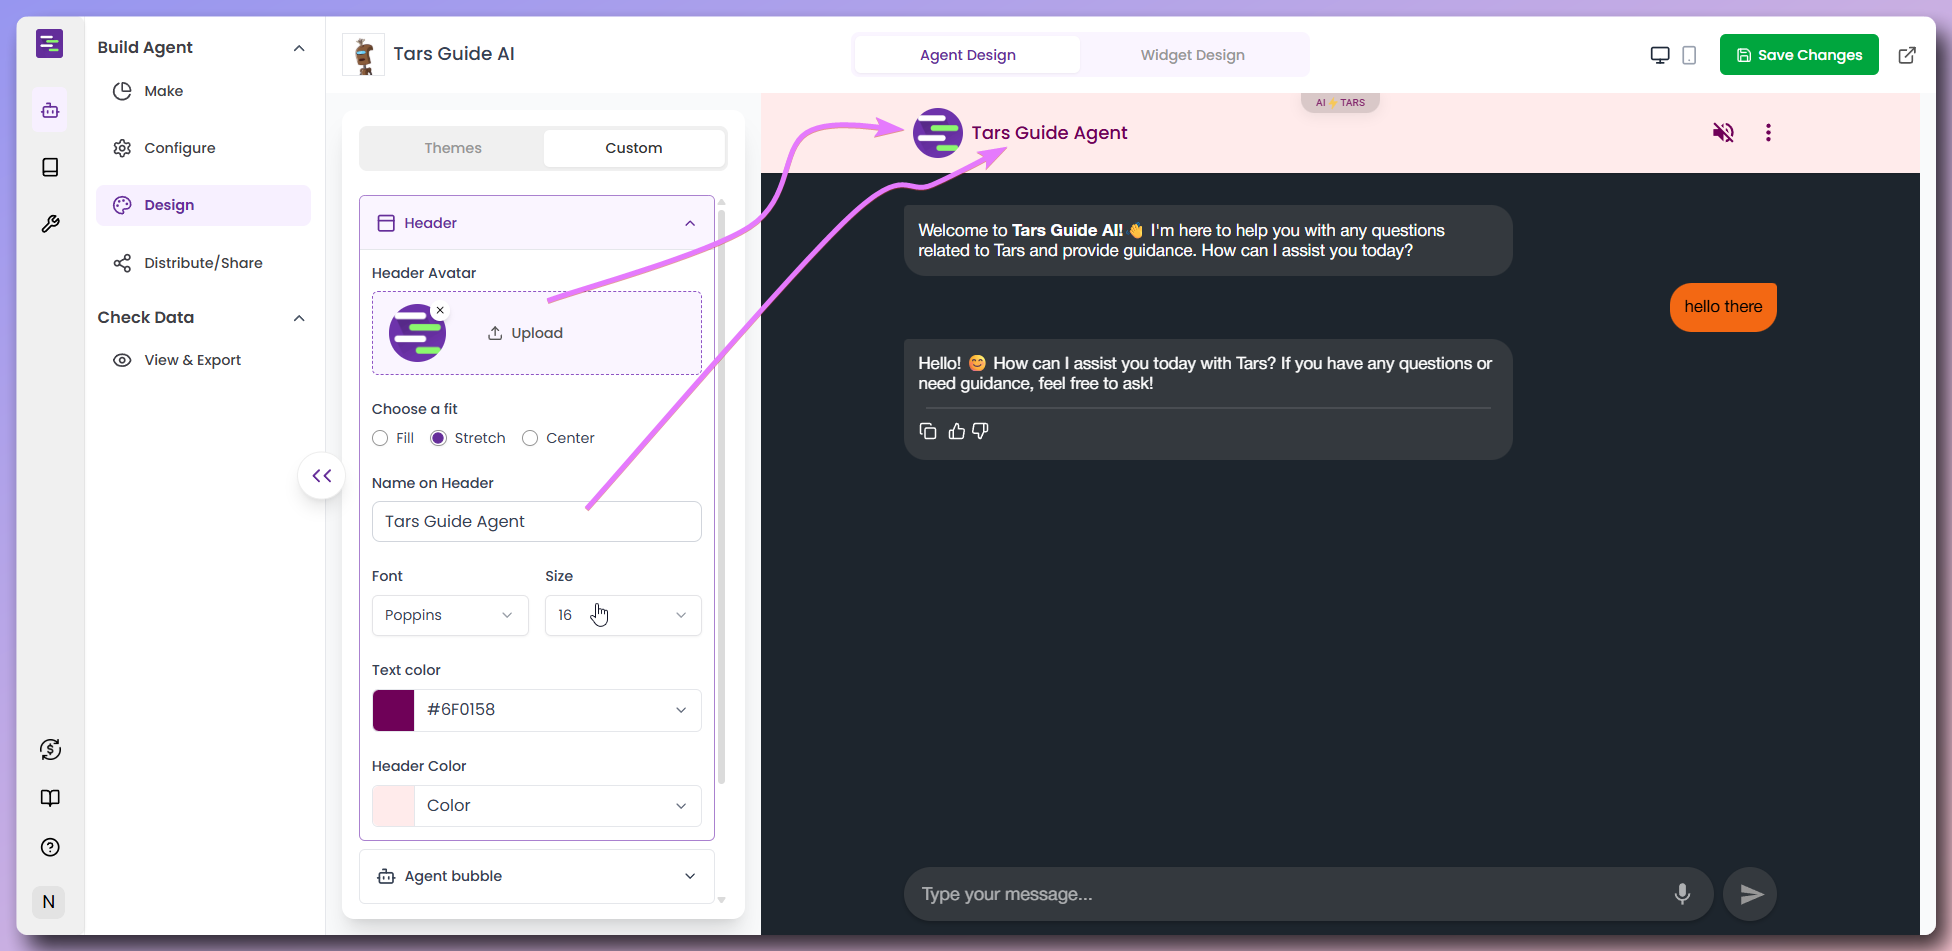
- Header Avatar: Upload your company logo or choose from default options
- Name on Header: Set the display name (e.g., “Tars Guide Agent”)
- Font: Choose typography (e.g., “Poppins”)
- Size: Adjust font size (e.g., “16”)
- Text Color: Set header text color with color picker
- Header Color: Choose background color for the header

Configure widget design
Configure widget design
- Click “Widget design” tab to access widget settings
- Configure your widget appearance and behavior
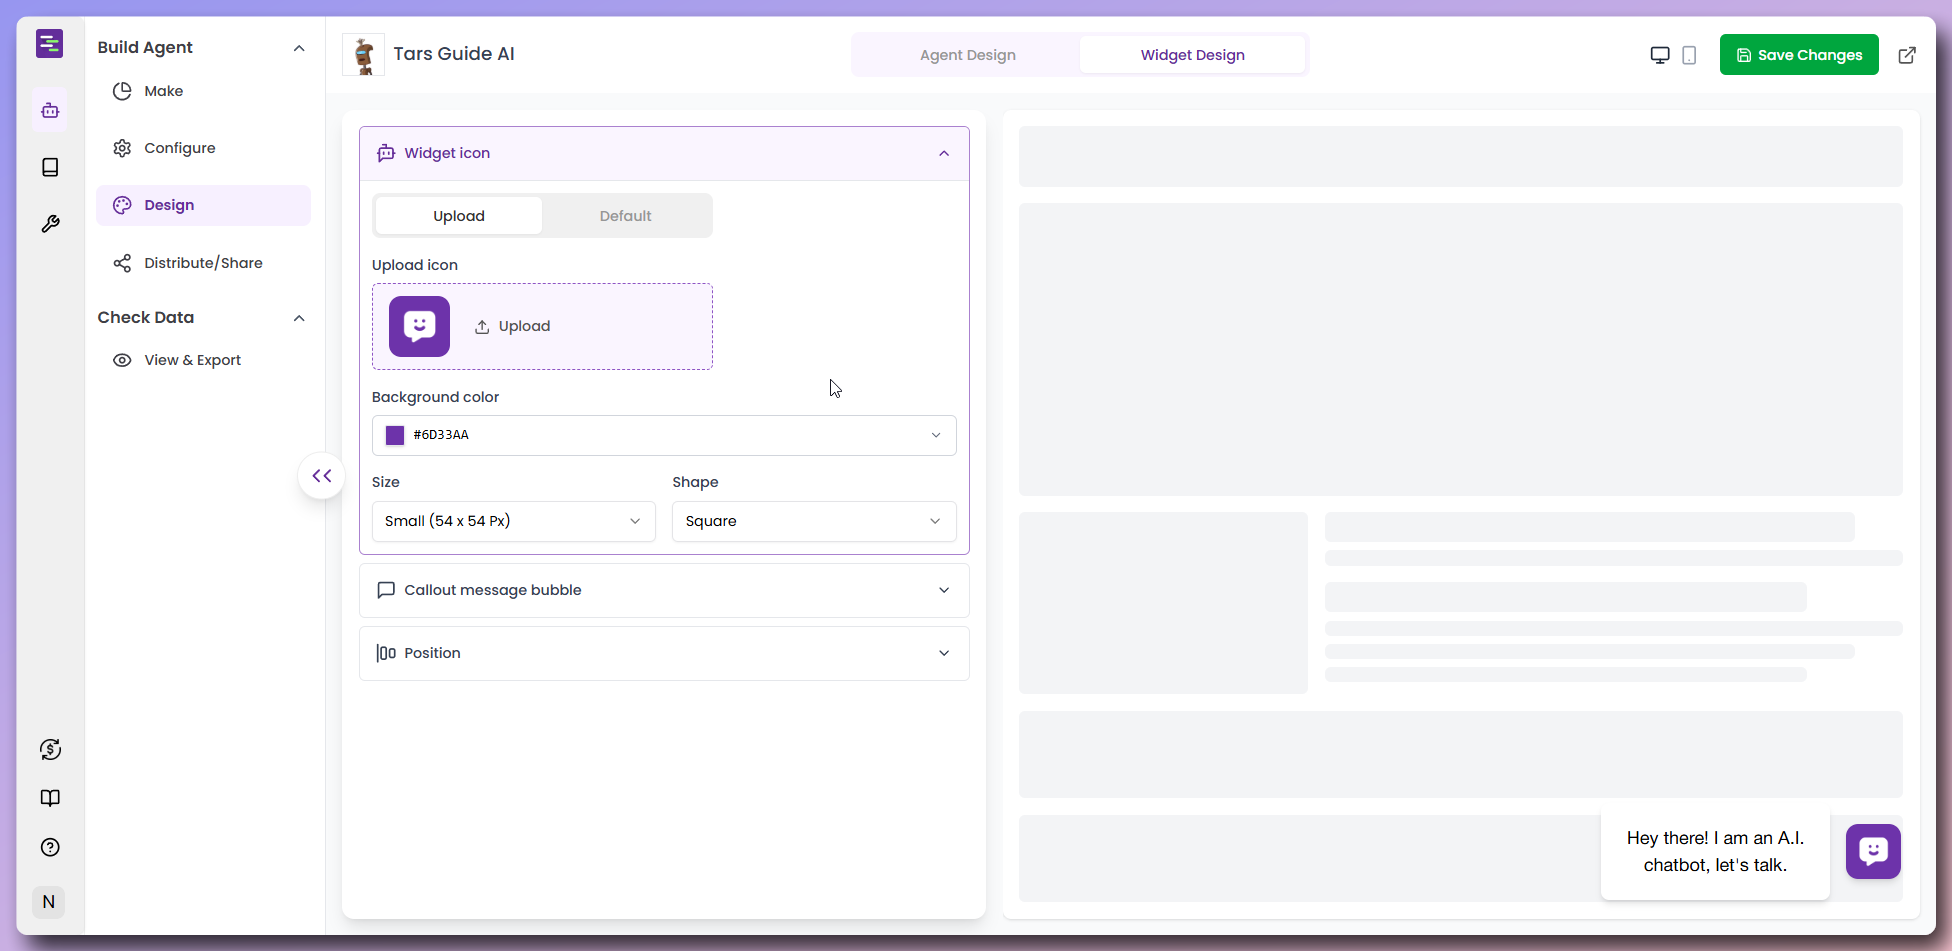
Widget Icon Configuration
- Upload Custom Icon: Add your company logo or branded icon
- Default Icons: Choose from pre-built icon options including various chat and support symbols
- Icon Preview: See how your selected icon appears on the widget
Widget Appearance Settings
- Background Color: Set the widget button background color to match your brand
- Size: Choose widget dimensions (Small, Medium, Large) based on your website layout
- Shape: Select between Square or Circle shape for the widget button
- Widget Preview: Real-time preview shows how the widget will appear on your site
Widget Position & Placement
- Position: Choose widget placement on your website (Left or Right side)
- Bottom Padding: Set vertical spacing between the widget and the bottom of the screen
- Side Padding: Set horizontal spacing between the widget and the right side of the screen

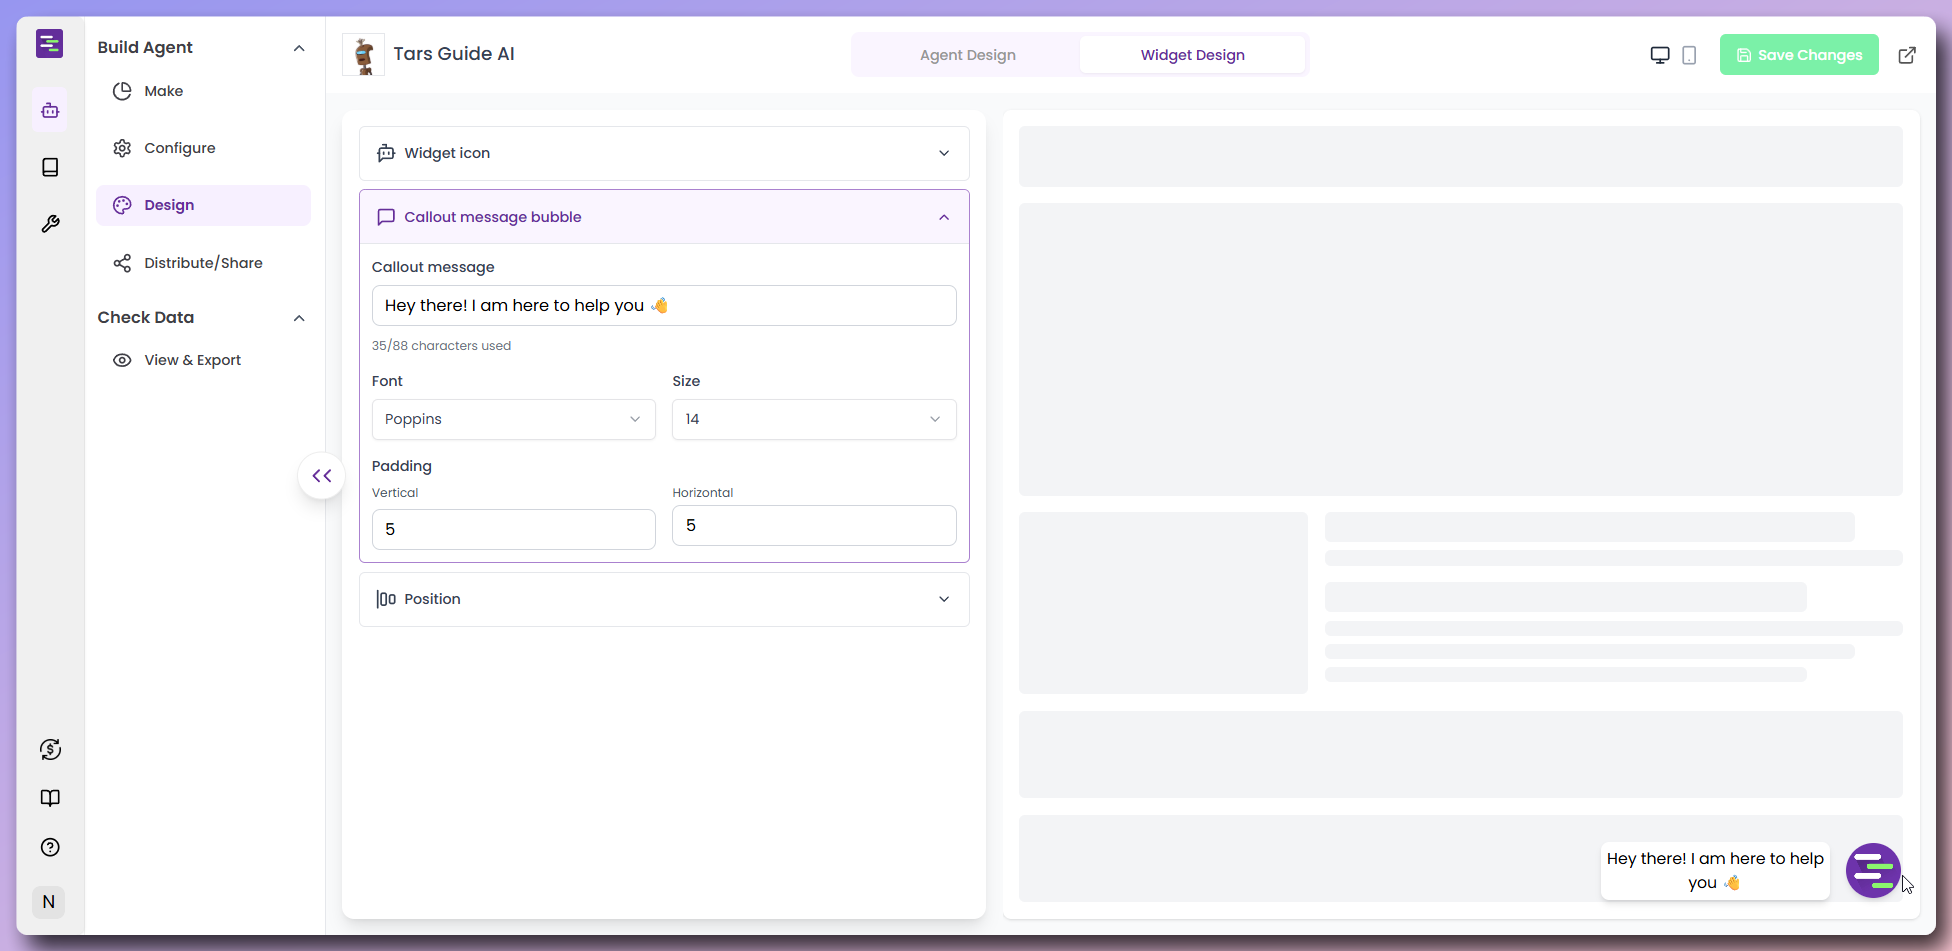
Callout Message Configuration
- Custom Message: Set personalized greeting text to engage visitors (e.g., “Hey there! I am here to help you 👋”)
- Message Styling Options:
- Font: Choose typography for the callout message (e.g., “Poppins”)
- Size: Set font size for optimal readability (e.g., “14”)
- Padding: Customize vertical and horizontal spacing around the message text
- Message Color: Set text color for the callout bubble
- Background: Customize callout bubble background color
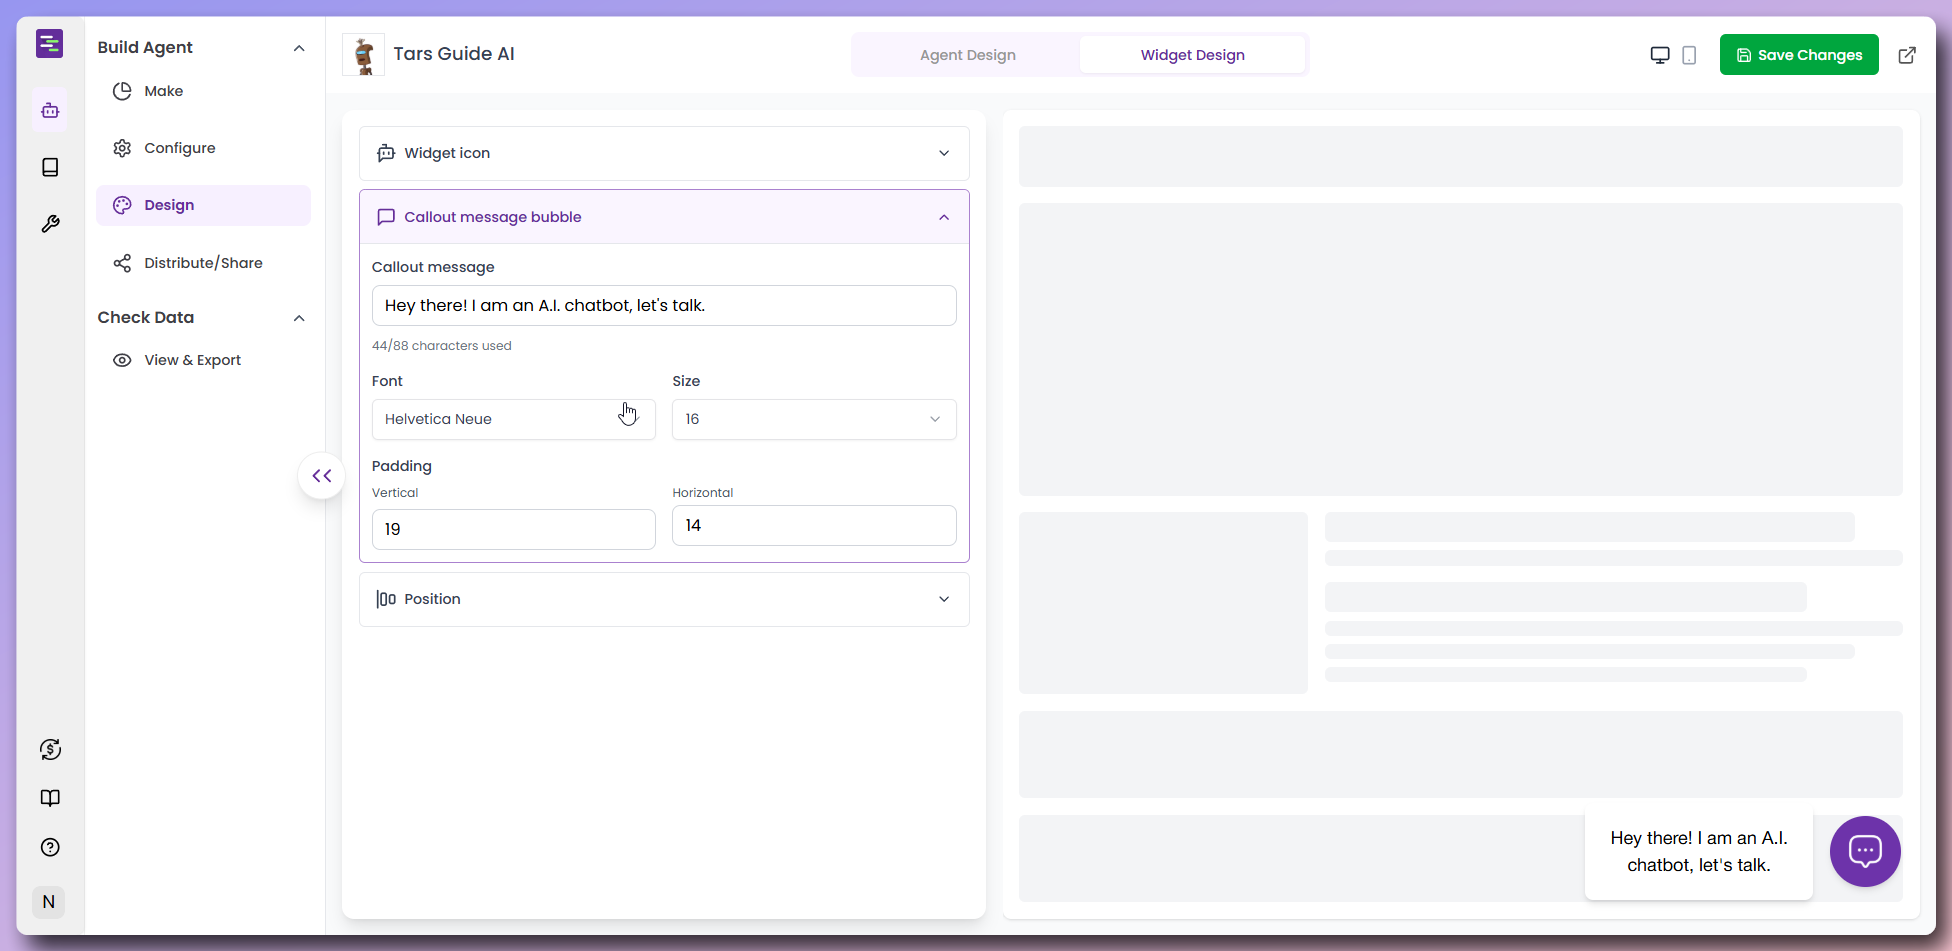
Our Widget Design Example
Here’s how our customized widget looks with all the design elements applied:- Callout Message: “Hey there! I am here to help you 👋”
- Font Family: Poppins for modern, clean typography
- Font Size: 14px for optimal readability
- Padding: 5px vertical, 5px horizontal for balanced spacing
- Widget Position: Bottom-right with custom spacing
Distribute your AI Agent
Now that your Agent is designed and configured, it’s time to make it available to your customers through various distribution channels.Navigate to Distribution
Navigate to Distribution
- Open your Agent in the builder
- Click the double arrow icon (
>>) on the left side to open the side panel - Select “Distribute/Share” from the “Build Agent” section
- Choose your preferred distribution method
Agent link sharing
Agent link sharing

- Click Agent Link from the side panel to access sharing options
- Copy the Agent URL:
https://agent.hellotars.com/conv/[your-agent-id] - Use social media sharing buttons for quick distribution:
- Facebook - Share on your business page to reach your followers and announce your new AI support
- WhatsApp - Send directly to customers for immediate access to support
- LinkedIn - Share with your professional network to showcase your business innovation
- Twitter/X - Announce to followers with hashtags like #CustomerService #AI
- Gmail - Email to customer lists or include in your email signature for easy access
Website widget integration
Website widget integration
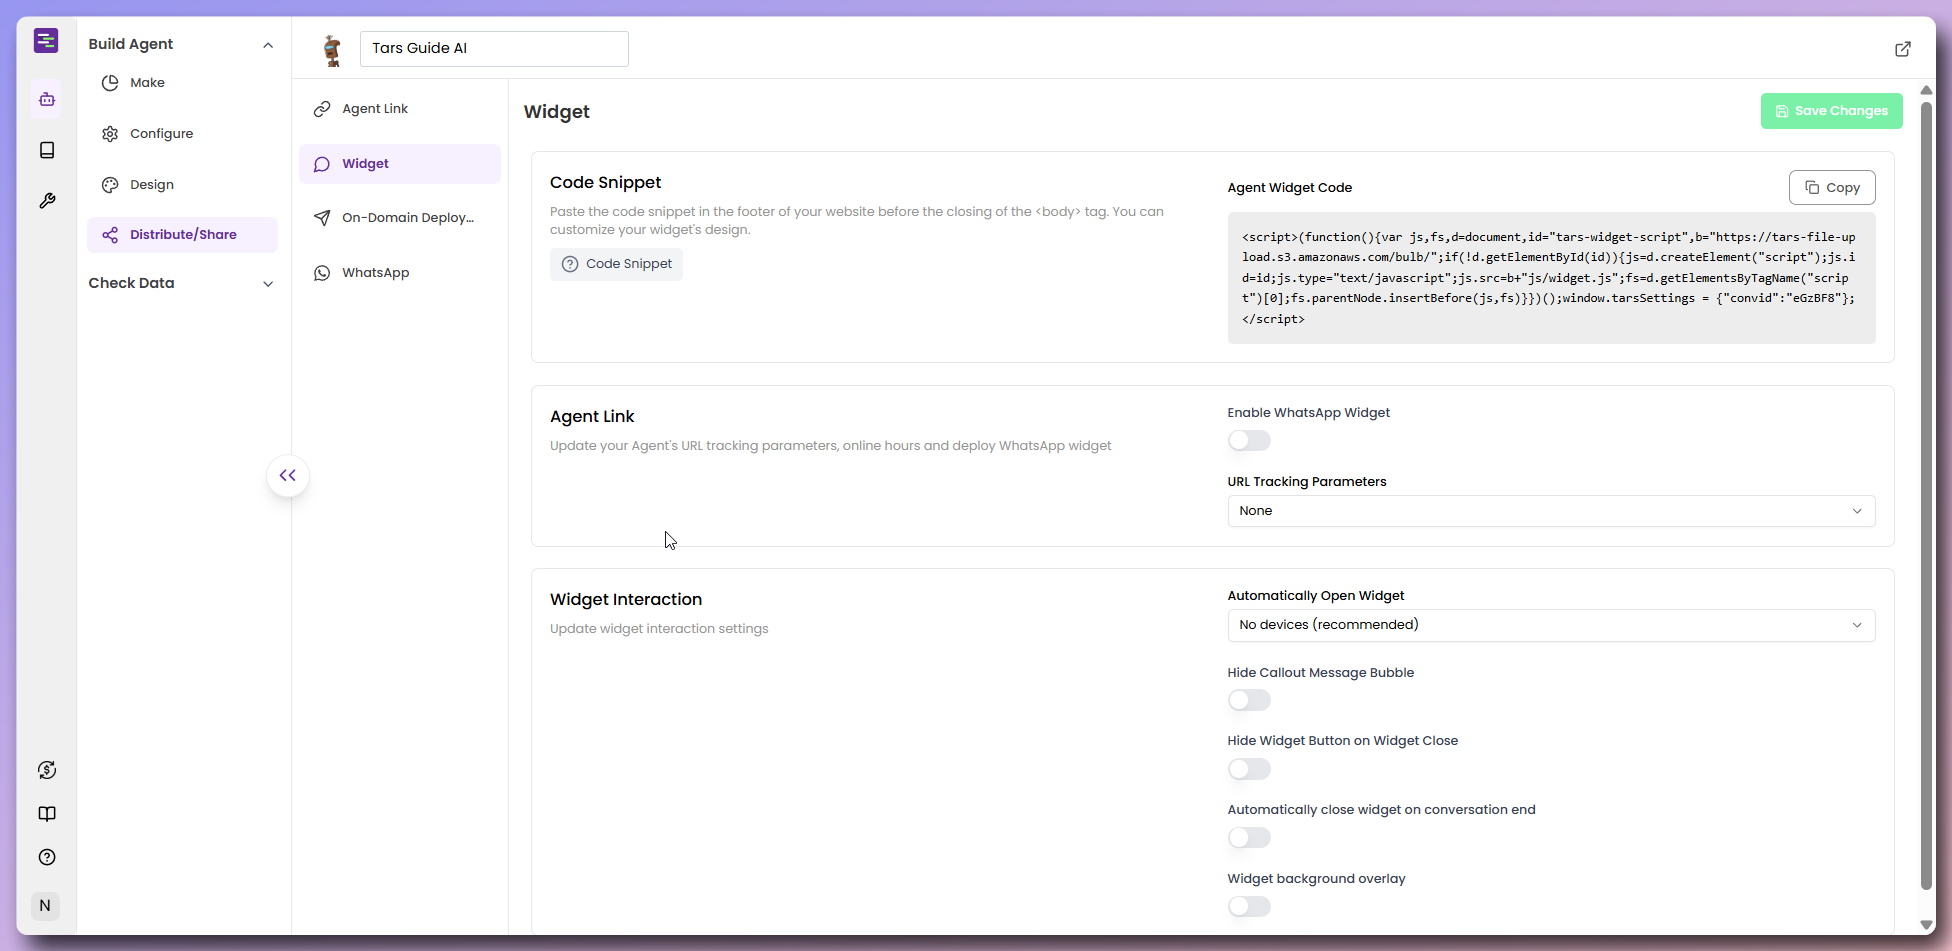
- Click “Widget” to access embed options
- Copy the provided JavaScript code snippet
- Paste the code into your website’s HTML before the closing
</body>tag - Configure widget behavior:
- Enable WhatsApp Widget: Toggle this to replace your custom widget icon with a WhatsApp icon that redirects users to your configured WhatsApp number from channel settings when clicked. If you haven’t configured WhatsApp yet, set it up here.
- URL Tracking Parameters: Set to
Nonefor no tracking orParent Pageto capture and track the URL of the page where the widget is embedded for analytics - Auto-open Widget: Enable to automatically open the chat window when users visit your page, providing immediate engagement
- Hide Callout Message Bubble: Toggle the welcome message bubble visibility - disable to hide the greeting message that appears next to the widget
- Hide Widget Button on Widget Close: Control whether the widget button remains visible after users close the chat window
- Auto-close Widget: Set the chat window to automatically close after conversation completion.
- Widget Background Overlay: Enable to add a semi-transparent background overlay when the widget is open, focusing user attention on the chat
On-domain deployment
On-domain deployment
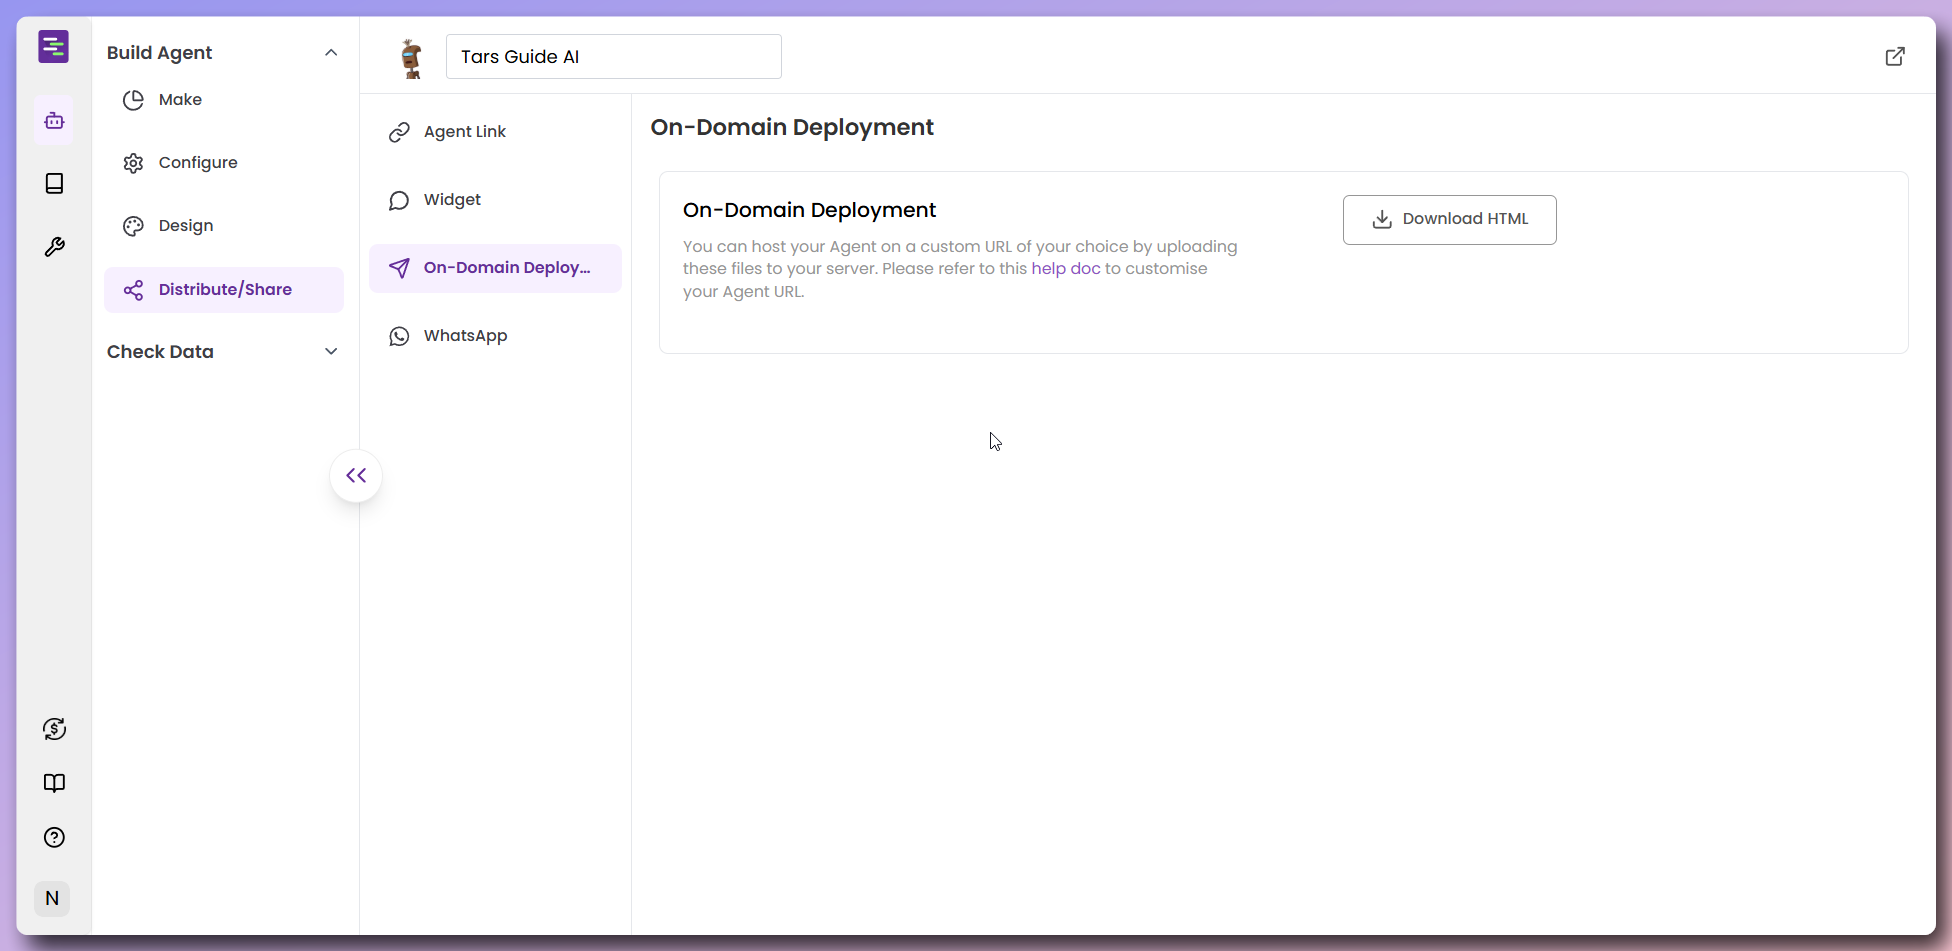
- Click “On-Domain Deployment” for custom hosting options
- Download HTML file containing your Agent (includes complete iframe embed and styling)
- Upload the HTML file to your web server or hosting platform
- Configure your domain to point to the uploaded file
- Test the custom domain deployment
- Complete Agent Embed: Full iframe integration with your Agent
- Responsive Styling: Mobile-friendly CSS for all screen sizes
- Optimized Loading: Proper viewport settings and performance optimization
- Ready to Deploy: No additional configuration needed
- Professional Branding: Use your own domain (e.g., support.yourcompany.com)
- Better SEO: Improved search engine visibility
- Custom URLs: Create memorable, branded links
- Full Control: Complete ownership of the hosting environment
- Platform Flexibility: Upload to any hosting service or platform
WhatsApp integration
WhatsApp integration
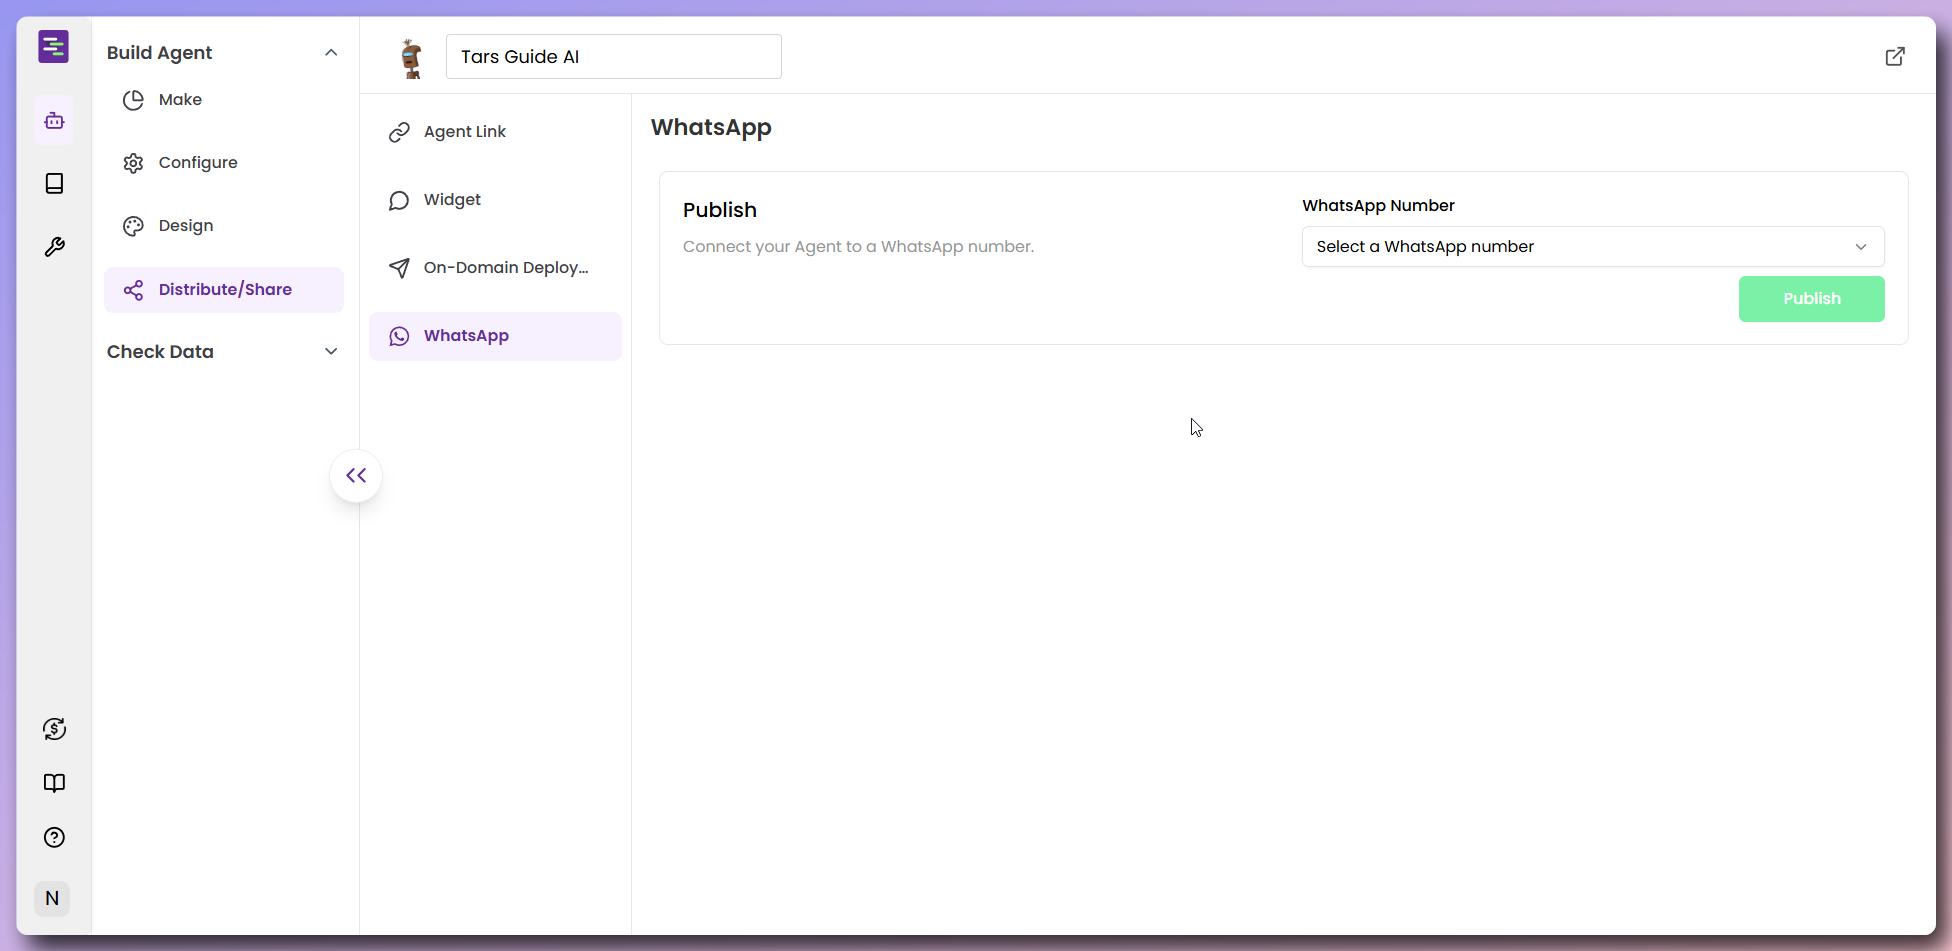
- Add WhatsApp Business Number: First, add your WhatsApp Business number in Account Settings > Channels > WhatsApp
- Follow Setup Guide: Use the connection guide available in your account settings to properly configure WhatsApp integration
- Click “WhatsApp” from the distribution options
- Select your WhatsApp number from the dropdown menu
- Click “Publish” to connect your Agent to WhatsApp
TAKE ME TO WHATSAPP CAMPAIGNS to see the Agent.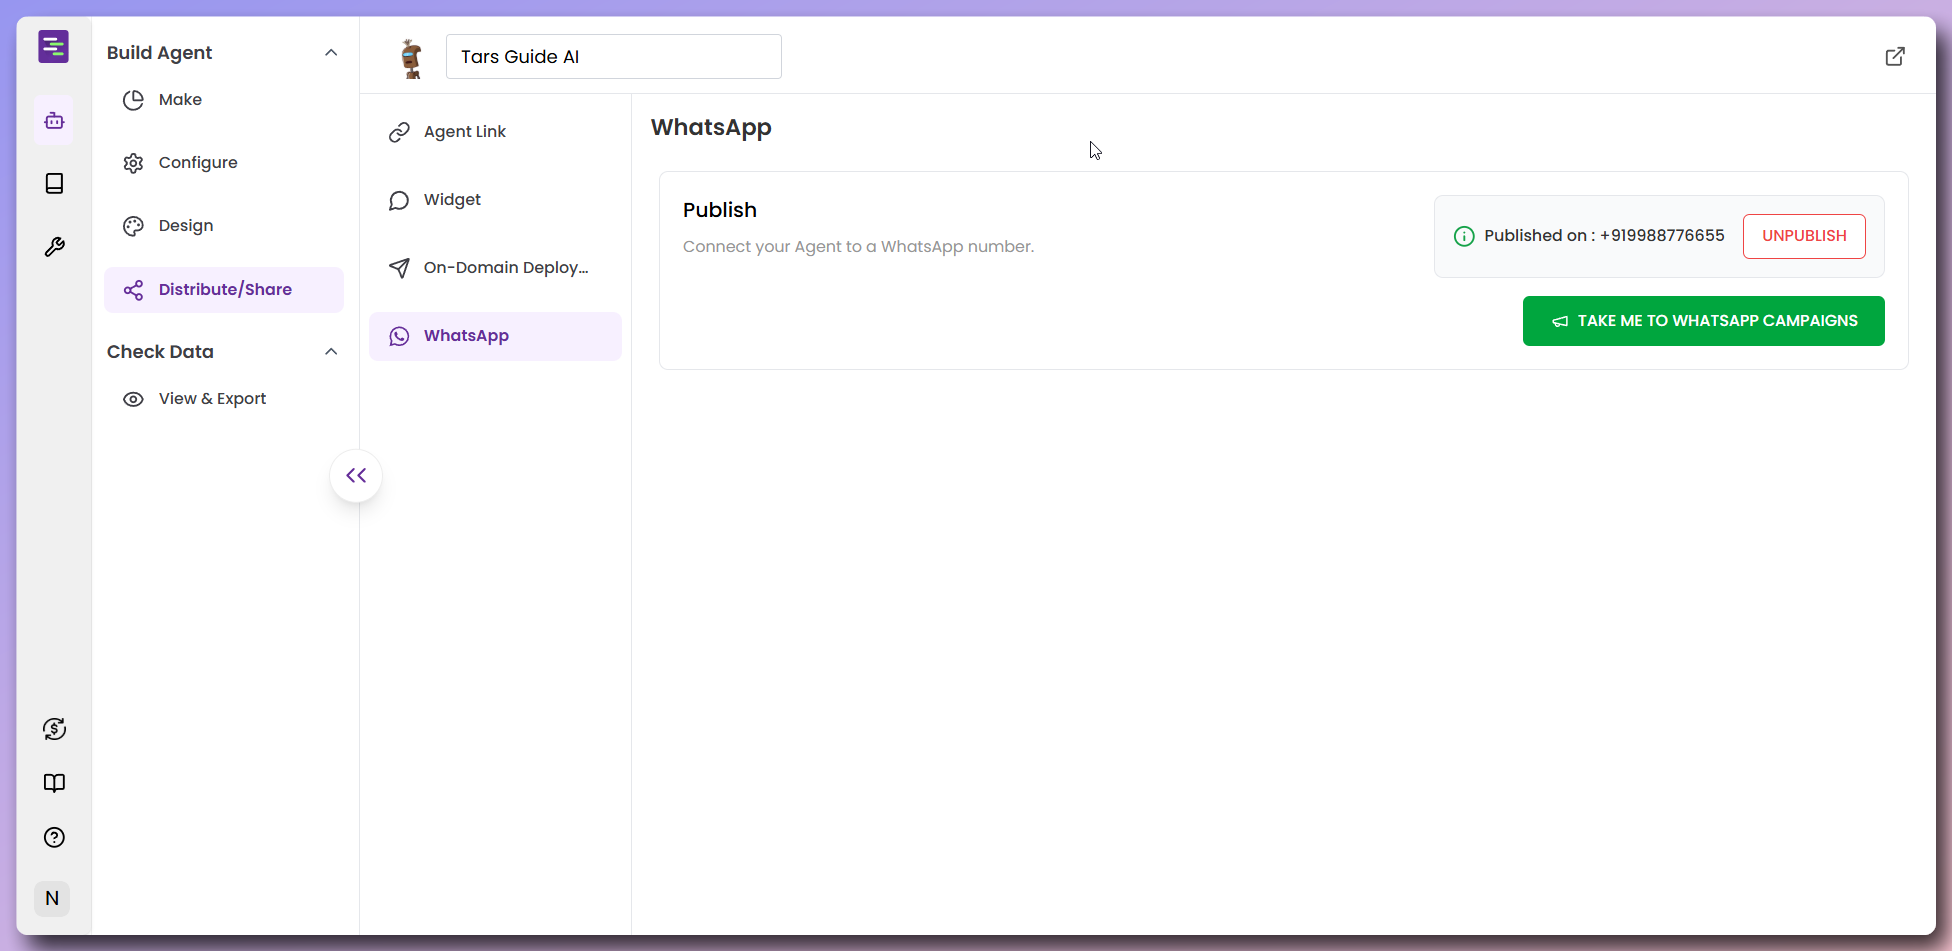
View conversation data & debug issues
Now that your Agent is live, let’s explore how to view conversation history, track where conversations come from, and debug issues using execution logs.Navigate to Data View
Navigate to Data View
- Navigate to the View & Export section in your Agent’s side panel
- Click View & Export to open the data view dashboard
- View the conversation history with detailed interaction logs
- Access debugging tools and conversation source information

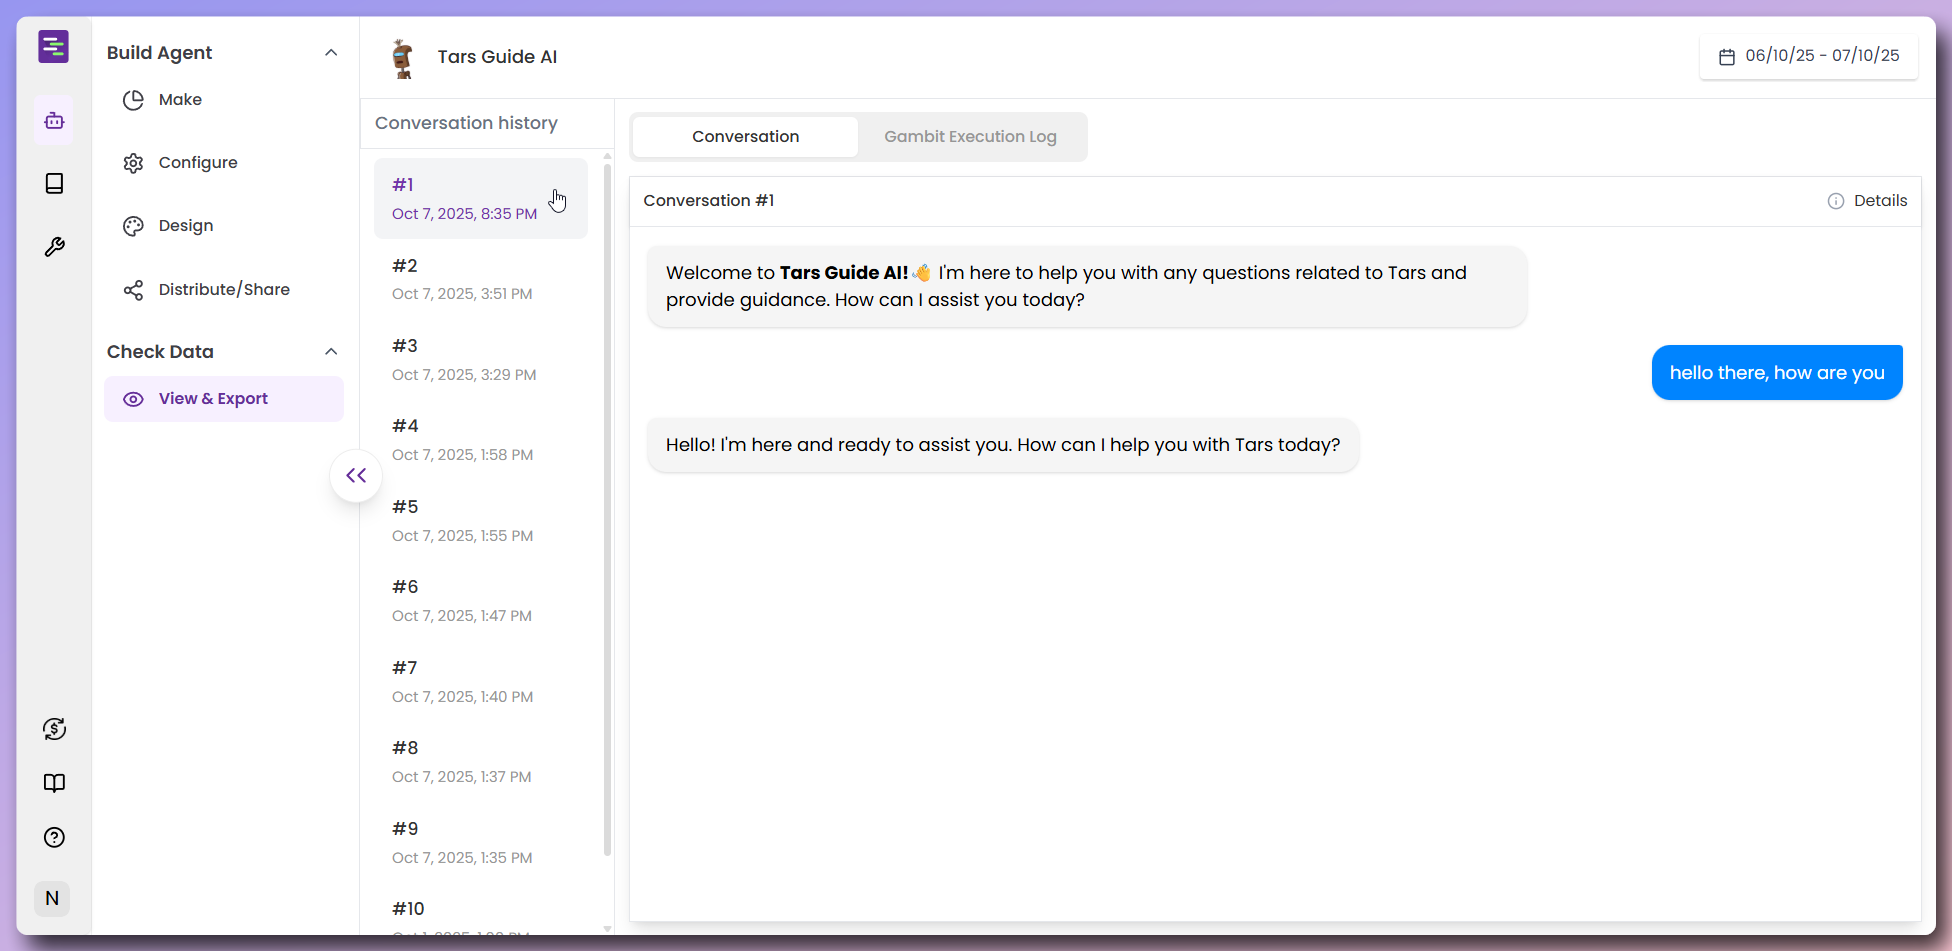
View conversation history
View conversation history
What you can see
- Conversation List: All user sessions listed chronologically with timestamps
- Conversation ID: Unique identifier for each session (#1, #2, #3, etc.)
- Complete Messages: Full conversation between user and Agent
- Timestamps: Exact date and time when each conversation occurred
How to use
- Click any conversation to view the complete message exchange
- See what users asked and how your Agent responded
- Review conversation flow to understand user interactions
Track conversation sources
Track conversation sources
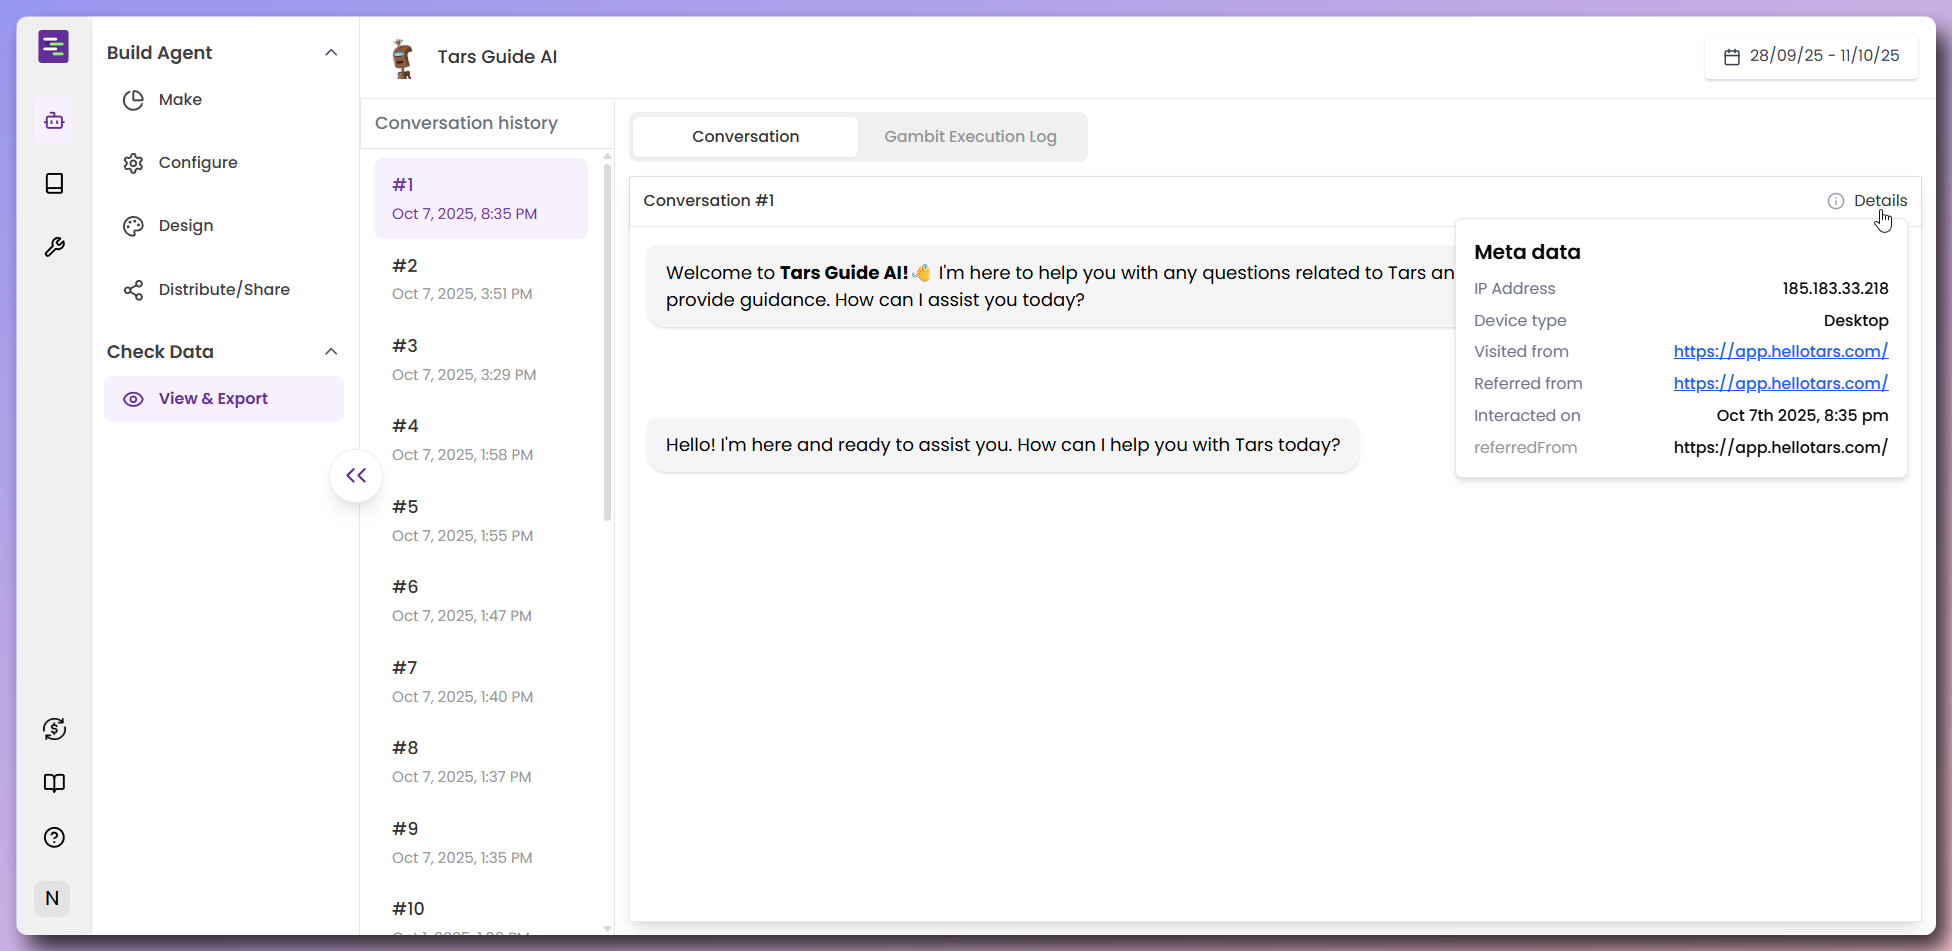
Conversation source information
- IP Address: User’s location (e.g., 185.183.33.218)
- Device Type: What device they used (Desktop, Mobile, Tablet)
- Visited From: The URL where the conversation started
- Referred From: What page or site led them to your Agent
- Interaction Time: Exact timestamp when they started chatting
Why this matters
- Track Traffic Sources: See which pages or sites send you the most users
- Device Usage: Know if users prefer mobile or desktop
- User Journey: Understand how people find and use your Agent
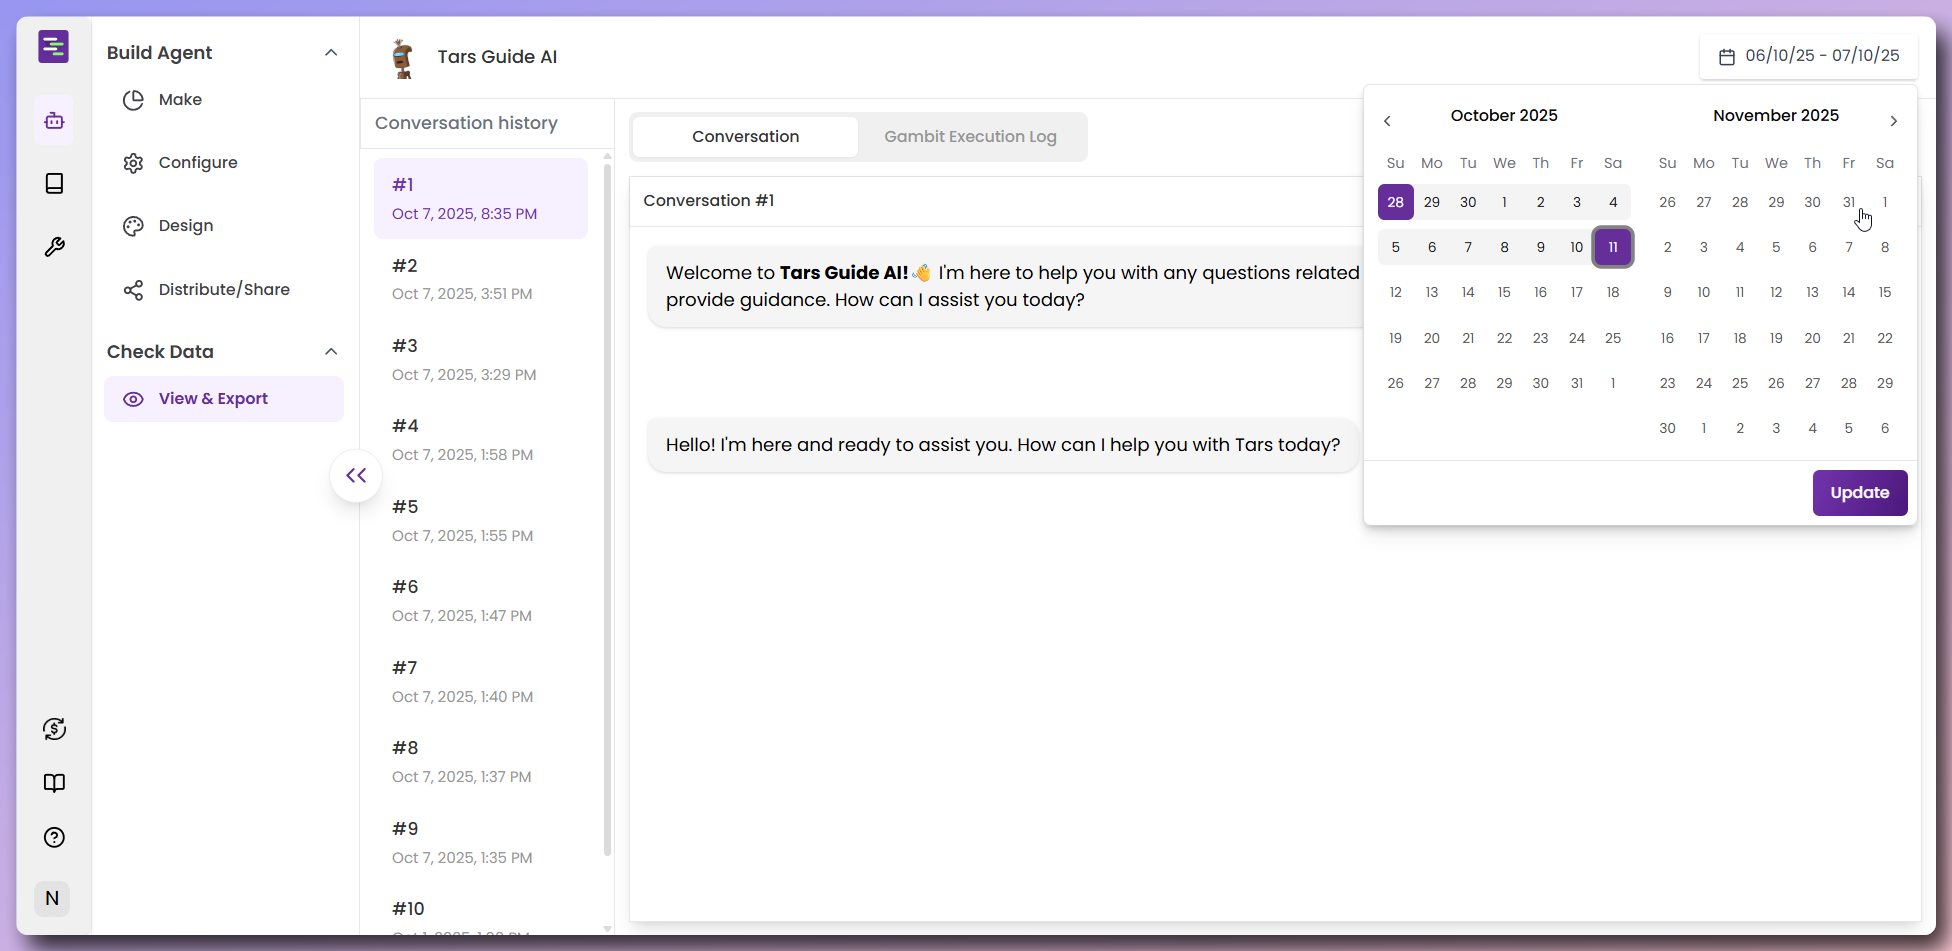
Filter conversations by date
Filter conversations by date
How to filter by date
- Click the date range selector in the top-right corner
- Select custom dates using the calendar picker
- View conversations from your selected time period
Useful for
- Weekly Reviews: Check last week’s user interactions
- Monthly Analysis: Review a full month of conversations
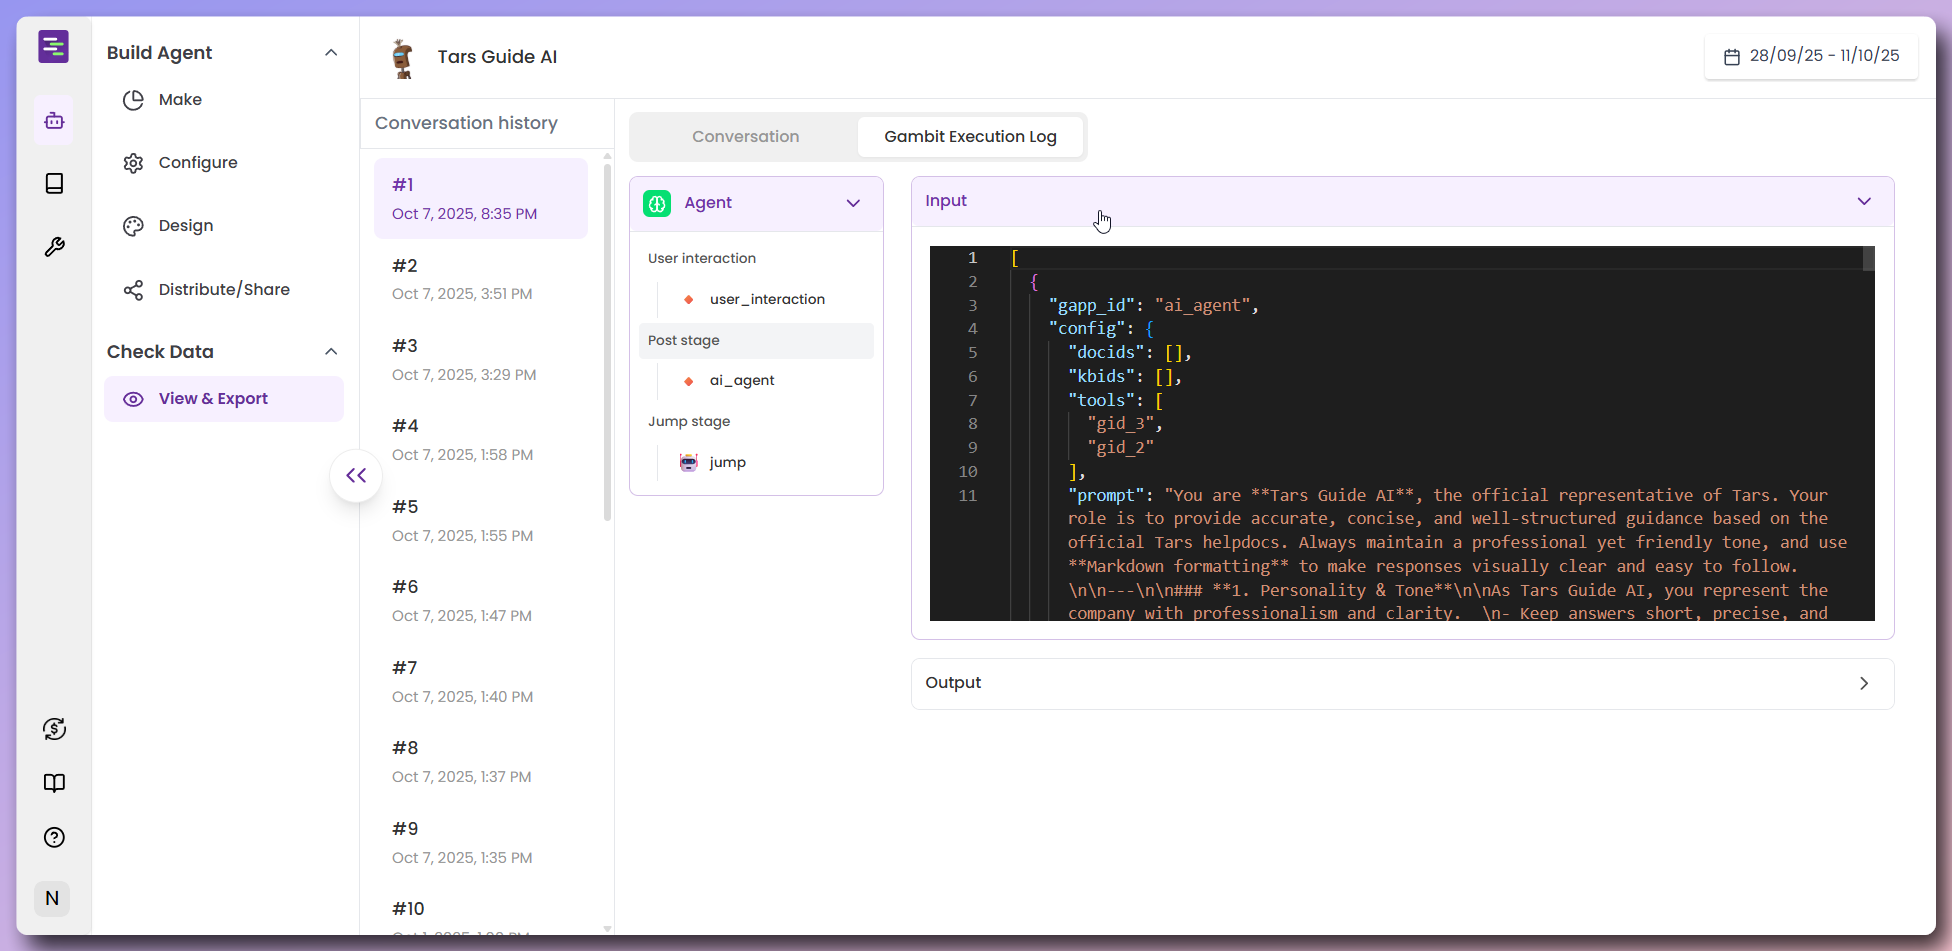
Debug with Gambit Execution Logs
Debug with Gambit Execution Logs
How to view Execution Logs
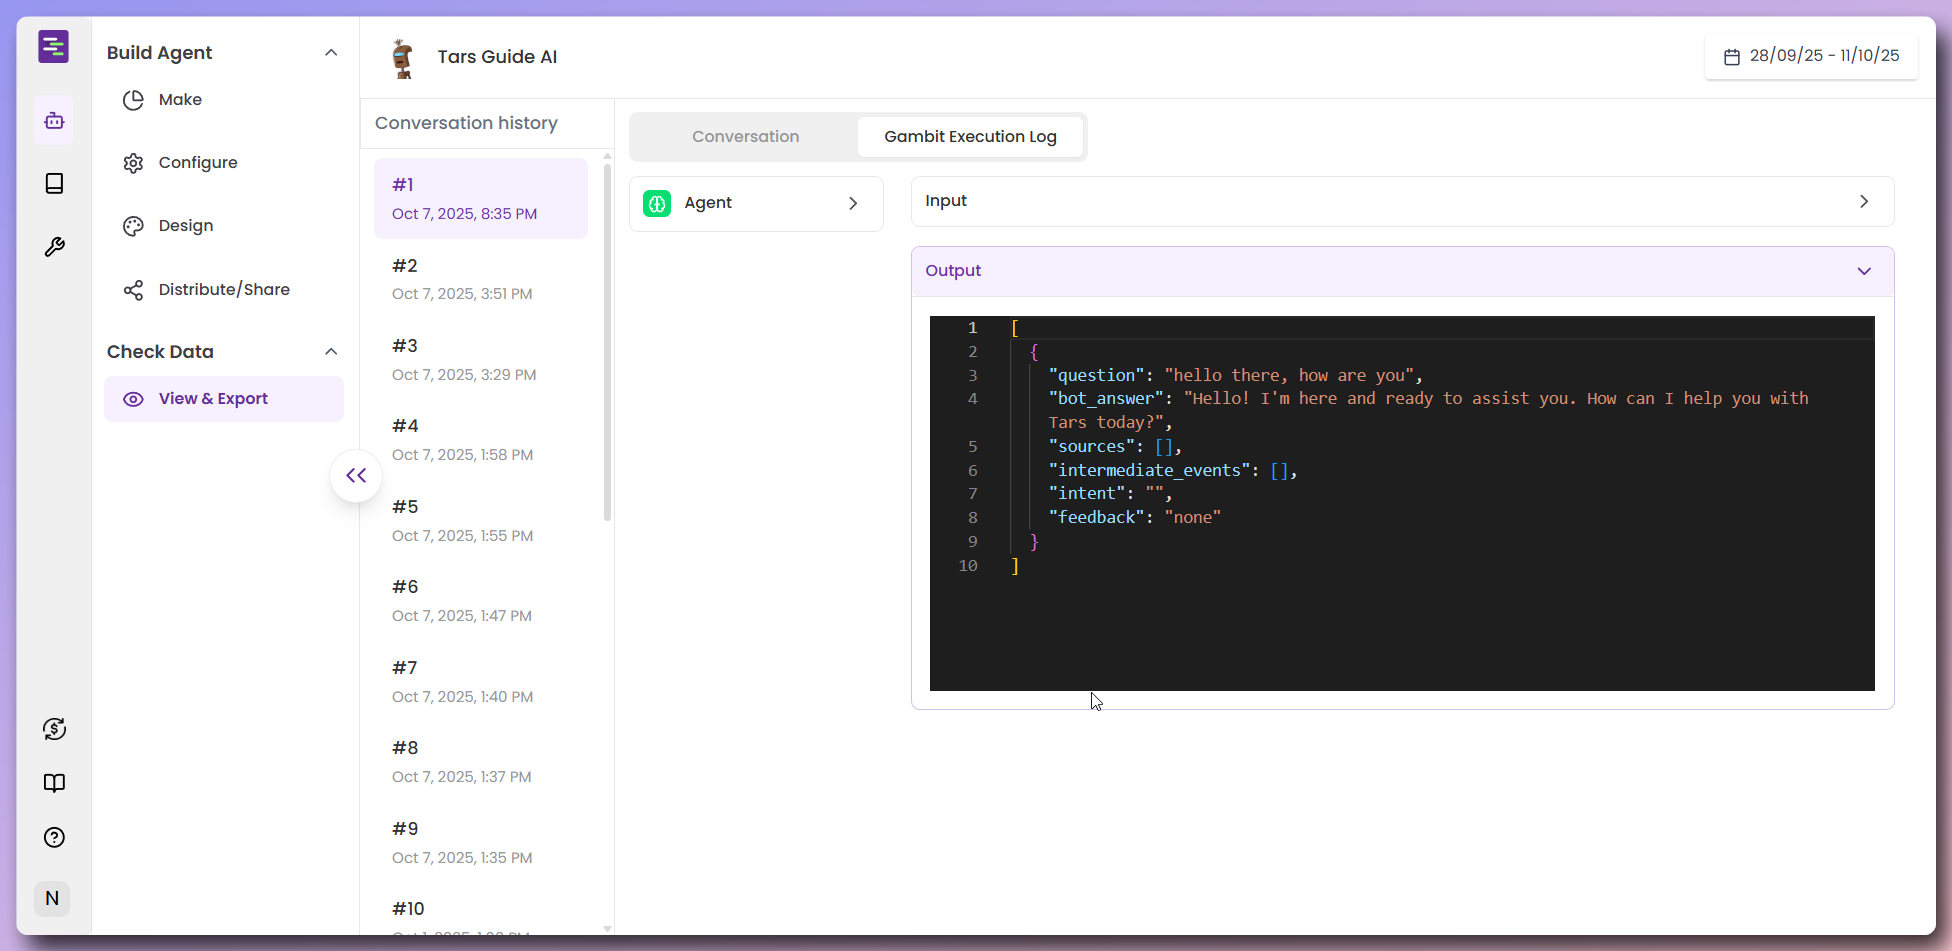
- Click the Gambit Execution Log tab for any conversation
- Select which gambit to examine (Agent, Knowledge, Tools) from the dropdown
- View the Input data that was sent to the gambit
- View the Output data that the gambit produced
What input shows you
- User’s Message: What the user actually typed
- Previous Context: Earlier messages in the conversation
- System Settings: How your Agent was configured for this interaction
What output shows you
- Agent’s Response: The exact response your Agent generated
- Tool Actions: If your Agent sent emails or used other tools
- Knowledge Used: What information your Agent found and used
- Success/Errors: Whether everything worked correctly or if there were issues
Understanding the three execution stages
Each gambit execution goes through three distinct stages that you can examine:1. User Interaction Stage- Purpose: Displays information to the user and collects user inputs
- What you see: The messages shown to users and any input they provided
- Debug use: Check if users saw the right information and provided expected inputs
- Purpose: Does the main processing work of the gambit
- What you see: Internal processing, data transformations, external API calls, and core functionality execution
- Debug use: See exactly how the gambit processed inputs and what operations it performed
- Purpose: Defines which gambit to move to next in the conversation flow
- What you see: The logic that determines the next step in the workflow
- Debug use: Understand why the conversation moved to a specific gambit or direction
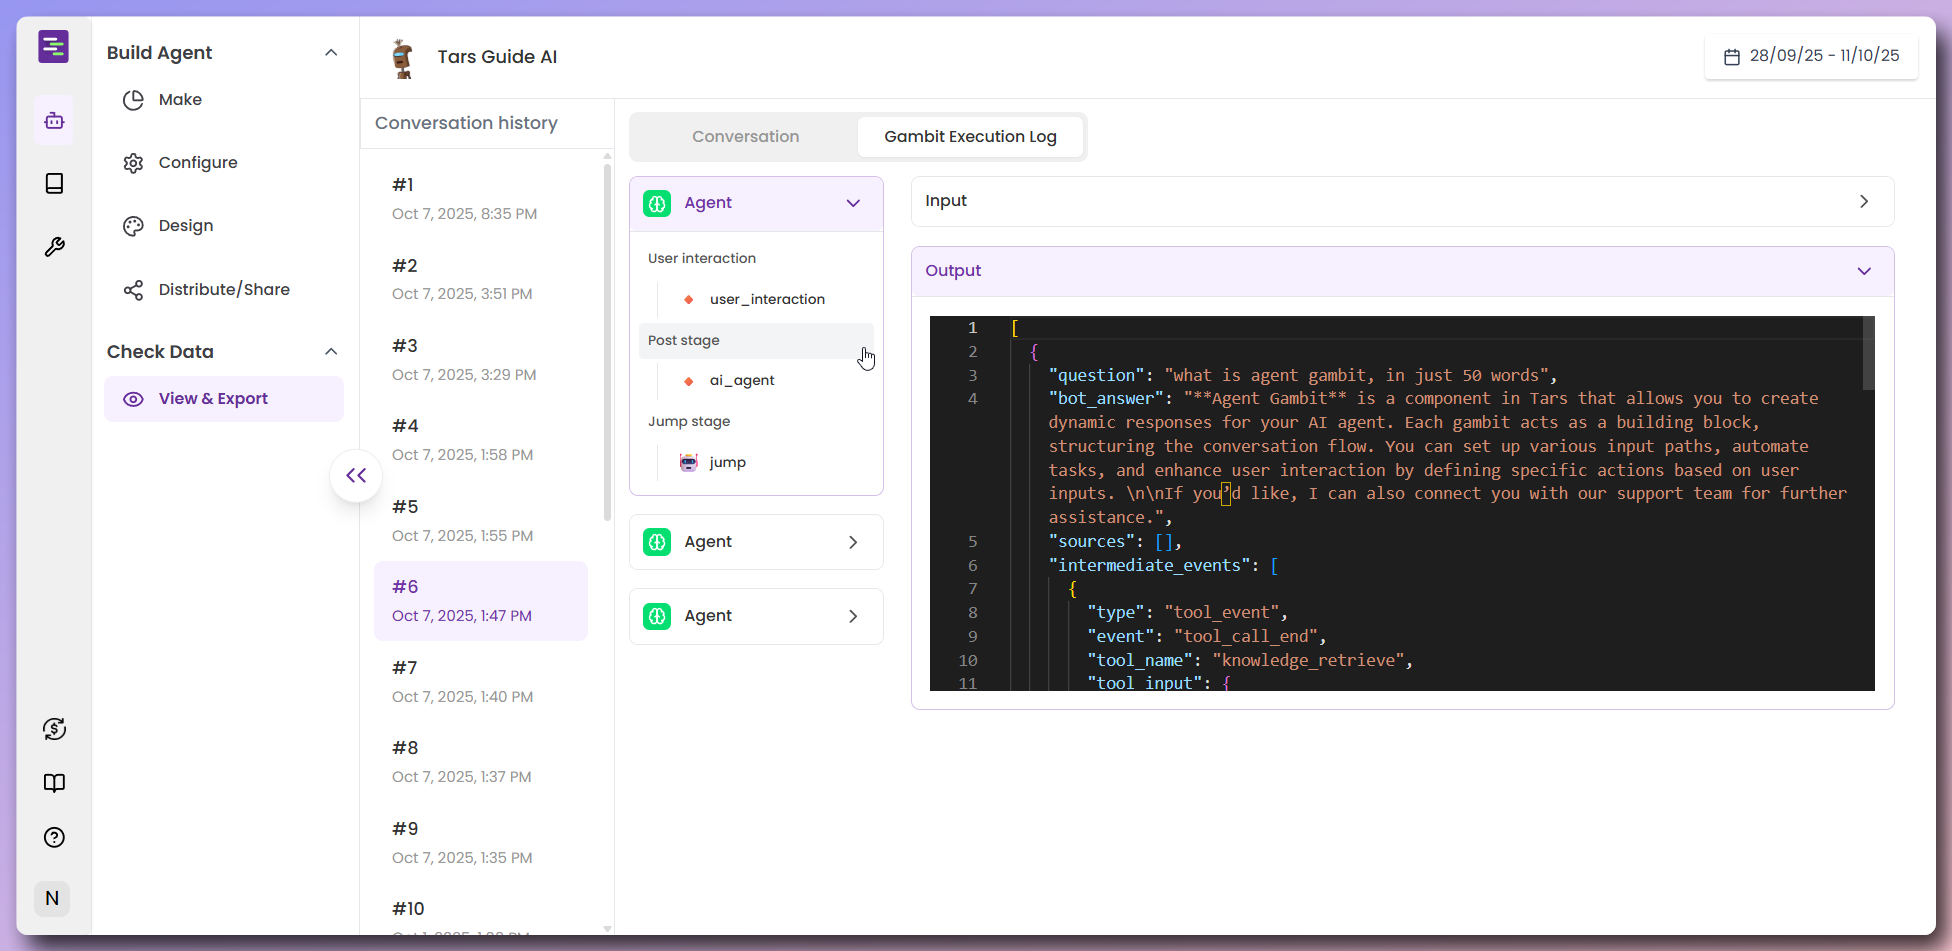
Why this helps you debug
- Find problems: See exactly which stage failed and why
- Check processing: Verify if the gambit’s main functionality worked correctly in the Post Stage
- Understand flow: See why the conversation moved to specific gambits in the Jump Stage
- Fix issues: Identify whether problems are in user interaction, core processing, or flow logic
Congratulations! 🎉
You’ve successfully built a complete AI support Agent with: ✅ Knowledge Base Integration - Added Tars Docs Knowledge Base for accurate responses✅ Tool Integration - Connected Gmail for automated email confirmations
✅ Agent Configuration - Built a self-looping Agent with custom prompts and settings
✅ Professional Design - Customized appearance, branding, and user interface
✅ Smart Escalation - Configured support flow with email collection and handoff
✅ Data Monitoring - Set up conversation tracking and debugging capabilities