What you get
- Automatic content discovery from your website structure
- Text extraction from web pages and structured data
- Link following to discover related content
- Content organization and indexing for optimal search
- Dynamic content support for JavaScript-heavy sites
Perfect for
- Company websites with product information and documentation
- Help centers and support documentation
- Blog content and articles
- Documentation sites and wikis
- E-commerce sites with product catalogs
Step-by-step creation process
Select Website data source
Navigate to the Create Knowledge Base section and click on the 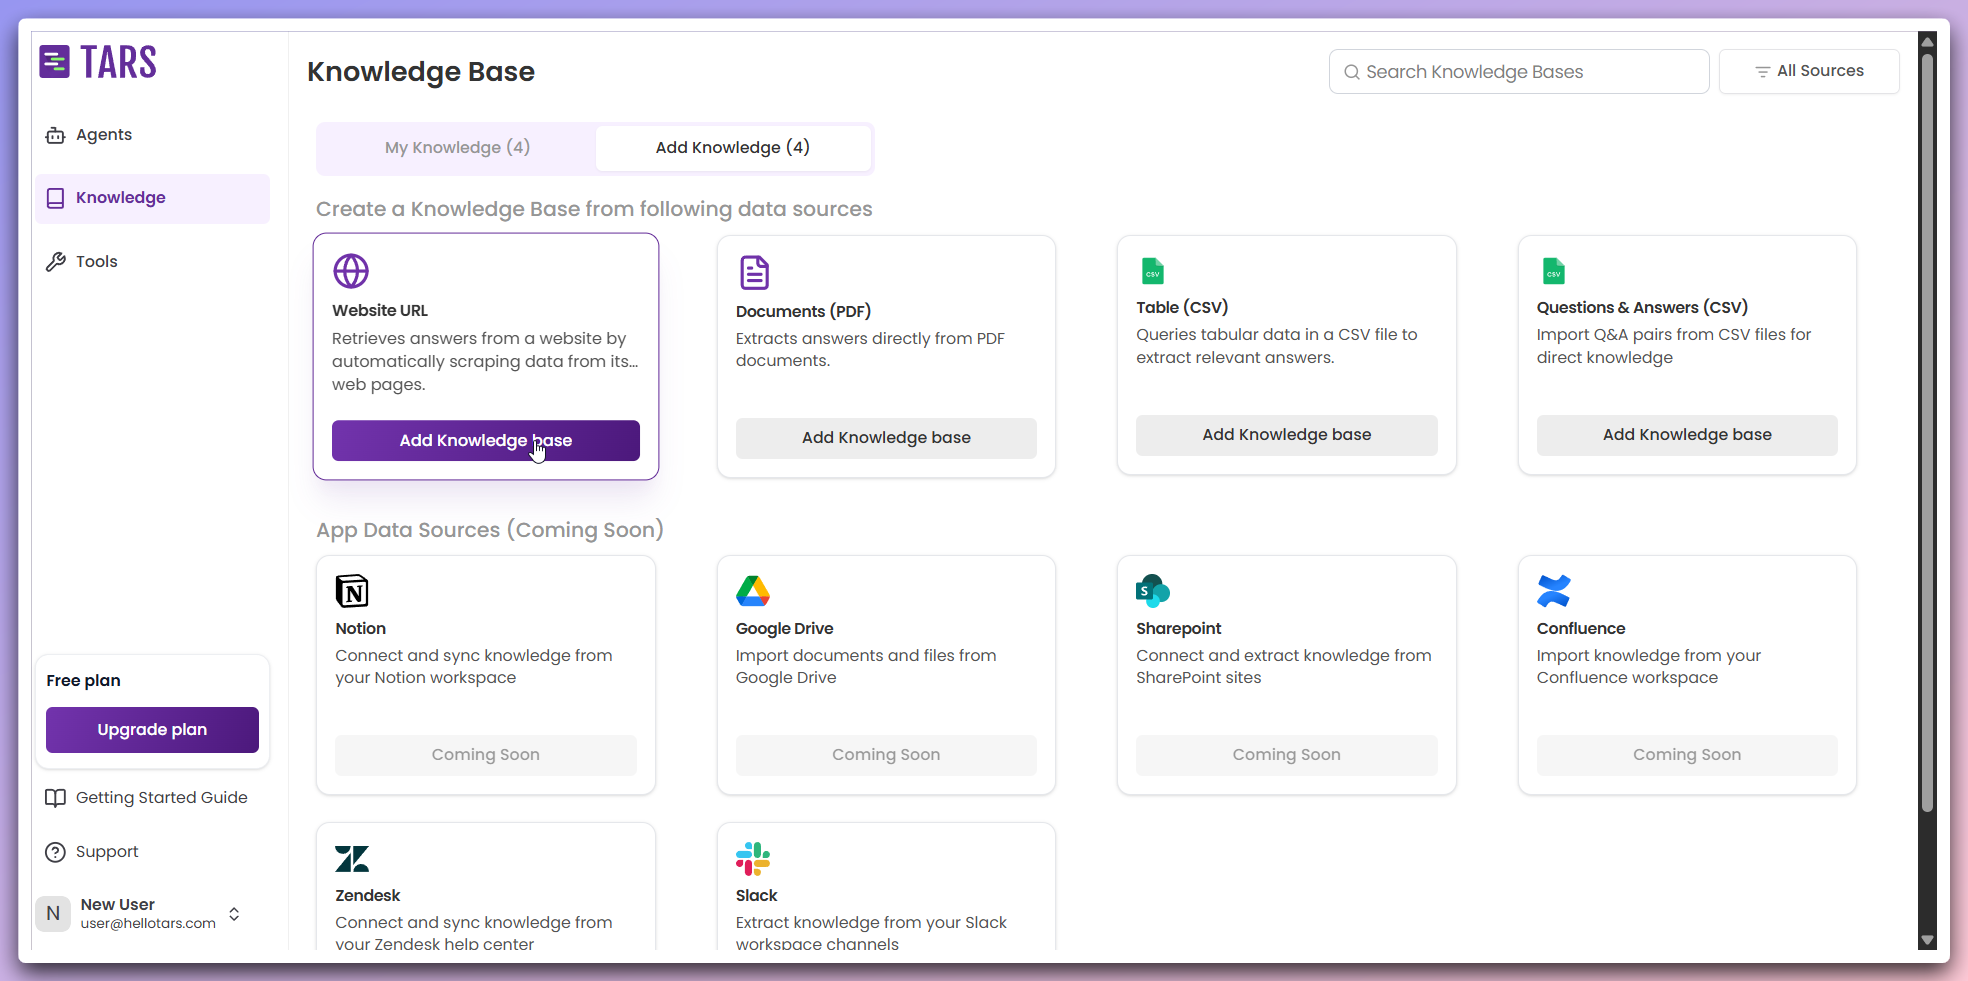
Website URL card to begin creating a website-based Knowledge Base.This opens the Knowledge Base configuration modal where you can set up your website scraping parameters.
Configure basic settings
Set up the fundamental information for your Knowledge Base in the basic
configuration section.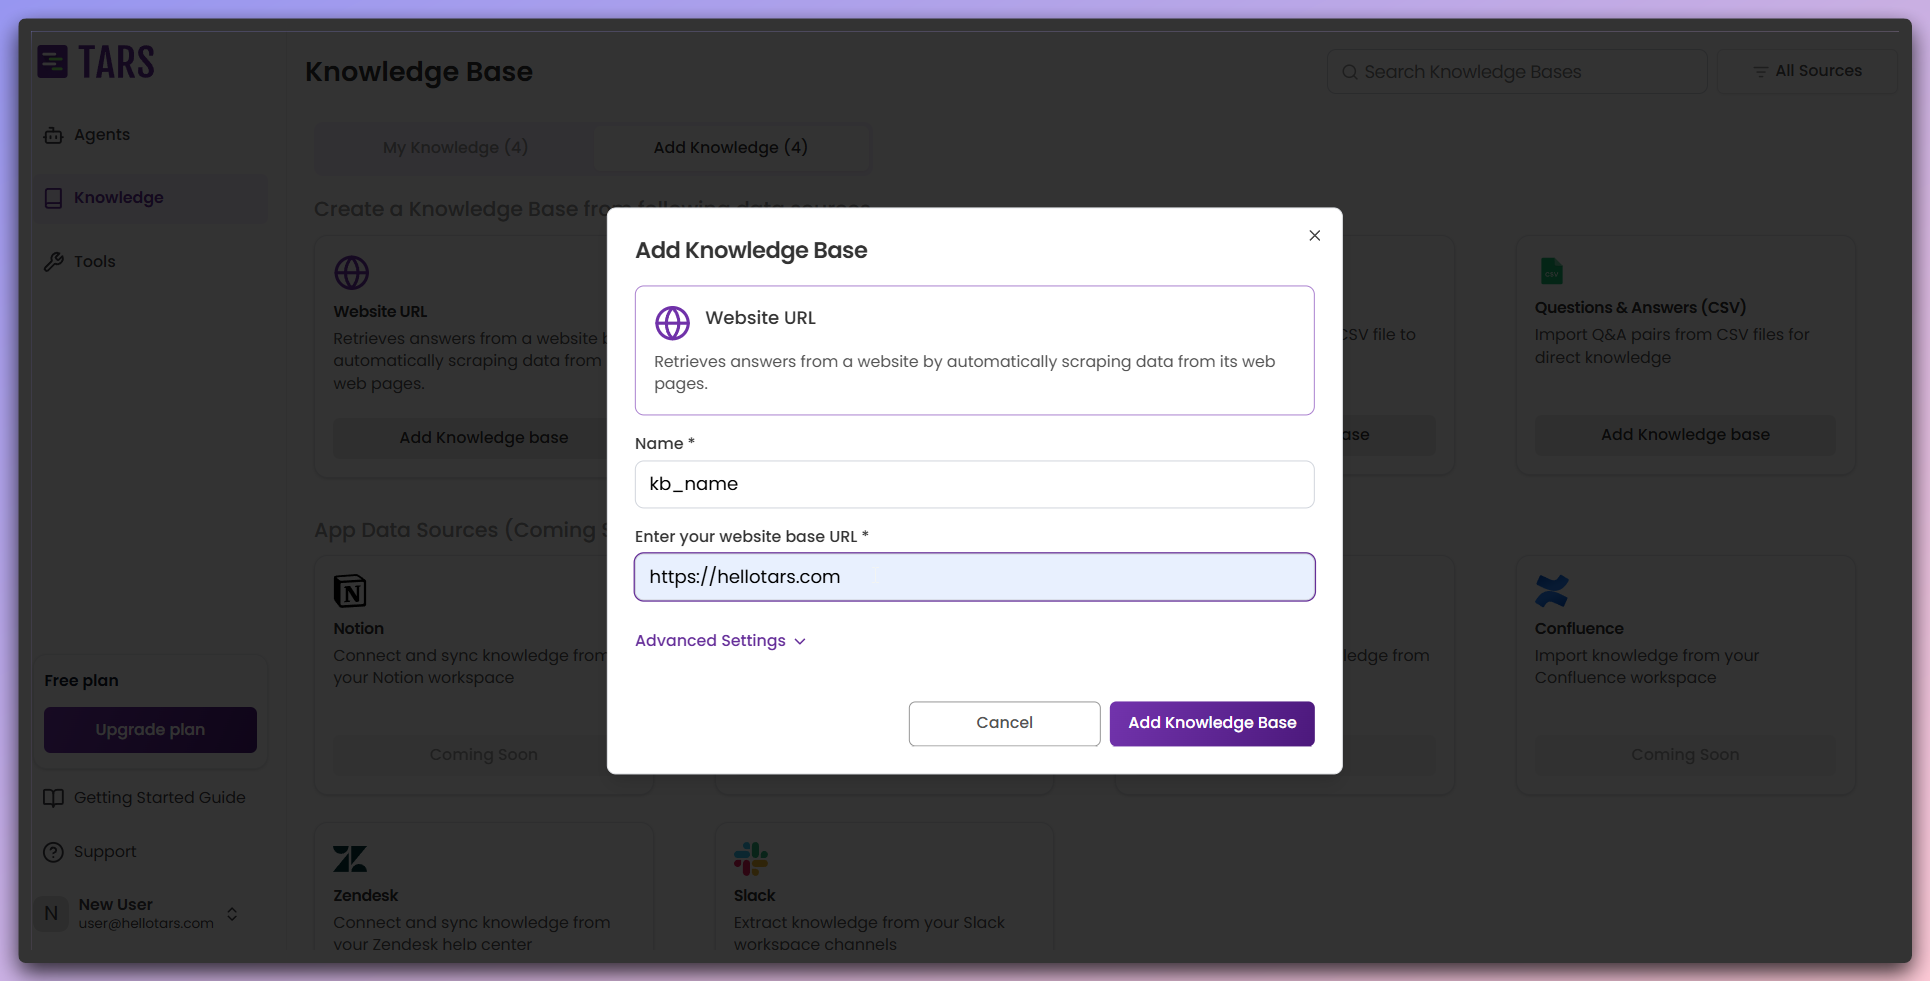
- Knowledge Base Name: Enter a descriptive name for your Knowledge Base
- Website Base URL: Provide the base URL of the website you want to scrape
The system will use this URL as the starting point for content discovery and
crawling.
Configure advanced scraping settings
Customize the scraping behavior and parameters for optimal content extraction.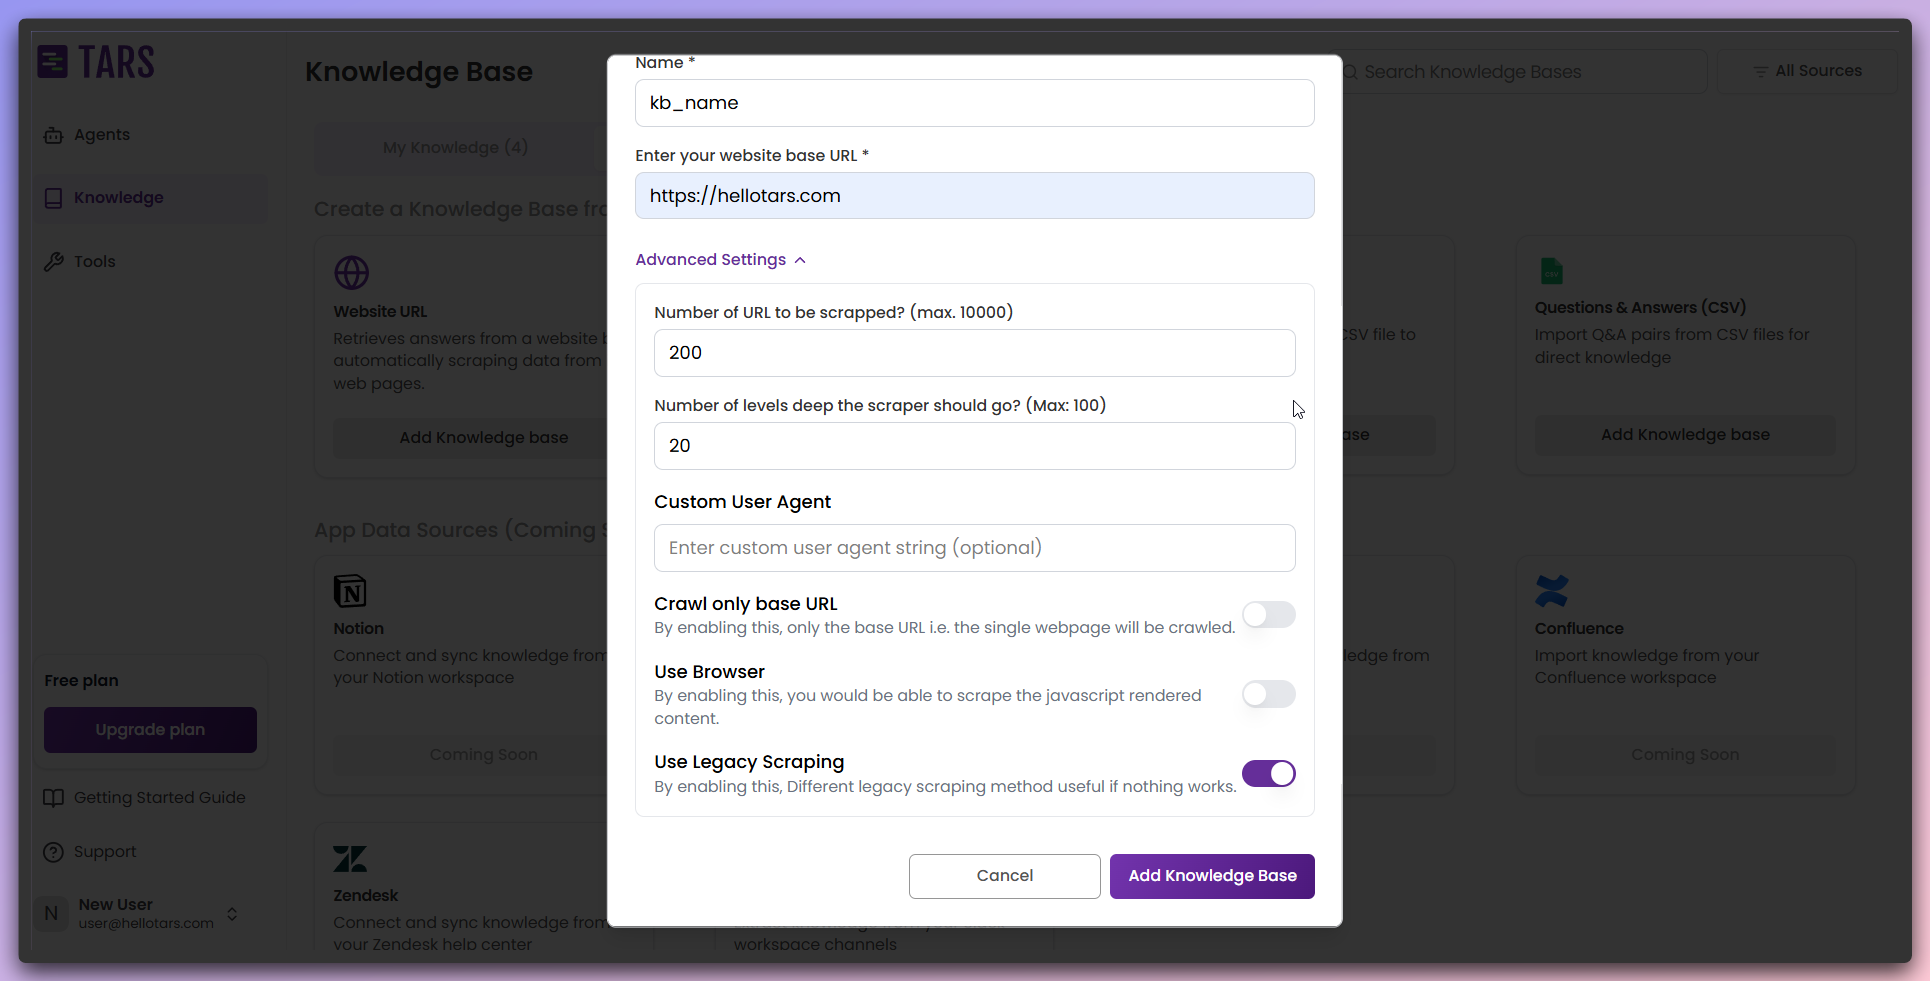
- Number of URLs to scrape: Specify the maximum number of pages to crawl. The default is 200, with a maximum limit of 10,000.
- Crawl depth: Set the number of levels deep to crawl within the website hierarchy. The default is 20, with a maximum of 100.
- Custom user agent: Provide an optional custom identification string for web requests.
- Base URL crawling: Limit crawling to a single level by using only base URLs, ignoring the depth setting.
- Browser rendering: Enable this option to render content using a browser for sites with dynamic JavaScript.
- Scraper engine: Choose between the legacy Scrapy engine and the modern Crawl4AI engine.
Add Knowledge Base
Click the 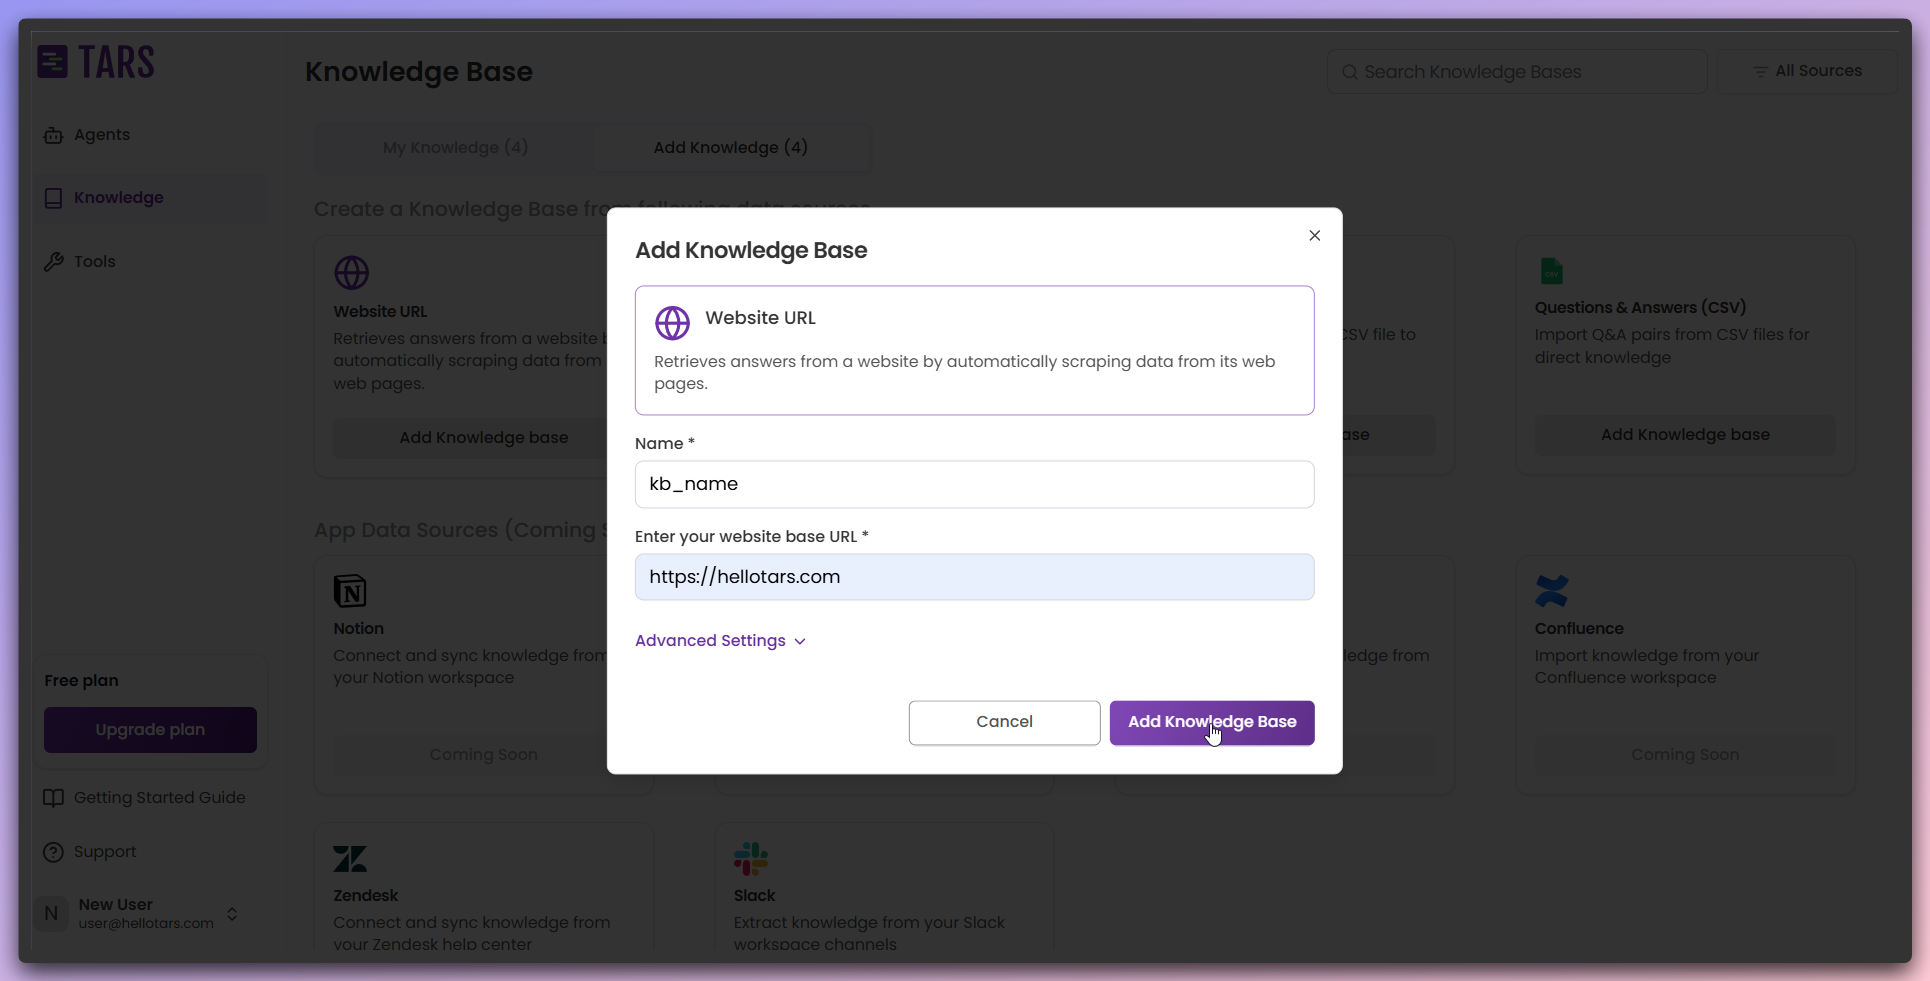
Add Knowledge Base button to create your Knowledge Base with the
configured settings.Your Knowledge Base is created and you’re redirected to the configuration
page where you can manage data resources.
Review Knowledge Base configuration
View your newly created Knowledge Base configuration page with the added data
resource.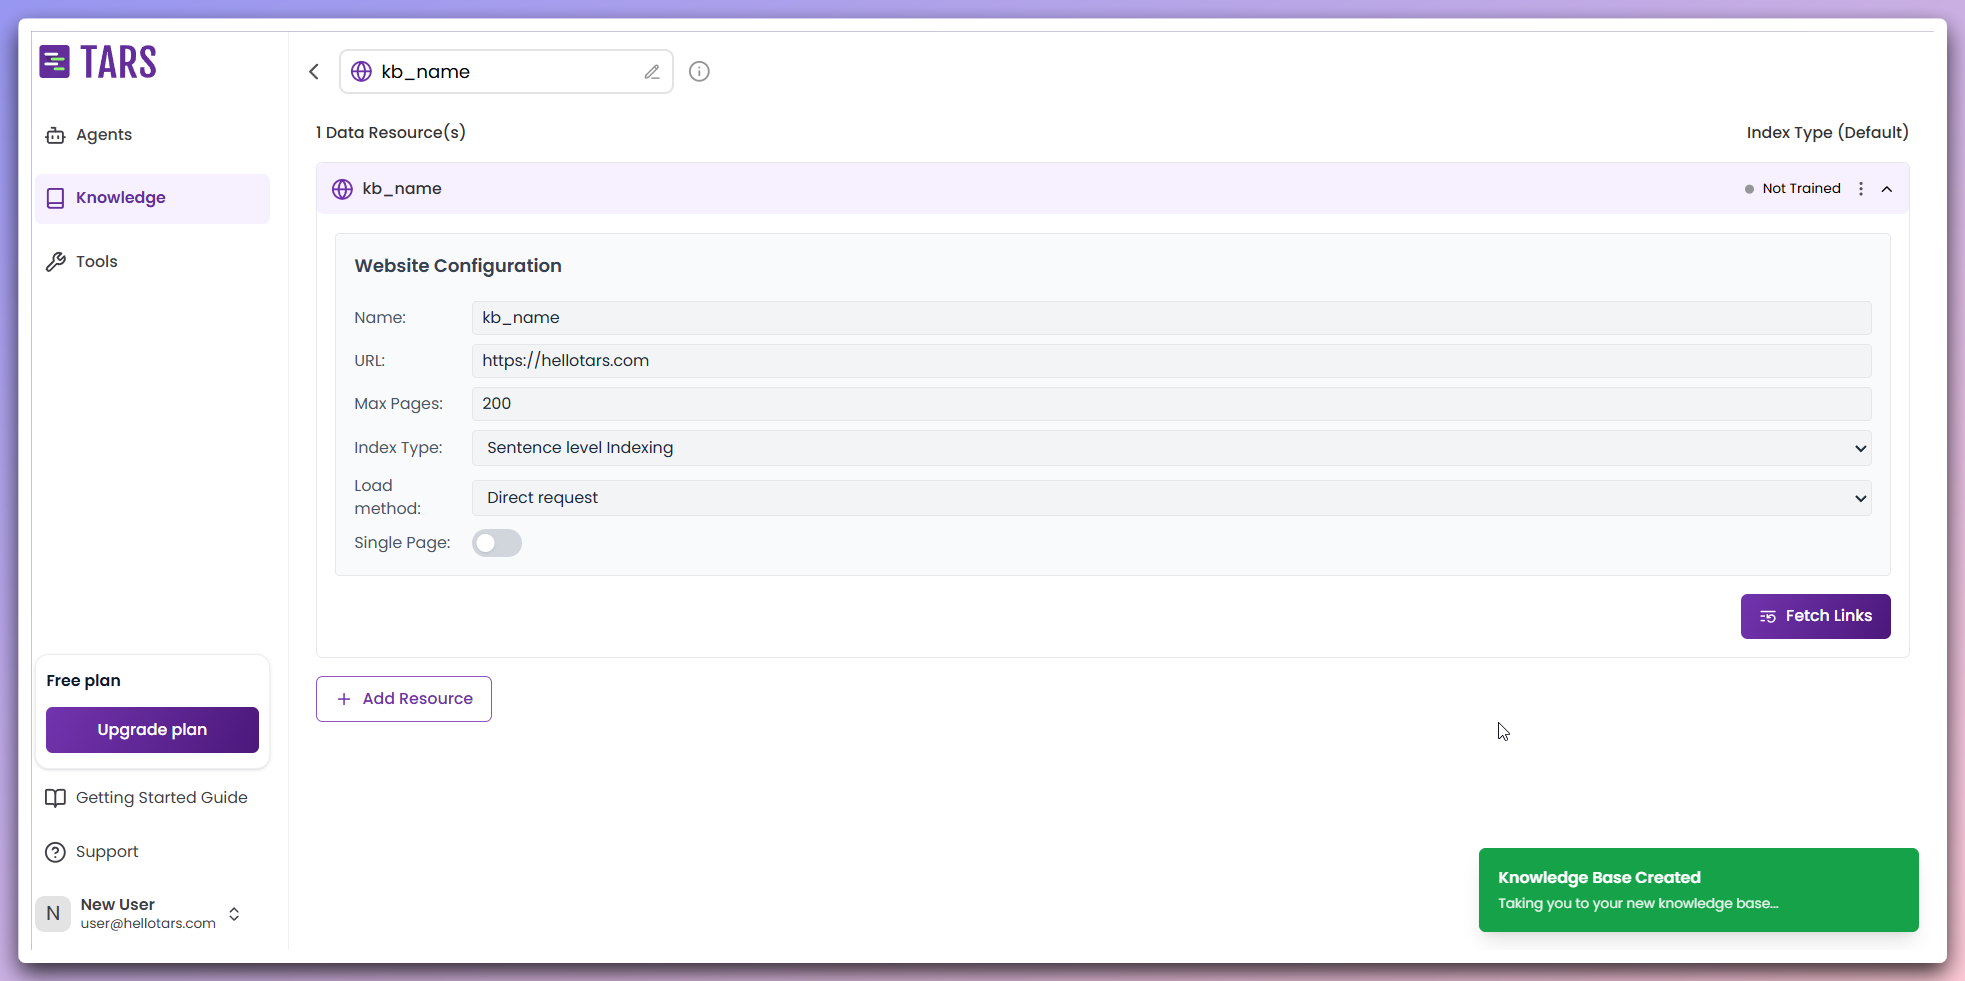
- Data resources: Displays the base URL of the website you have added.
- Fetch links: Initiates the scraping process.
- Indexing type: Choose from Sentence level Indexing or Section level Indexing. The default is Sentence level Indexing.
- Training status: Shows the current processing state of your Knowledge Base.
- Load method: Choose how the system retrieves web content. Select between Direct request, which fetches data directly from the server, or Browser environment, which simulates a browser to render and extract content. The default is Direct request if
Use browseris disabled. - Menu Actions: Provides options to delete the added data resource.
This page serves as your central hub for managing all aspects of your
Knowledge Base.
Initiate content fetching
Click the 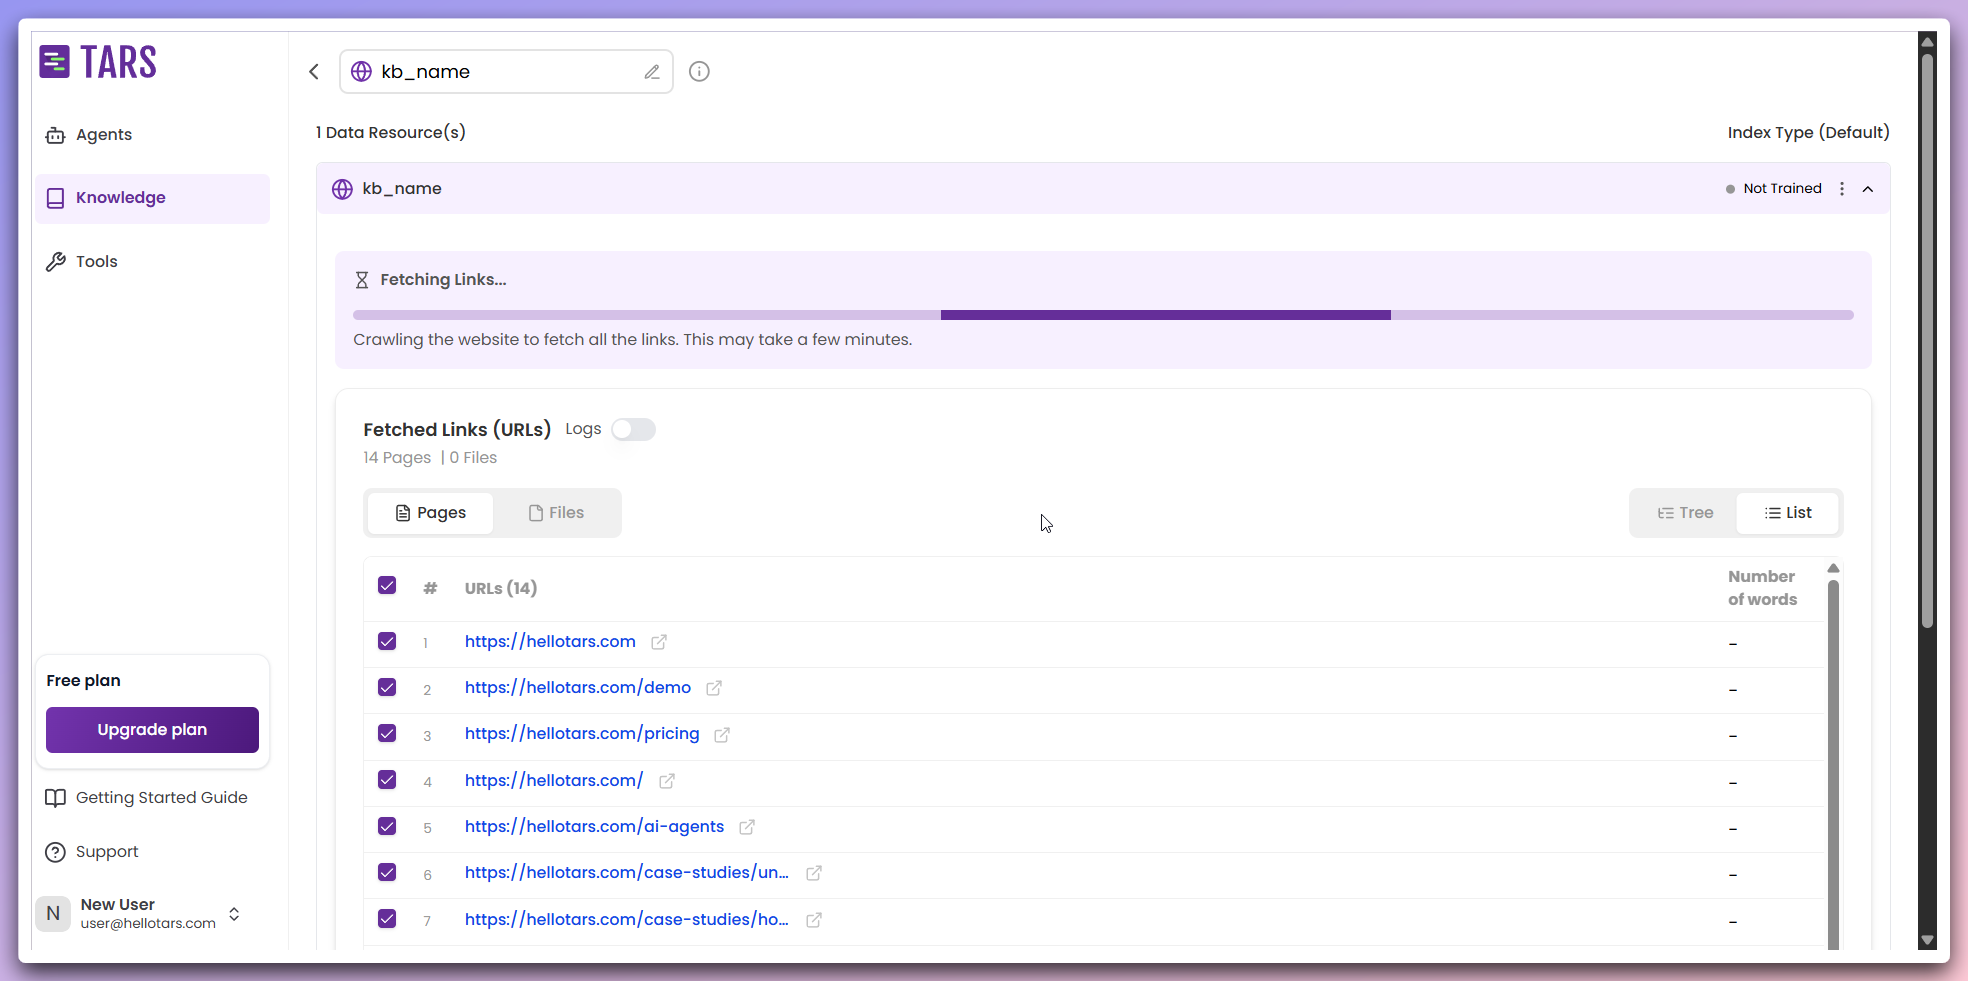
Fetch Links button to begin the web scraping process.- Content discovery: The system identifies and navigates through web pages.
- Text extraction: Content is extracted from each identified page.
- Data processing: Extracted content is cleaned and organized.
- Progress monitoring: Real-time logs display scraping activity and status updates.
Review and Select Pages
After fetching completes, review the extracted content and select pages for
training.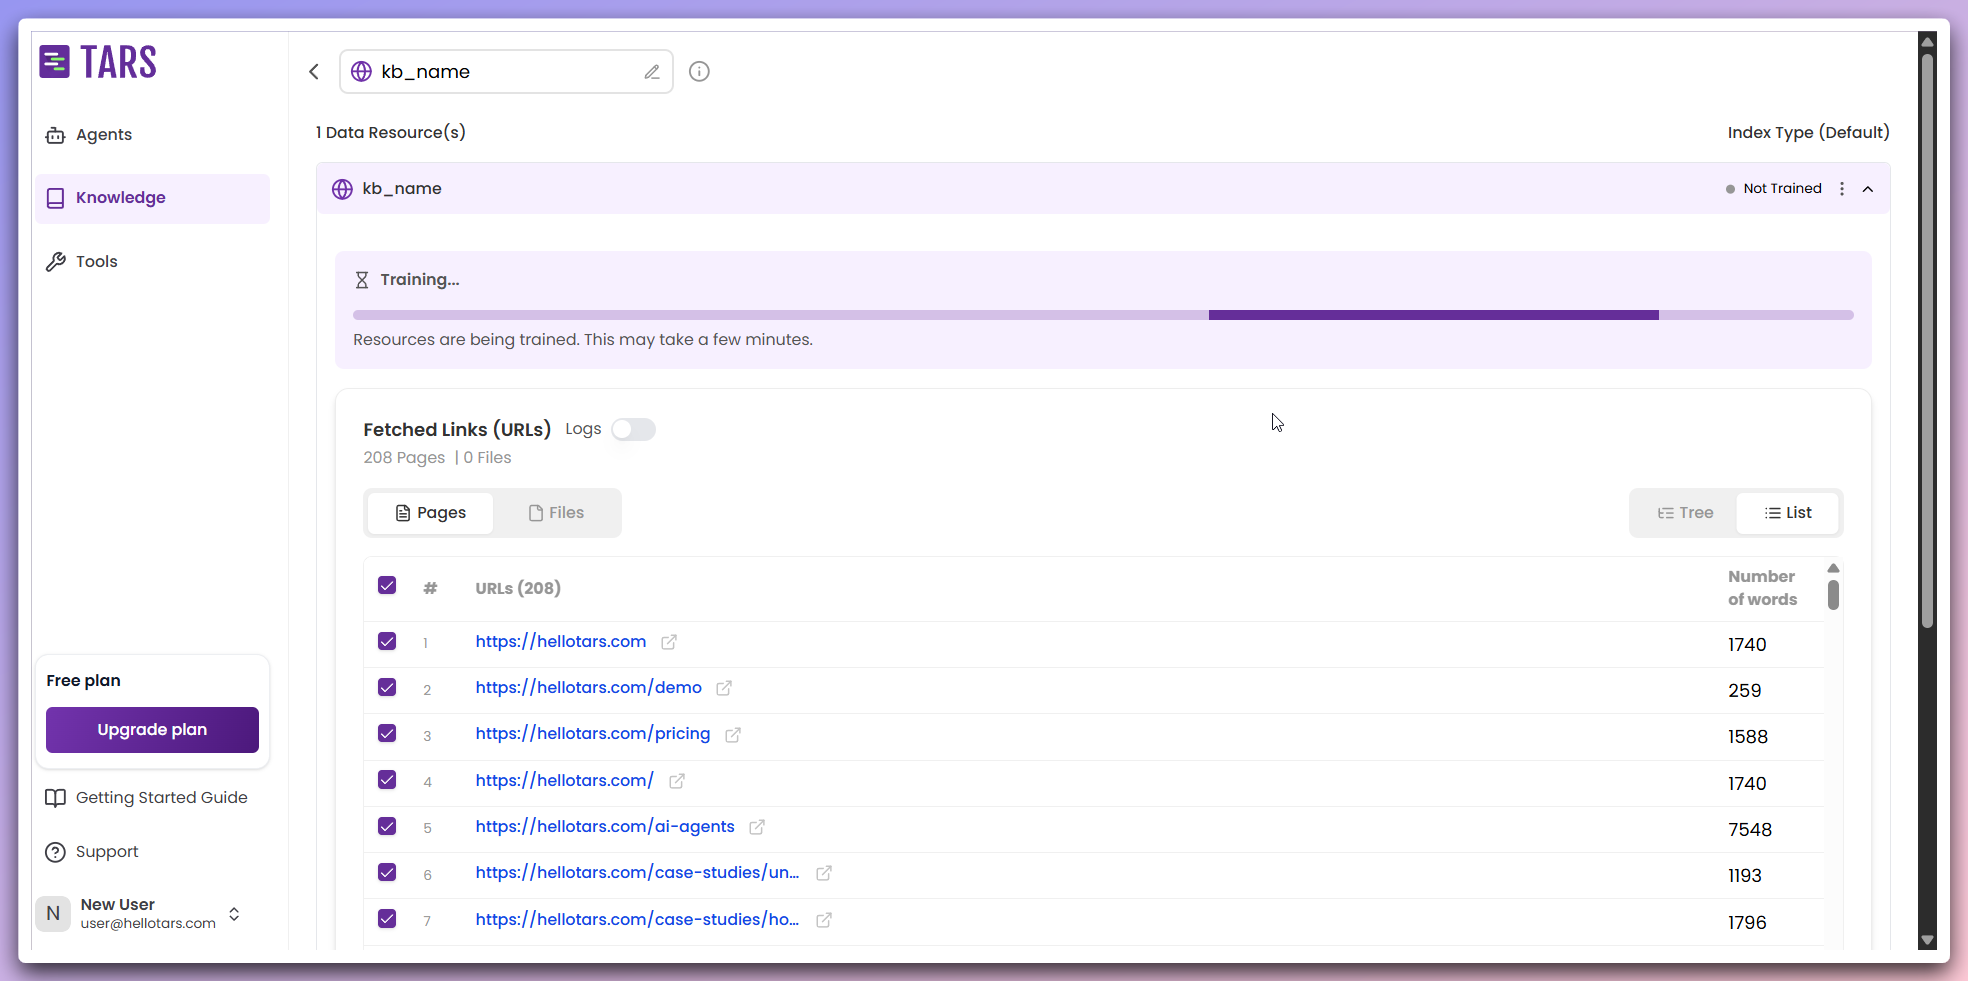
- Extracted pages: Access a list of all discovered and scraped web pages, each with clickable links.
- Word count: Review the number of words extracted from each page.
- Page selection: Select specific pages to include in the training process.
- Pre-filtering: Filter pages based on content relevance and word count to optimize training preparation.
All content has been successfully extracted, and you can now select the
desired pages for the training phase.
Training and Monitoring
Initiate the training process and monitor the real-time progress as your
content is processed and indexed.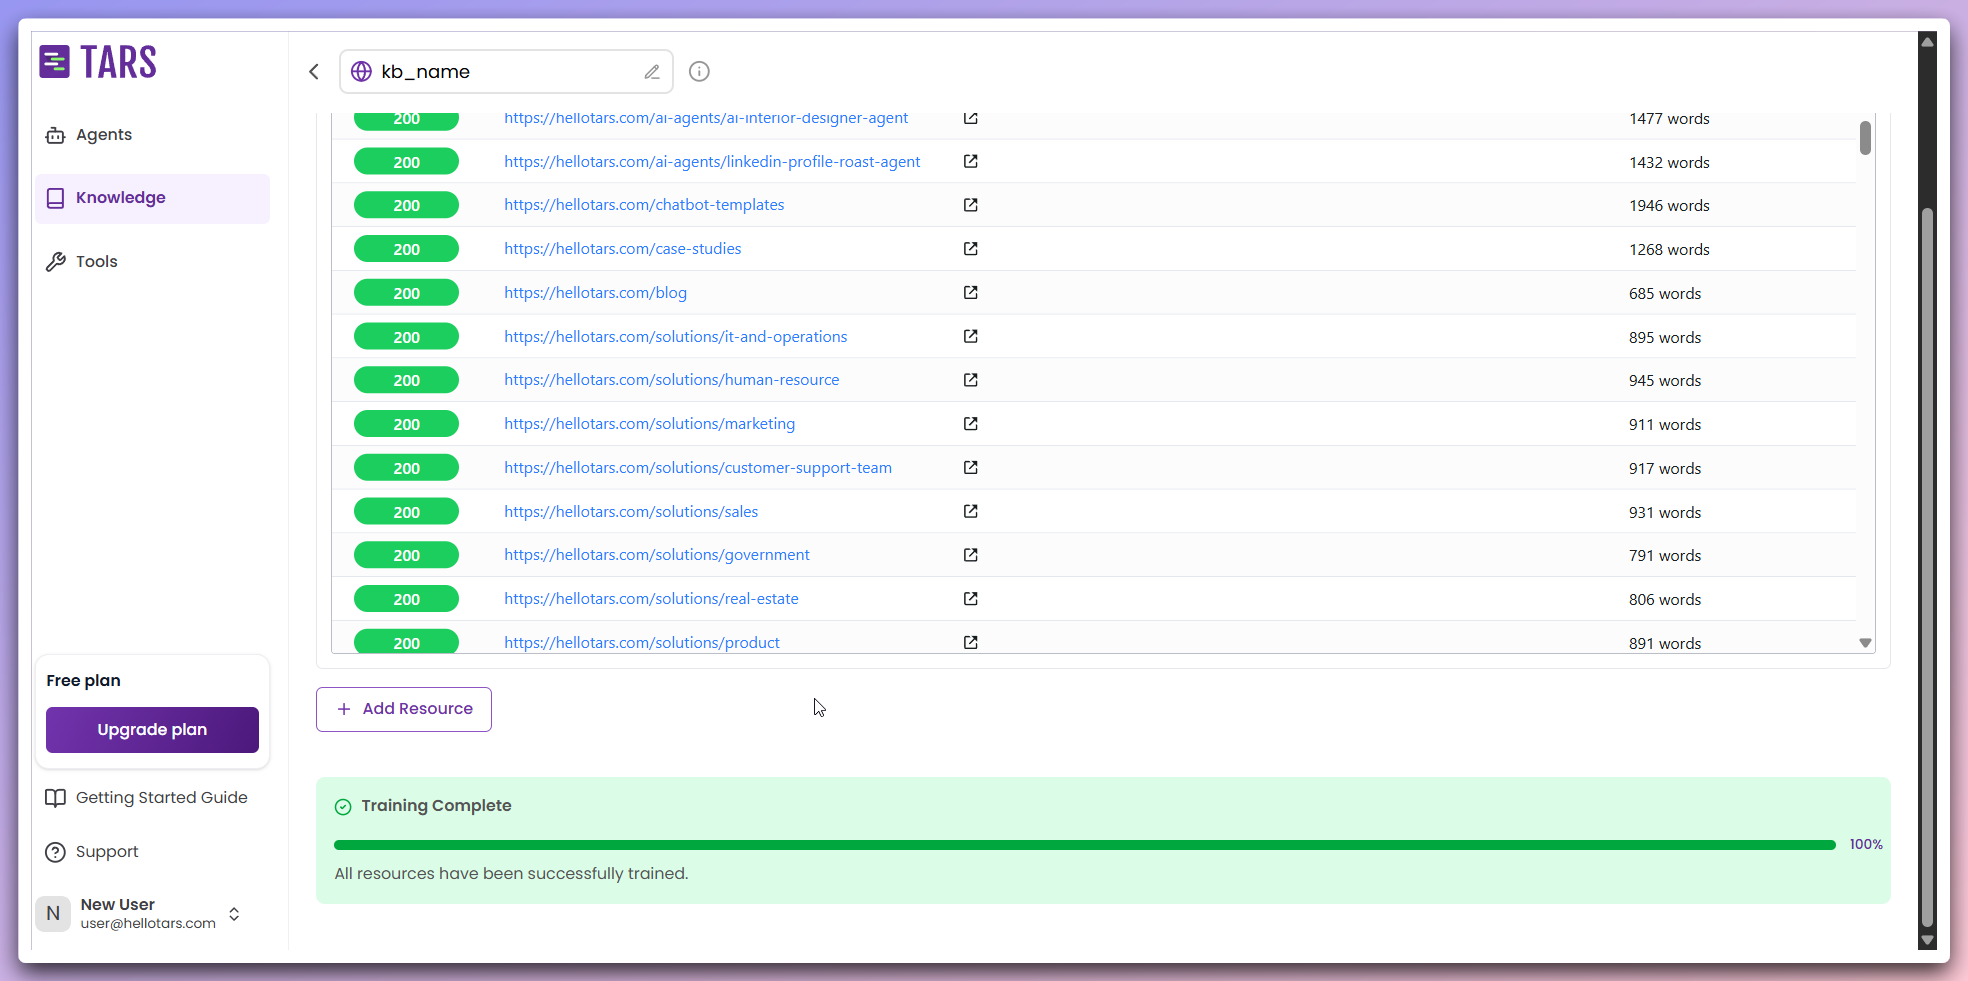
- Initiate training: Begin by clicking the
Trainbutton to start the AI processing. - Data reading: The system reads and imports the stored data resources for processing.
- URL filtering: Unnecessary URLs are filtered out to ensure only relevant data is processed.
- Text chunking: The text is divided into smaller, manageable chunks for efficient processing.
- Embedding generation: These text chunks are converted into vector embeddings using AI models.
- Vector storage: The generated embeddings are stored in vector databases like Qdrant and Weaviate for efficient retrieval.
- Index optimization: The system optimizes the index to enhance search and retrieval performance.
Once the training is complete, your Knowledge Base will be fully functional and ready for integration with AI Agents.
View extracted content
If you wish to see the content of the training after the post-train phase,
click on the particular link that is fetched to view the extracted content.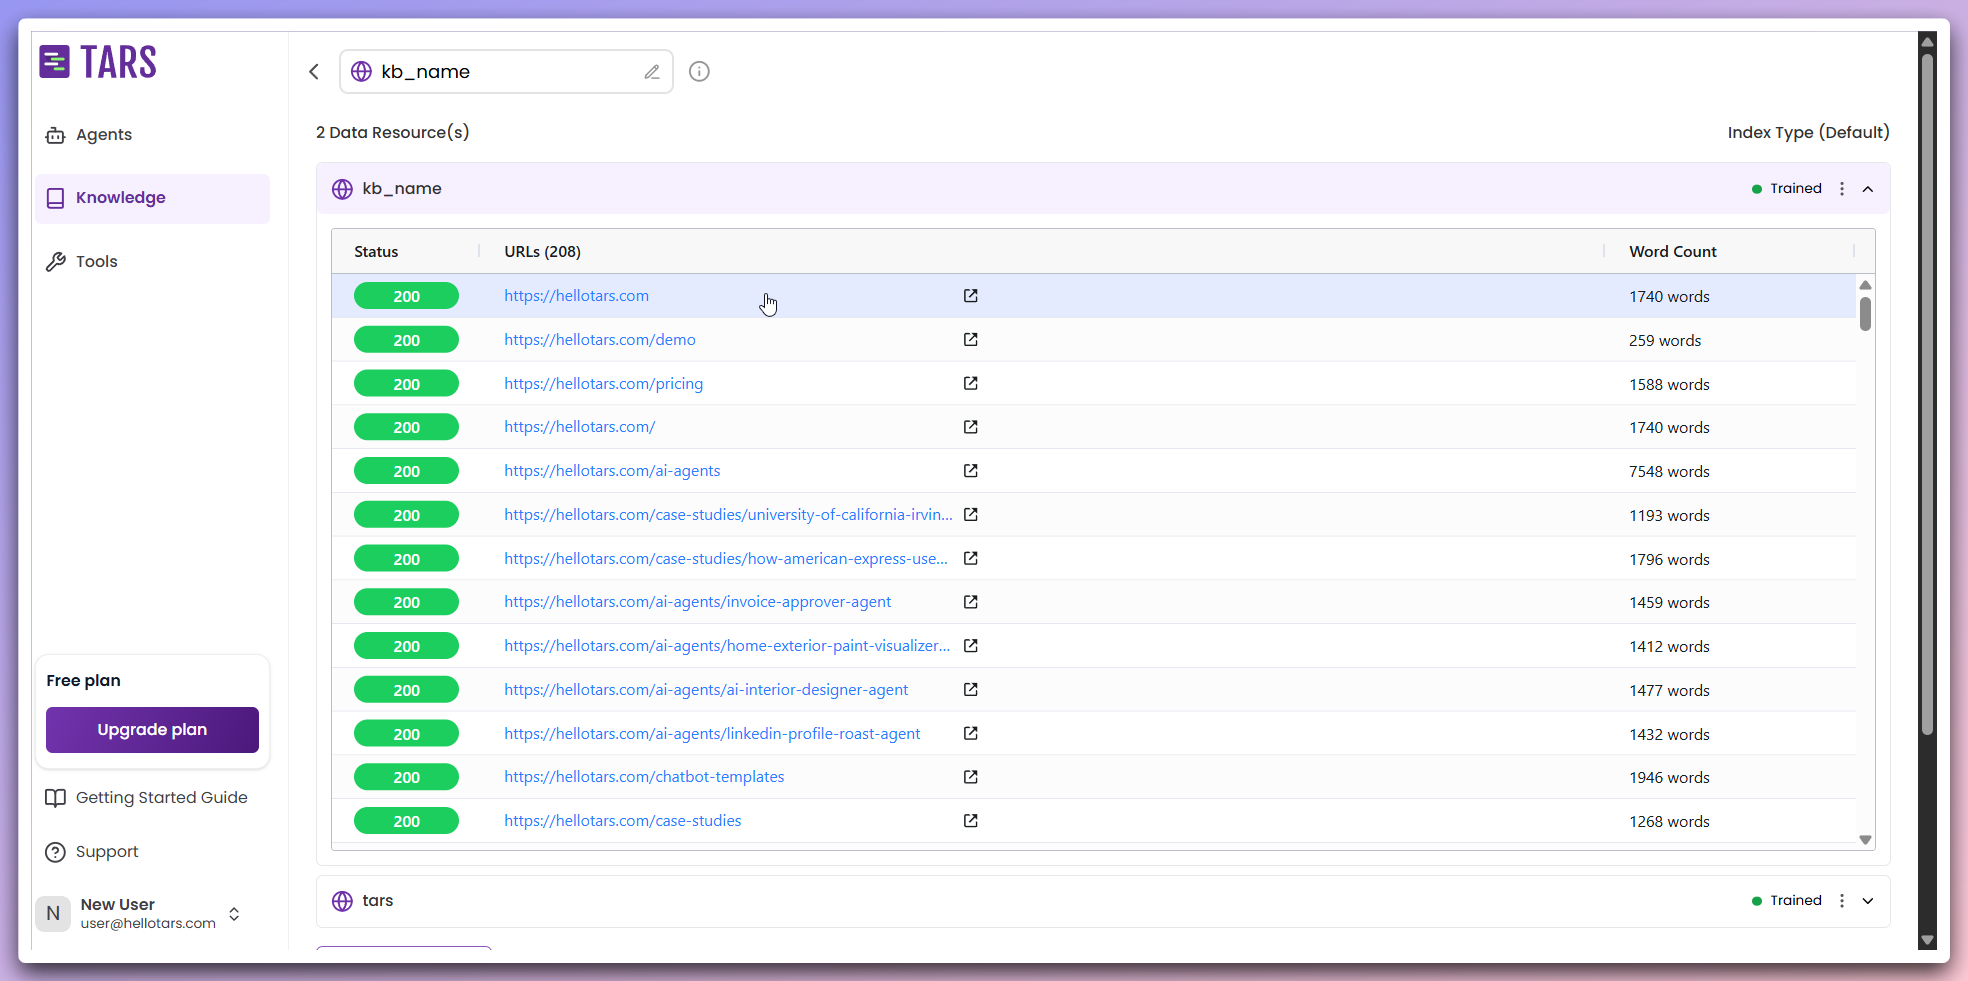
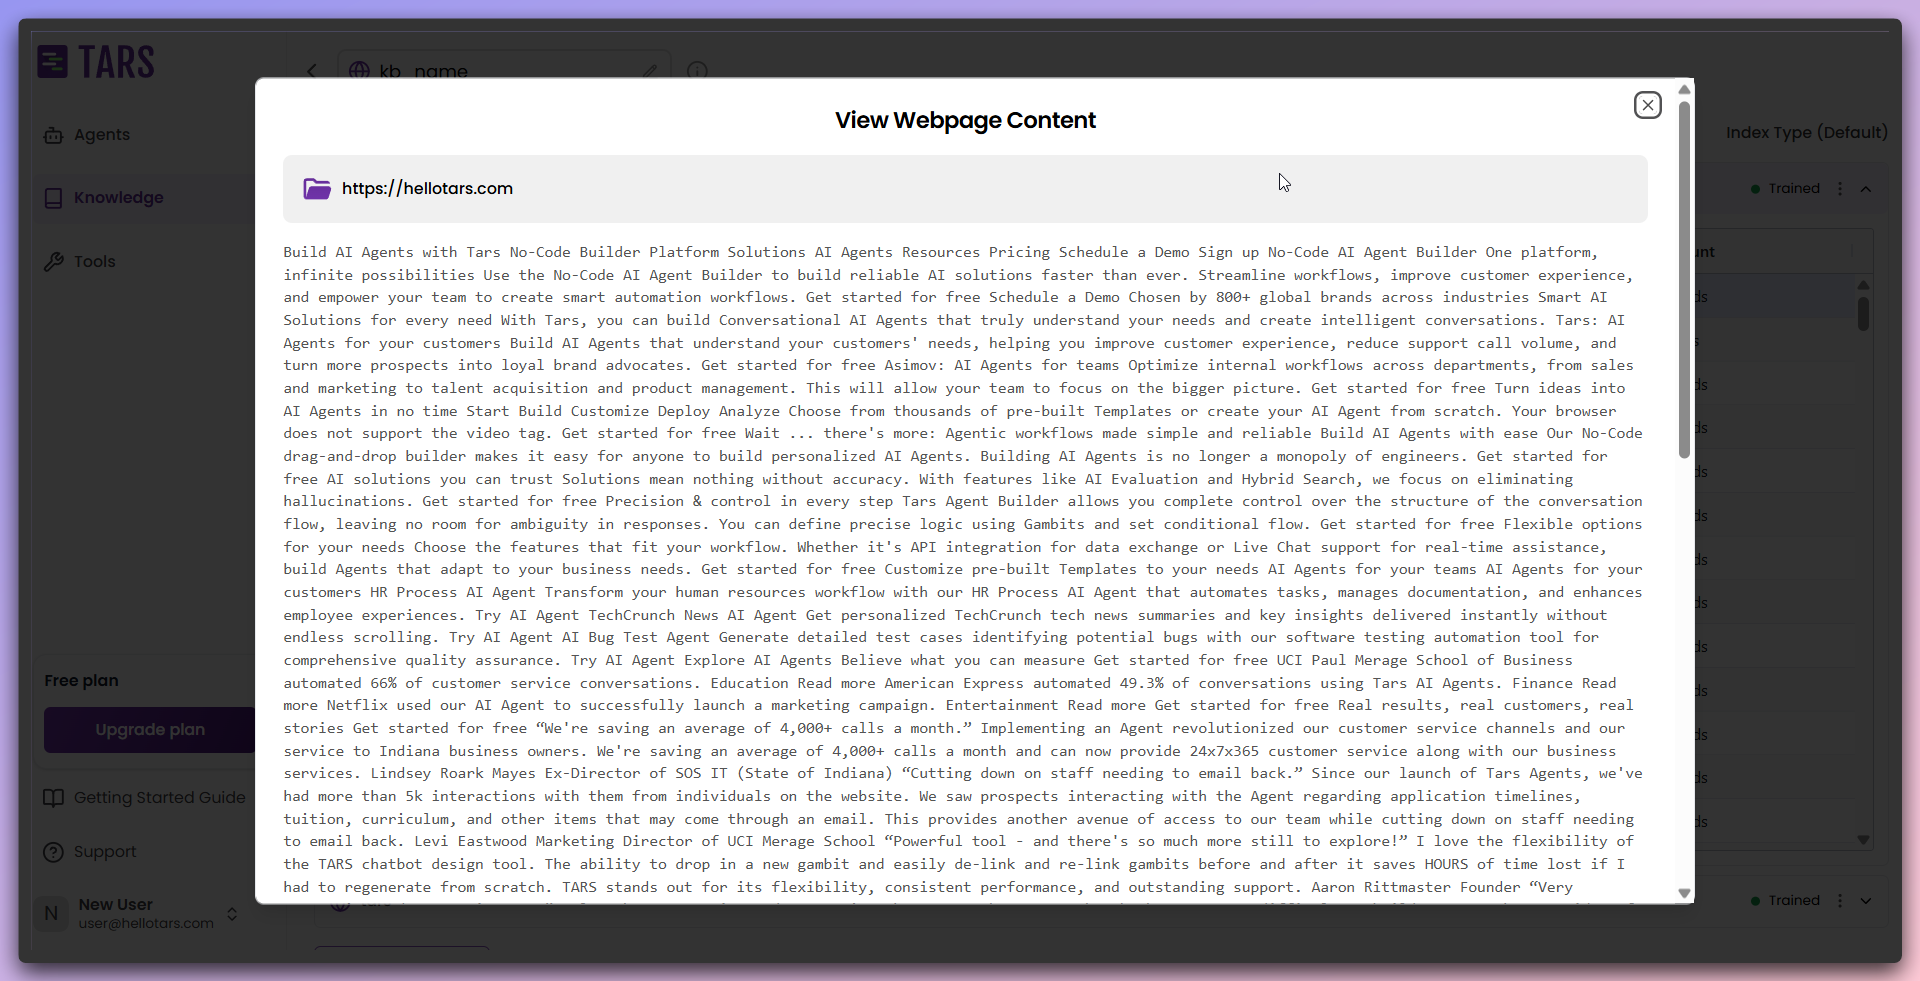
- Preview content: Click on the links to view detailed content extracted from each page.
- Content analysis: Evaluate the quality and relevance of the extracted data for further refinement.
Add additional data sources (optional)
Optionally add more data sources to expand your Knowledge Base content.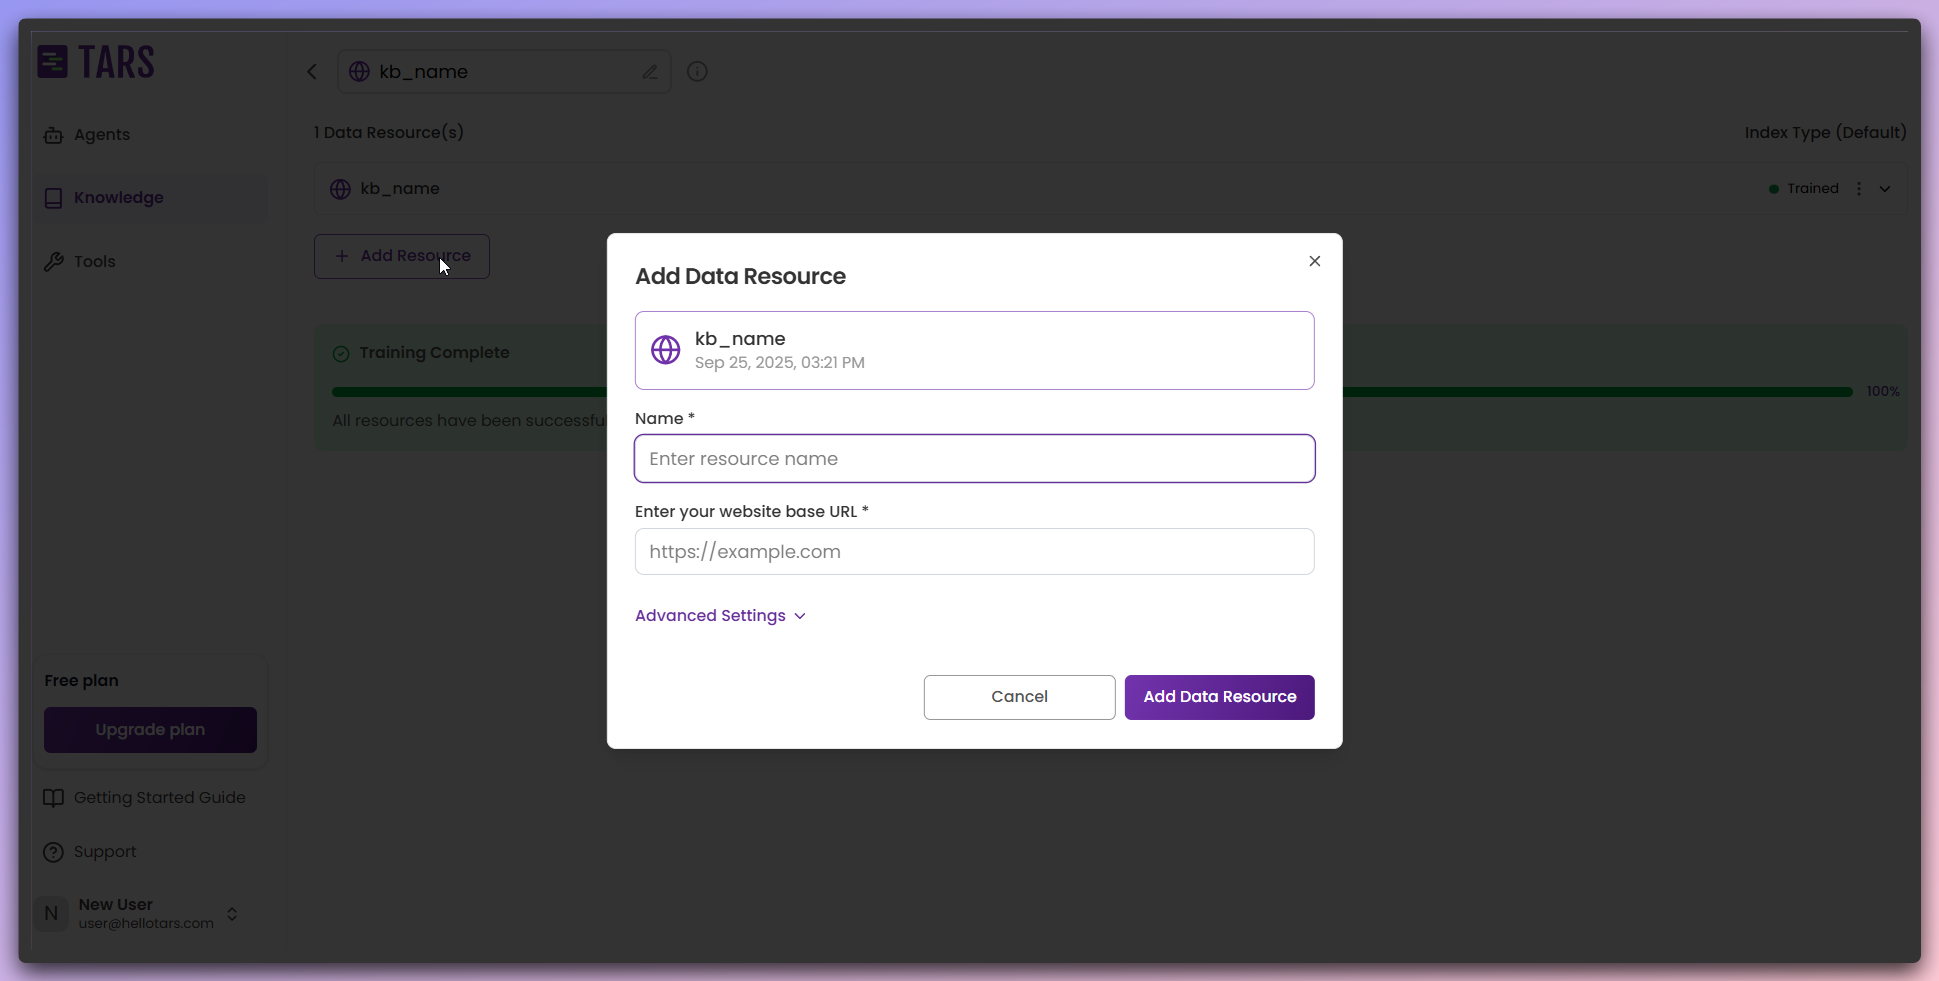
- Add data resource: Click to add more websites or content sources.
- Same configuration: Use the same modal interface for additional sources.
- Multiple sources: Combine content from multiple websites or URLs.
- Unified knowledge: All sources contribute to a single comprehensive Knowledge Base.
Train additional content
Process and train any newly added data sources to integrate them into your
Knowledge Base.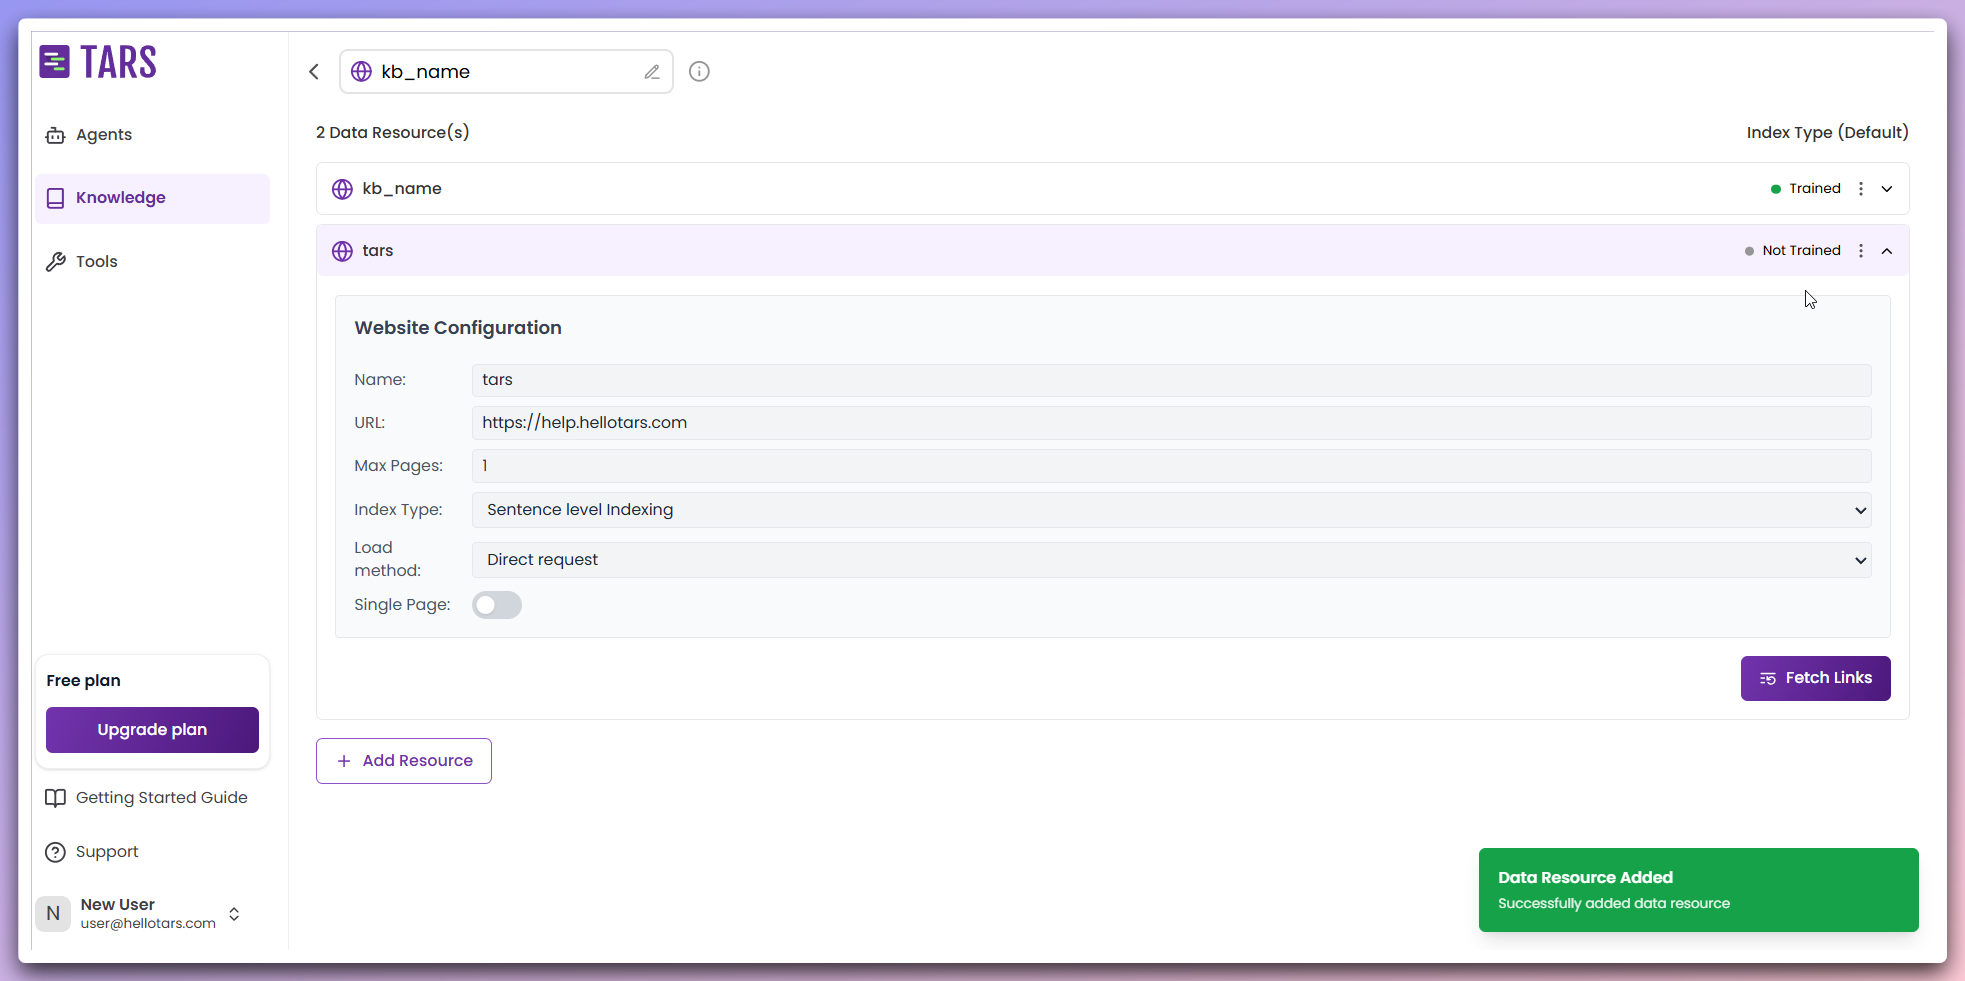
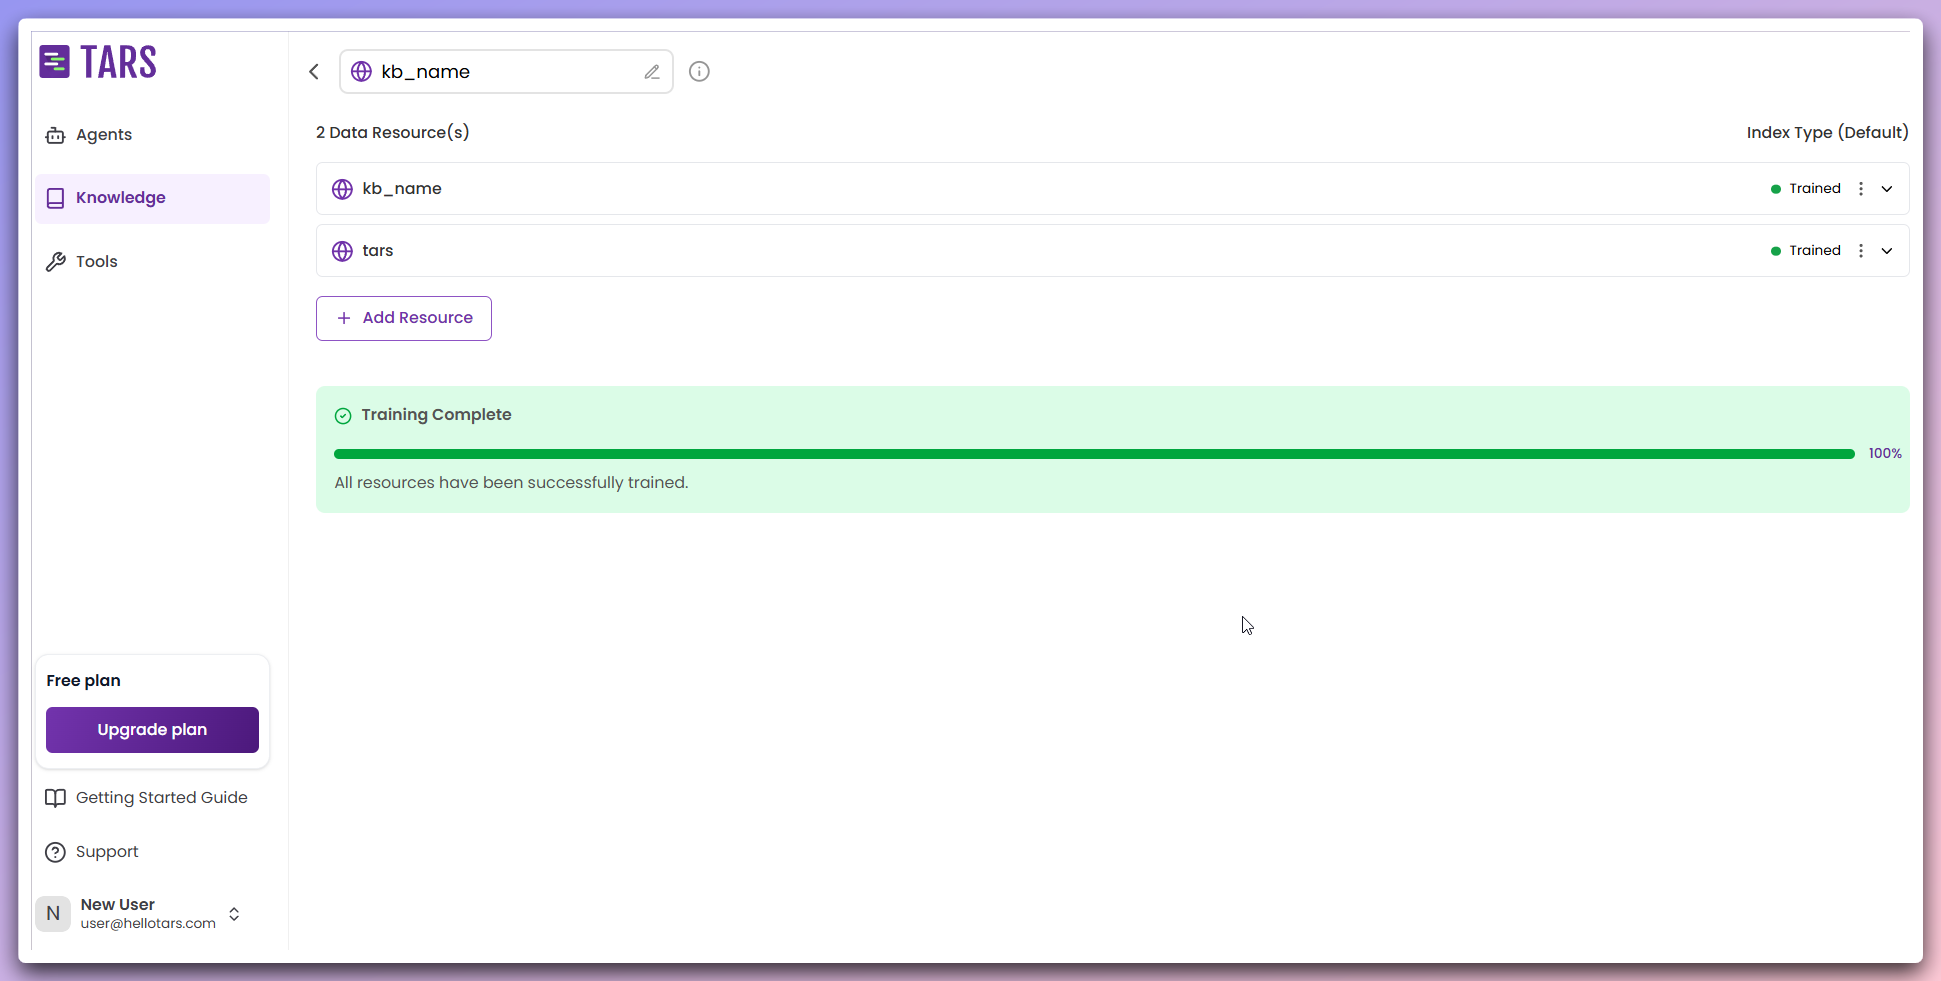
- Fetch new content: Scrape additional data sources.
- Integrate content: Combine with the existing Knowledge Base.
- Retrain system: Update embeddings with new content.
- Unified knowledge: All sources work together seamlessly.
All data sources have been successfully trained and integrated into your
Knowledge Base.
Knowledge base ready
Your website-based Knowledge Base is now complete and available in your knowledge bases library.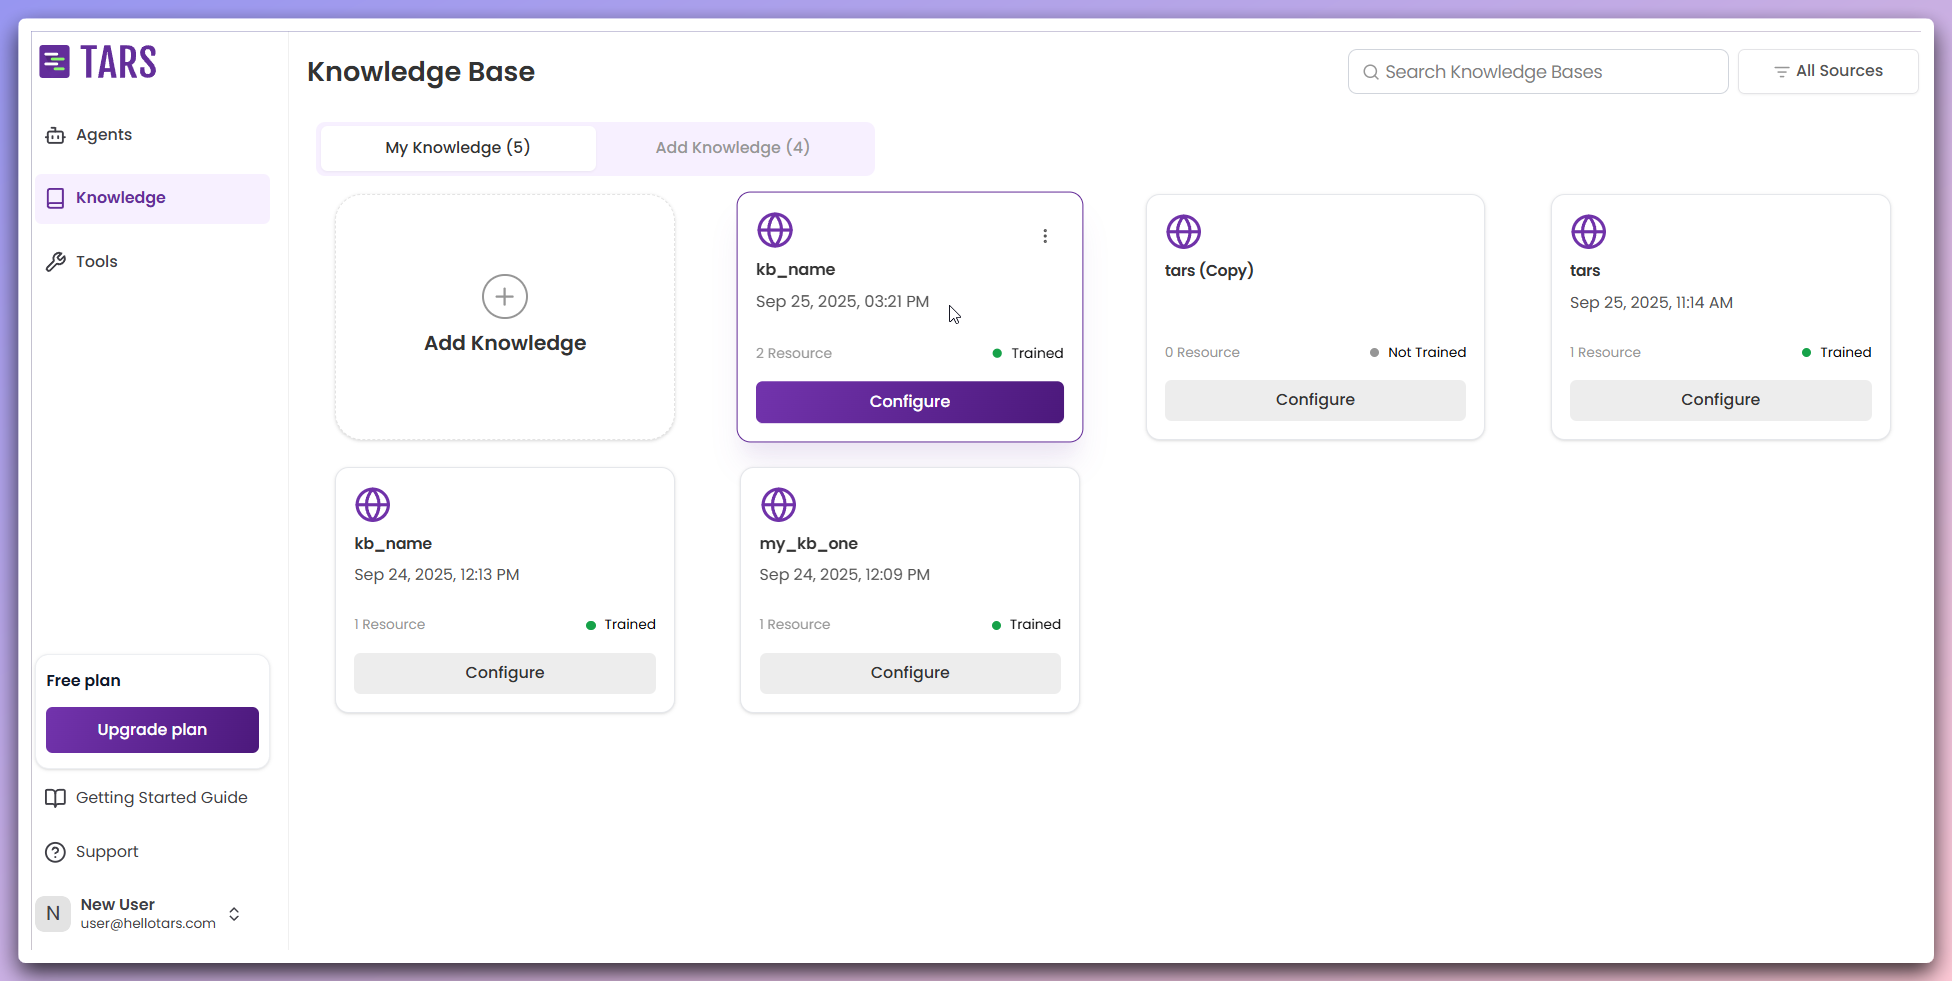
- Name and description: Your configured Knowledge Base information
- Creation date: When the Knowledge Base was created
- Training status: Confirmed as trained and ready
- Data sources count: Number of websites/content sources included
- Configure button: Access to modify settings and add more sources
Ready to use: Your Knowledge Base is immediately available for connecting to AI Agents and providing intelligent responses based on your website content.